
I’m a big fan of Stack Overflow and I tend to contribute regularly (am currently in the top 0.X%). In this category (stackoverflow) of posts, I will be posting my top rated questions and answers. This, btw, is allowed as explained in the meta thread here.
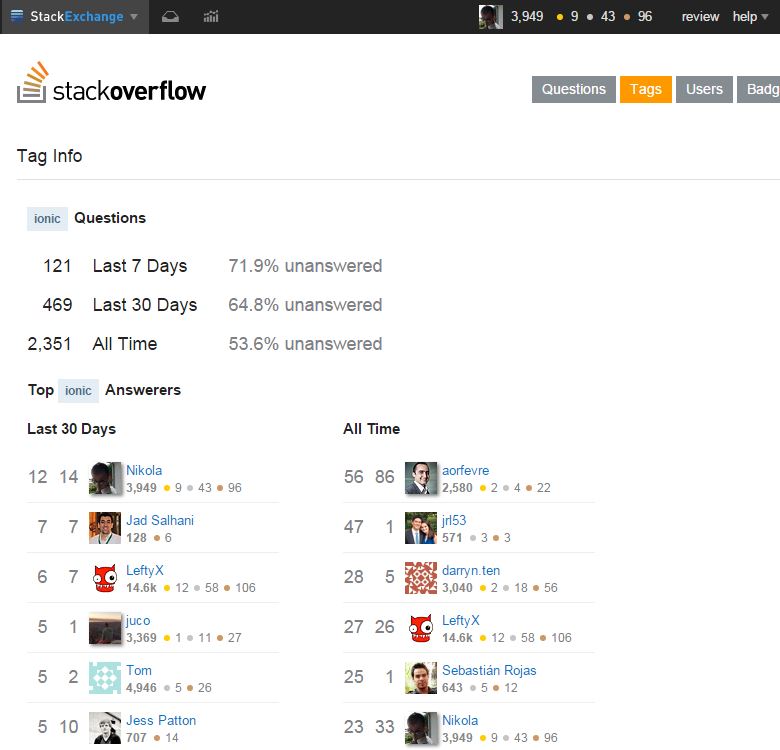
As you may be aware of, lately I’m really into Ionic framework and am helping out on StackOverflow with the knowledge I gained so far with the framework. In the last 30 days, I’m the top answerer in the ionic tag, and am currently #6 All time answerer:
I answered this question by user user1365697:
We want to build a simple application that use a lot of videos and images. The application should run on different mobile devices running Andriod and iPhone operating systems. Does Ionic also convert each application to all mobiles options? What do you suggest to use Cordova or Ionic?
My answer was:
Disclamer: This will sound like advertisement, so I have to say I’m in no way affiliated with Ionic, I just happen to like it so much that I’m sharing the love for it.
Ionic is so much more than “just” an UI framework. Ionic allows you to:
- generate icons and splash screens for all devices and device sizes with a single command:
ionic resources. This alone saves you at least a day of image preparing for various sizes.- instantly update your apps with code changes, even when running directly on your device with
ionic run --livereload- build and test iOS and Android versions side-by-side and see changes instantly with
ionic serve --lab- share your Ionic apps with clients, customers, and testers all around the world without ever going through the App Store with
ionic share- easily accessing the full native functionality of the device using ngCordova (here you get to use any Cordova plugin – so Ionic is indeed much more than Cordova per se)
Also, they’re building a full-stack backend services and tools for your Ionic app like Deploy (for deploying a new version without going through Apple review process!), Analytics, Push notifications.
Ionic CLI (command line interface) uses Cordova in the backend and allows you to build (directly using Ionic CLI) apps for iOS and Android (you by doing
ionic build iosorionic build androidand woila).Ionic uses Angular as a frontend framework so if you’re familiar with it it will come as a bonus. They’reworking closely with the Angular 2.0 team too.
All in all, I personally think Ionic has a bright future, so if nothing else – give it a try I bet you’ll like the ease of making an app with it.