Nikola Brežnjak blog - Tackling software development with a dose of humor
  • Home
  • Daily Thoughts
  • Ionic
  • Stack Overflow
  • Books
  • About me
Home
Daily Thoughts
Ionic
Stack Overflow
Books
About me
  • Home
  • Daily Thoughts
  • Ionic
  • Stack Overflow
  • Books
  • About me
Nikola Brežnjak blog - Tackling software development with a dose of humor
Unity3D

Sharing data between scenes in Unity3D

Here’s I’m going to show you steps on how to share your data between scenes in Unity3D

  1. In the starting scene make a new empty object and name it GameData.
  2. Add a script named GameController with the following content:
    #pragma strict
    
    private var data : Array;
    
    function Awake () {
    	DontDestroyOnLoad (this);
    }
    
    function Start () {
    	data = new Array();
    	
    	GetNewResults();
    }
    
    function GetNewResults(){
    	var www : WWW = new WWW ("http://localhost/check");
    	
    	yield www;// Wait for download to complete
    	
    	var dataJson = JSON.Parse(www.data);
    	var novi = dataJson["data"].Value;
    	data = dataJson["someMoreData"];
    	
    	if (novi == "true"){	
    		Application.LoadLevel(Application.loadedLevel + 1);
    	}
    	else{
    		Debug.Log("false");
    	}
    }
    
    public function getData(){
    	return data;
    }

    The most important part is DontDestroyOnLoad(this) which does not destroy this object once a new scene is loaded.

  3. Then, in another scene, in some script do the following to fetch the data:
    var data = GameObject.Find("GameData").GetComponent(GameController).getData();


CodeProject, Unity3D

Quick tip on how to use custom fonts in Unity3D

In this post I’m going to show you how to use custom fonts in Unity3D.

TimerTime

demo  forkMe

  1. Create a new project
  2. Save scene (CTRL + s) and name it whatever you wish
  3. Download some free font from the web (I used Texas Grunge from dafont.com):
    FontImportUnity
  4. Create a new folder called Fonts in the Assets folder and drag the .ttf  file inside
    FontImportUnity_2
  5. Adjust the size of the Camera to 8:
    CameraSize
  6. Hierarchy->Create->UI->TextAddingText
  7. Click on Canvas in Hierarchy and set the Render Mode and select your Render Camera:CanvasRenderMode
  8. Click on Text and change the settings (Rect Transform – resize the text to match the canvas size and drag the anchors in all 4 corners, Text, Font, Best Fit, Max Size):
    FontImportUnity_4
CodeProject, Unity3D

How to create a countdown timer and show current time in Unity3D

In this post I’m going to show you how to create a countdown timer and show current time in Unity3D.

TimerTime

demo  forkMe

  1. Create a new 2D project:
    unityCreateNewProject
  2. Optionally download some background image (I used this one) and drag it to the Assets folder:
    assetsFolder
  3. Drag the background image to the Hierarchy:
    Hierarchy
  4. Adjust the size of the Camera to 8:
    CameraSize
  5. Hierarchy->Create->UI->Text:
    AddingText
  6. Click on Canvas in Hierarchy and set the Render mode:
    CanvasRenderMode
  7. Click on Text and change the settings (Positions, Width, Height, Text, Font Site):
    textSettings
  8. Rename the Text to TimerText
  9. Duplicate the TimerText and rename to TimeText:
    duplicate
  10. Change y position of TimeText to -200:positionChange
  11. Hierarchy -> Create -> Create Empty:
    CreateEmpty
  12. Rename it to GameController
  13. Inspector -> Add Component -> New Script (name it Timer and select JavaScript):
    AddScript
  14. Paste the following code:
    #pragma strict
     
     var timer: float = 70;
     var isFinishedLevel : boolean = false;
     public var displayText : UnityEngine.UI.Text;
     public var timeText : UnityEngine.UI.Text;
     
     var minsDisplay : String;
     var secsDisplay : String;
     
     var mySeconds : int = 0;
     
     private var oldTimer : float;
     
     function Start(){
         oldTimer = timer;
     }
     
     function Update()
     {
         if (!isFinishedLevel) {
             timer -= Time.deltaTime;
         } 
         
         CurrentTime();
     }
     
     function CurrentTime() { 
         var dt : System.DateTime = System.DateTime.Now;
         var h : int = dt.Hour; 
         var m : int = dt.Minute; 
         var s : int = dt.Second;
     
         timeText.text = h + ":" + m + ":" + s;
         
         if(mySeconds != s)
         {
             mySeconds = s;
             Timing();
         }
         
     }
     
     function Timing()
     {
         if (timer > 0) {
             //var minsDisplay : String = parseInt( timer / 60 ).ToString();
             minsDisplay = parseInt( timer / 60 ).ToString();
             
             //var secsDisplay : String = parseInt( timer ).ToString();
             secsDisplay = parseInt( timer ).ToString();
              
             if ( (timer - ( parseInt(minsDisplay) * 60)) > 10 ) {
                  secsDisplay = parseInt( timer - ( parseInt(minsDisplay) * 60) ).ToString();
             } 
             else {
                 secsDisplay = "0" + parseInt( timer - ( parseInt(minsDisplay) * 60) ).ToString();
             }
             
             //displayText.text = minsDisplay + " : " + secsDisplay;
         } 
         else {
              timer += oldTimer;
         }
         displayText.text = minsDisplay + " : " + secsDisplay;
     }
  15. Drag TimerText and TimeText to the script from Hierarchy:
    dragging
  16. [le problems] – Run the program, and you’ll run into few issues:
    1. If you open up any other window you will notice that the timer will stop, and continue counting once you return to the Unity window [edit: this seems to be expected behavior and in order to “fix” this, you have to set the “Edit -> Project Settings -> Player -> Run In Background” option (from here)]
    2. TimerText and TimeText are not “ticking off” at the same time [edit: this is now also fixed and the code is updated with the fix]
  17. If someone has info on how to solve this, please comment and I’ll update the post once the solution is found [edit: both issues have been resolved thanks to Unity Answers, I’m just leaving them here for some future reference].
CodeProject, Unity3D

How to build an advanced space shooter in Unity3D

Followed this official tutorial on how to build an advanced space shooter in Unity3D, my own version on GitHub, and you can see it in action here (WSAD to move, mouse click to shoot).

  1. Create a new 2D project, download and import the assets from https://www.assetstore.unity3d.com/en/#!/content/13866
  2. Save a scene in _Scenes folder and name it Main
  3. File -> Build settings -> Web player -> Switch platform
  4. Player Settings… – define the size
  5. Reorder the layout the way you want but remember to save it by clicking the Layout button in the top right corner
  6. Drag Vehicle_play from the Assets->Model folder to the Hierarchy
    1. Rename to player, reset transform origin
    2. Add component -> Physics -> Rigidbody and deselect Use Gravity
    3. Add component -> Physics -> Capsule collider, change direction to Z-Axis and adjust position of X, and check Is Trigger
    4. Click on the y gizmo of the camera and adjust again
    5. In this example the Capsule collider would suffice, but we can add Mesh collider and this is very detailed but we can also drag a predefined Mesh collider from Models folder to Mesh collider -> Mesh variable which is less detailed but sufficent and better than the Capsule collider
      1. To see the mesh collider turn off the Mesh renderer
    6. Add Prefabs -> VFX -> Engines -> engines_player to the player object
  7. Reset camera transform origin
    1. set transform Y to 10, Z to 5 (so that the ship starts at the bottom)
    2. set rotation X to 90
    3. Set Projection to ortographic
    4. Set Size to 10
    5. Set Clear flags to Solid Color
    6. Background black
  8. Edit -> Render settings – property Ambient light set to Black (0,0,0,255) to effectively turn it off
  9. Lights
    1. Main light
      1. Hierarchy -> Create -> Directional light (based on rotation!, not position) and rename accordingly
      2. Reset origin position
      3. Set Rotation X = 20, Y = – 115
      4. Intensity = 0.75
    2. Fill light
      1. Duplicate the Main light and rename accordingly
      2. Rename to Fill light
      3. Reset its rotation only
      4. Set Rotation Y = 115
      5. Set Color to some shade of blue
    3. Rim light
      1. Duplicate the Fill light and rename accordingly
      2. Reset origin position
      3. Color White
      4. Rotation Y = 65, X = -15
      5. Intensity = 0.25
  10. Object organization
      1. Create new empty object (ctrl + shift + n)
      2. Rename to Lights
      3. Rest transform origins
      4. Move the whole Lights object out of the way by setting the position Y = 100
  11. Background
    1. Hierarchy -> Create -> 3D object -> Quad; rename accordingly
    2. Reset transform origin
    3. Set rotation X = 90
    4. Remove the Mesh Collider component
    5. Drag Assets -> Textures -> tile_nebula_green to the Quad object
    6. Scale X = 15, Y = 30
    7. Shaders; difuse – mat, specular – glossy, unlit -> texture is the one we will use since this makes it independent of the lighting system (it displays the image originally as it looks)
    8. Position Y = -10 because it otherwise overlaps with 0,0,0 player object position
  12. Moving the player ship
    1. In the Assets folder create folder Scripts
    2. Click on the player and Add Component -> Script -> name it PlayerController
    3. Drag the created script file to the Scripts folder
    4. You have Update and FixedUpdate. We will use since we are dealing with physics.
    5. #pragma strict
      public var speed = 12;
      
      function FixedUpdate () {
      	var moveHorizontal = Input.GetAxis("Horizontal") ;
      	var moveVertical = Input.GetAxis("Vertical");
      	
      	rigidbody.velocity = Vector3(moveHorizontal, 0, moveVertical) * speed;	
      }
    6. Input.GetAxis returns a number from 0 to 1 that’s why you have to multiply
    7. At this point the player ship can go out of the play area, to fix this, use the Mathf.Clamp function:
      #pragma strict
      
      public class Boundary extends System.Object {
      	public var zMin : float;
      	public var zMax : float;
      	public var xMin : float;
      	public var xMax : float;
      }
      
      public var speed = 10;
      public var boundary : Boundary; 
      
      function FixedUpdate () {
      	var moveHorizontal = Input.GetAxis("Horizontal") ;
      	var moveVertical = Input.GetAxis("Vertical");
      	
      	rigidbody.velocity = Vector3(moveHorizontal, 0, moveVertical) * speed;	
      	
      	rigidbody.position = Vector3(
      		Mathf.Clamp(rigidbody.position.x, boundary.xMin, boundary.xMax),
      		0,
      		Mathf.Clamp(rigidbody.position.x, boundary.zMin, boundary.zMax)
      	);
      }
    8. extends System.Object is used to Serialize the object to be able to be used within other object and visible in the inspector
    9. To add tilting when moving:
      #pragma strict
      
      public class Boundary extends System.Object {
      	public var zMin : float;
      	public var zMax : float;
      	public var xMin : float;
      	public var xMax : float;
      }
      
      public var speed = 10;
      public var boundary : Boundary; 
      public var tilt = 4;
      
      function FixedUpdate () {
      	var moveHorizontal = Input.GetAxis("Horizontal") ;
      	var moveVertical = Input.GetAxis("Vertical");
      	
      	rigidbody.velocity = Vector3(moveHorizontal, 0, moveVertical) * speed;	
      	
      	rigidbody.position = Vector3(
      		Mathf.Clamp(rigidbody.position.x, boundary.xMin, boundary.xMax),
      		0,
      		Mathf.Clamp(rigidbody.position.z, boundary.zMin, boundary.zMax)
      	);
      	
      	rigidbody.rotation = Quaternion.Euler(0, 0, rigidbody.velocity.x * - tilt);
      }
  13. Bullets
    1. Create a new empty object rename to Bolt
    2. Reset transform
    3. Create Quad, reset transform, rename VFX
    4. Add VFX as Child of the Bolt
    5. Rotate X = 90
    6. Drag Textures -> fx_lazer_orange_dff to it
    7. Shader -> Particles -> Additive (you can also use Mobile version)
    8. Add component -> Physics -> Rigidbody, deselect Use gravity
    9. Remove the VFX Mesh collider
    10. Select Bolt and add Capsule colider
    11. Change radius and Direction to Z-axis
    12. Check the Is Trigger checkbox
    13. Add script to Bolt object, name it Mover
    14. Make it a Prefab
    15. Delete it from Hierarchy
  14. Firing Bullets
    1. PlayerController.js:
      #pragma strict
      
      public class Boundary extends System.Object {
      	public var zMin : float;
      	public var zMax : float;
      	public var xMin : float;
      	public var xMax : float;
      }
      
      public var bullet : GameObject;
      
      public var speed = 10;
      public var boundary : Boundary; 
      public var tilt = 4;
      public var waitPeriod = 0.05;
      private var nextFire : float;
      
      function FixedUpdate () {
      	var moveHorizontal = Input.GetAxis("Horizontal") ;
      	var moveVertical = Input.GetAxis("Vertical");
      	
      	rigidbody.velocity = Vector3(moveHorizontal, 0, moveVertical) * speed;	
      	
      	rigidbody.position = Vector3(
      		Mathf.Clamp(rigidbody.position.x, boundary.xMin, boundary.xMax),
      		0,
      		Mathf.Clamp(rigidbody.position.z, boundary.zMin, boundary.zMax)
      	);
      	
      	rigidbody.rotation = Quaternion.Euler(0, 0, rigidbody.velocity.x * - tilt);
      }
      
      function Update(){
      	if (Input.GetButton("Fire1") && Time.time > nextFire){
      		nextFire = Time.time + waitPeriod;
      		Instantiate(bullet, Vector3(rigidbody.position.x, 0, rigidbody.position.z), Quaternion.identity);
      	}
      }
    2. Drag the bullet prefab to the bullet variable on the player script
  15. Cleaning up
    1. Create Cube, rename Boundary
    2. Reset transform origin and place it around the whole game
    3. Turn off Mesh Renderer
    4. Is Trigger on Box collider
    5. Remove the renderer
    6. Add script Destroy:

      function OnTriggerExit(other : Collider)
      {
          Destroy(other.gameObject);
      }
  16. Enemies
    1. Create an empty game object – Asteroids
    2. Reset transform origin, move a bit away along the Z axis
    3. Drag the Asteroid model from the Models folder and place it as a child of the Asteroids empty game object – RTO (reset transform origin from now on)
    4. Click on the EGO (empty game object) and add Physics -> Rigidbody
    5. Deselect Use Gravity
    6. Add -> Physics -> Capsule collider
    7. Add Script:
      public var tumble : float;
      
      function Start () {
      	rigidbody.angularVelocity = Random.insideUnitSphere * tumble;
      }
    8. AngularVelocity – how fast the object is rotating
    9. Remove the AngularDrag which eventually slows the asteroid to a halt (drag – trenje for all you Croatian readers)
    10. Add script DestroyByContact:
      #pragma strict
      
      function OnTriggerEnter (other : Collider) {
      	if (other.tag == "Boundary"){
      		return;
      	}
      		
      	Destroy(other.gameObject);
      	Destroy(gameObject);
      }
    11. Add Tag Boundary to Boundary
  17. Explosions
    1.  Adjust the DestroyByContact script:
      #pragma strict
      
      public var asteroidExplosion : GameObject;
      public var playerExplosion : GameObject;
      
      function OnTriggerEnter (other : Collider) {
      	if (other.tag == "Boundary"){
      		return;
      	}
      	
      	//it will create an explosion on the same position as our asteroid
      	Instantiate(asteroidExplosion, transform.position, transform.rotation);
      	
      	if (other.tag == "Player"){
      		Instantiate(playerExplosion, other.transform.position, other.transform.rotation);
      	}
      	
      	Destroy(other.gameObject);
      	Destroy(gameObject);
      }
    2. Drag the needed explosions from the VFX folder
    3. Drag the Mover script to the Asteroid and set speed to -5
    4. Drag Asteroid to a Prefab folder
    5. Delete it from Hierarchy
  18. Game Controller
    1. Create EGO and rename accordingly
    2. Set tag to GameController
    3. Add script:
      #pragma strict
      
      public var enemy : GameObject;
      public var spawnValues : Vector3;
      
      
      function Start () {
      	SpawnWaves();
      }
      
      function SpawnWaves(){
      	
      	var spawnPosition = Vector3(Random.Range(-spawnValues.x, spawnValues.x), spawnValues.y, spawnValues.z);
      	var spawnRotation = Quaternion.identity;
      	
      	Instantiate(enemy, spawnPosition, spawnRotation);
      }
    4. Outside set values for spawnValues to 6, 0, 18
  19. Add wave of enemies
    #pragma strict
    
    public var enemy : GameObject;
    public var spawnValues : Vector3;
    public var enemyCount : int;
    public var waitForEnemy : float;
    public var waitForPlayer : float;
    public var waveWait : float;
    
    function Start () {
    	SpawnWaves();
    }
    
    function SpawnWaves(){
    	yield WaitForSeconds(waitForPlayer);
    	
    	while (true){
    		for (var i=0; i<enemyCount; i++){
    			var spawnPosition = Vector3(Random.Range(-spawnValues.x, spawnValues.x), spawnValues.y, spawnValues.z);
    			var spawnRotation = Quaternion.identity;
    		
    			Instantiate(enemy, spawnPosition, spawnRotation);
    			yield WaitForSeconds(waitForEnemy);
    		}
    	}
    	
    	yield WaitForSeconds(waveWait);	
    }
  20. Destroying explosion animations
    1. Add new script DestroyByTime

      #pragma strict
      
      public var aliveTime : float;
      function Start () {
      	Destroy(gameObject, aliveTime);
      }
    2. Set this script on all of the explosion prefabs
    3. Set AliveTime to 2
  21. Audio
    1. Drag the Audio files to appropriate Explosion Prefabs
    2. For a weapon_player – drag it to a Player object in Hierarchy and remove the Play on Awake
    3. Update the PlayerController script to:
      function Update(){
      	if (Input.GetButton("Fire1") && Time.time > nextFire){
      		nextFire = Time.time + waitPeriod;
      		Instantiate(bullet, Vector3(rigidbody.position.x, 0, rigidbody.position.z), Quaternion.identity);
      		
      		audio.Play();
      	}
      }
    4. Drag music_background to GameController
    5. Select Loop and Play on Awake
    6. Adjust the volumes
      1. Player 0.5
      2. Game Controller 0.5
  22. Displaying score
    1. Create -> UI -> Text, rename to ScoreText
    2. Set correct Rect Transform
    3. In the GameController script add:
      #pragma strict
      
      public var enemy : GameObject;
      public var spawnValues : Vector3;
      public var enemyCount : int;
      public var waitForEnemy : float;
      public var waitForPlayer : float;
      public var waveWait : float;
      
      public var scoreText : UnityEngine.UI.Text;
      private var score : int;
      
      function Start () {
      	score = 0;
      	updateScore();
      	SpawnWaves();
      }
      
      function SpawnWaves(){
      	yield WaitForSeconds(waitForPlayer);
      	
      	while (true){
      		for (var i=0; i<enemyCount; i++){
      			var spawnPosition = Vector3(Random.Range(-spawnValues.x, spawnValues.x), spawnValues.y, spawnValues.z);
      			var spawnRotation = Quaternion.identity;
      		
      			Instantiate(enemy, spawnPosition, spawnRotation);
      			yield WaitForSeconds(waitForEnemy);
      		}
      	}
      	
      	yield WaitForSeconds(waveWait);	
      }
      
      function updateScore(){
      	scoreText.text = "Score: " + score;
      }
      
      function IncreaseCount(){
      	score ++;
      	updateScore();
      }
    4. In the DestroyByContact:
      #pragma strict
      
      public var asteroidExplosion : GameObject;
      public var playerExplosion : GameObject;
      private var gameController : GameController;
      
      function Start(){
      	var gameControllerObject : GameObject = GameObject.FindWithTag("GameController");
      	if (gameControllerObject != null){
      		gameController = gameControllerObject.GetComponent(GameController);
      	}
      	else{
      		Debug.Log("oops");
      	}
      }
      
      function OnTriggerEnter (other : Collider) {
      	if (other.tag == "Boundary"){
      		return;
      	}
      	
      	//it will create an explosion on the same position as our asteroid
      	Instantiate(asteroidExplosion, transform.position, transform.rotation);
      	
      	if (other.tag == "Player"){
      		Instantiate(playerExplosion, other.transform.position, other.transform.rotation);
      	}
      	
      	gameController.IncreaseCount();
      	
      	Destroy(other.gameObject);
      	Destroy(gameObject);
      }
    5. Drag the ScoreText object to form the reference to it in the GameController
  23. Ending the game
    1. Create an empty game object and rename it to DisplayText
    2. Rest transform origin
    3. Add ScoreText to it (drag the Canvas containing it)
    4. Create new UI -> Text (rename to RestartText), and place it in the upper right corner
    5. Create new UI -> Text (rename to GameOverText)
    6. Update the script to:
      #pragma strict
      
      public var enemy : GameObject;
      public var spawnValues : Vector3;
      public var enemyCount : int;
      public var waitForEnemy : float;
      public var waitForPlayer : float;
      public var waveWait : float;
      
      public var scoreText : UnityEngine.UI.Text;
      public var restartText : UnityEngine.UI.Text;
      public var gameOverText : UnityEngine.UI.Text;
      
      private var restart : boolean;
      private var gameOver : boolean;
      
      private var score : int;
      
      function Start () {
      	restart = false;
      	gameOver = false;
      	
      	restartText.text = "";
      	gameOverText.text = "";
      	
      	score = 0;
      	updateScore();
      	SpawnWaves();
      }
      
      function Update(){
      	if (restart){
      		if (Input.GetKeyDown(KeyCode.R)){
      			Application.LoadLevel(Application.loadedLevel);
      		}
      	}
      }
      
      function SpawnWaves(){
      	yield WaitForSeconds(waitForPlayer);
      	
      	while (true){
      		for (var i=0; i<enemyCount; i++){
      			var spawnPosition = Vector3(Random.Range(-spawnValues.x, spawnValues.x), spawnValues.y, spawnValues.z);
      			var spawnRotation = Quaternion.identity;
      		
      			Instantiate(enemy, spawnPosition, spawnRotation);
      			yield WaitForSeconds(waitForEnemy);
      		}
      		
      		if (gameOver){
      			restartText.text = "R to restart";
      			restart = true;
      			break;
      		}
      	}
      	
      	yield WaitForSeconds(waveWait);	
      }
      
      function updateScore(){
      	scoreText.text = "Score: " + score;
      }
      
      function IncreaseCount(){
      	score ++;
      	updateScore();
      }
      
      function GameOver(){
      	gameOver = true;
      	gameOverText.text = "Game over!";
      }
    7. Drag the text object to form a reference in GameController object
    8. Update the DestroyByContact with:
      if (other.tag == "Player"){
      		Instantiate(playerExplosion, other.transform.position, other.transform.rotation);
      		gameController.GameOver();
      	}
  24. Deploy the game
    1. File -> Build settings
    2. Web Player
    3. Build
CodeProject, Unity3D

How to create a Unity3D Brick shooter step by step

Followed this official tutorial, my own version on GitHub, and you can see it in action here (WSAD to move, mouse click to shoot).

Steps on how to create this:

  1. Create a new 3D project
  2. Save the scene as Main
  3. Create -> 3D object -> Plane
  4. Create -> 3D object -> Cube
    1. Add Component -> Physics -> Box collider
    2. Add Component -> Physics -> Rigidbody
    3. Drag and drop this object in the Assets/Prefabs folder
    4. Make duplicates (use snapping to move by using the ctrl key)
    5. Make a row of them (about 8) and then make a new empty object and drag them all into this object
    6. Now duplicate this object and position above (again by using snapping with ctrl key)
  5. Create -> 3D object -> Sphere
    1. Add Component -> Physics -> Sphere collider
    2. Add Component -> Physics -> Rigidbody
    3. Make it into a prefab
    4. Delete it from Hierarchy
  6. On the camera object => Add Component -> Script:
    1. #pragma strict
      
      public var projectile : Rigidbody;
      public var shotPos : Transform;
      public var shotForce : float = 1000f;
      public var moveSpeed : float = 10f;
      
      
      function Update ()
      {
          var h : float = Input.GetAxis("Horizontal") * Time.deltaTime * moveSpeed;
          var v : float = Input.GetAxis("Vertical") * Time.deltaTime * moveSpeed;
          
          transform.Translate(new Vector3(h, v, 0f));
          
          if(Input.GetButtonUp("Fire1"))
          {
              var shot : Rigidbody = Instantiate(projectile, shotPos.position, shotPos.rotation);
              shot.AddForce(shotPos.forward * shotForce);
          }
      }
    2. Drag the Sphere prefab to the projectile
  7. Create empty game object and rename to shotPos
    1. drag and drop it on the camera
    2. reset transform origin
    3. Position y=-0.5, z=1
    4. Rotation x=-15
  8. Drag Camera to shot pos variable in the script
  9. If you want to clean up the bullets after 2 seconds, add script to Sphere prefab:
    function Start () {
    	Destroy(gameObject, 2f);
    }
CodeProject, Unity3D

Unity3D scene changing with fade effect

Followed this official tutorial, my own version on GitHub, and you can see it in action here (click the cube to see the effect).

LevelChangeWithFading.

Steps on how to make this:

  1. Create a new 3D project
  2. Save the scene as Level0
  3. Create -> 3D object -> Cube
  4. Create -> Light -> Directional light
  5. Save this scene and create a new one Level2 and repeat the process just here create two cubes
  6. Create an empty object called FaderObj and attach a new script to it called Fading:
    #pragma strict
    
    public var fadeOutTexture : Texture2D;	// the texture that will overlay the screen. This can be a black image or a loading graphic
    public var fadeSpeed : float = 0.8f;		// the fading speed
    private var drawDepth : int = -1000;		// the texture's order in the draw hierarchy: a low number means it renders on top
    private var alpha : float = 1.0f;			// the texture's alpha value between 0 and 1
    private var fadeDir : int = -1;			// the direction to fade: in = -1 or out = 1
    
    
    function OnGUI()
    {
    	// fade out/in the alpha value using a direction, a speed and Time.deltaTime to convert the operation to seconds
    	alpha += fadeDir * fadeSpeed * Time.deltaTime;
    	// force (clamp) the number to be between 0 and 1 because GUI.color uses Alpha values between 0 and 1
    	alpha = Mathf.Clamp01(alpha);
    	
    	// set color of our GUI (in this case our texture). All color values remain the same & the Alpha is set to the alpha variable
    	GUI.color = new Color (GUI.color.r, GUI.color.g, GUI.color.b, alpha);
    	GUI.depth = drawDepth;																// make the black texture render on top (drawn last)
    	GUI.DrawTexture(new Rect(0, 0, Screen.width, Screen.height), fadeOutTexture);		// draw the texture to fit the entire screen area
    }
    
    // sets fadeDir to the direction parameter making the scene fade in if -1 and out if 1
    public function BeginFade (direction : int)
    {
    	fadeDir = direction;
    	return (fadeSpeed);
    }
    
    // OnLevelWasLoaded is called when a level is loaded. It takes loaded level index (int) as a parameter so you can limit the fade in to certain scenes.
    function OnLevelWasLoaded()
    {
    	//alpha = 1;		// use this if the alpha is not set to 1 by default
    	BeginFade(-1);		// call the fade in function
    }
  7. Add the following script to the Cube object:
    #pragma strict
    
    var counter = 0;
    function Start () {
    
    }
    
    function Update () {
    
    }
    
    function OnMouseDown(){
    	Debug.Log("clicked " + counter++);
    	var fadeTime = GameObject.Find ("FaderObj").GetComponent(FadingJS).BeginFade(1);		
    	
    	yield WaitForSeconds(fadeTime);	
    	
    	GameObject.Find("Cube").renderer.enabled = false;
    	
    	fadeTime = GameObject.Find ("FaderObj").GetComponent(FadingJS).BeginFade(-1);
    	
    	yield WaitForSeconds(fadeTime);	
    	
    	Application.LoadLevel(Application.loadedLevel + 1);	
    }
  8. Drag a 2×2 black png image to the Texture variable in the Fading script.
CodeProject, Unity3D

How to create bouncing balls in Unity3D step by step

Followed this official tutorial: http://unity3d.com/learn/tutorials/modules/beginner/physics/assignments/bouncing-ball

My own version on GitHub, and you can see it in action here (watch for 10 seconds to see what happens with the balls in the way the interact).

Steps to make this:

  1. Create a new empty 3D project
  2. Save the scene as Main.unity
  3. Hierarchy -> Create -> 3D object -> Plane
  4. Hierarchy -> Create -> 3D object -> Sphere
    1. drag it up the y axis
  5. Hierarchy -> Create -> Light -> Directional light
    1. drag it up the y axis above the sphere
    2. set x rotation to 90
  6. Click on the Sphere
    1. Add Component -> Physics -> Rigidbody
    2. Add Component -> Physics -> Sphere collider
  7. Assets -> Create -> Physics material
    1. Set Bounciness to 0.8 (to bounce forever set to 1)
    2. Set Bounce combine to Maximum
    3. drag it to the Material of the Sphere collider of the Sphere object
  8. Create a folder called Prefabs in the Assets folder
    1. Drag the Cube to this folder and delete it from the Hierarchy
    2. Drag the prefab Cube from the Prefabs folder to the Hierarcy and you can now duplicate it with the same behavior
CodeProject, Unity3D

How to build a 2D Space shooter with efficiency calculation in Unity3D

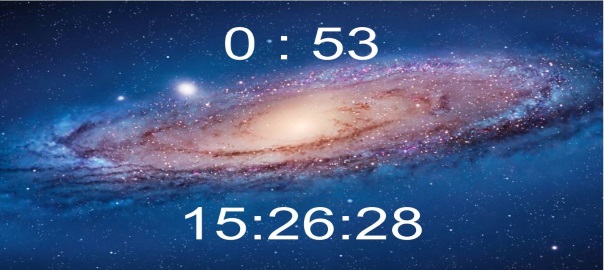
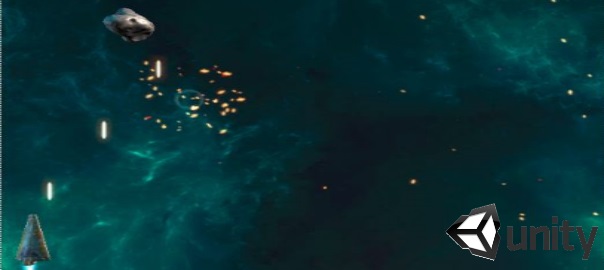
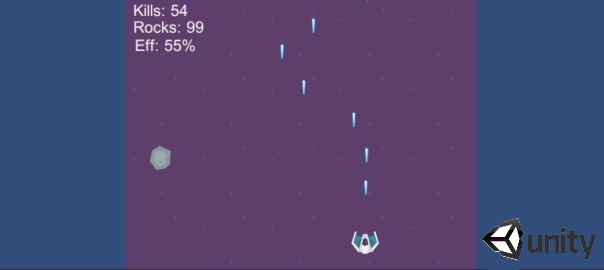
In this blog post I’m going to show you how to build a 2D Space shooter with efficiency calculation in Unity3D.

I followed these two blog posts: post #1 and post #2, and updated it for the use with Unity 4.5 and added the counters for number of bullets fired and number of rocks generated and showed the precision efficiency.

You can try my version, or you can download the project on GitHub. Following are the steps on how to make it your self:

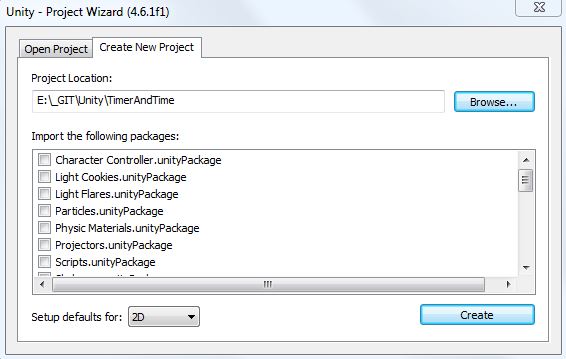
    1. Start a new 2D project in Unity3D
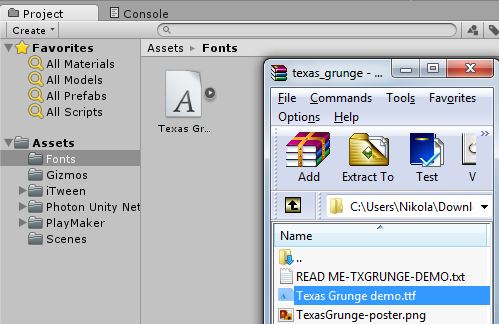
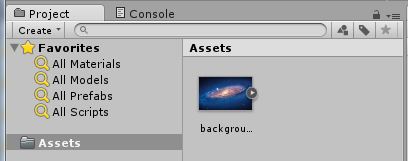
    2. Create folders Scripts, Scenes, Prefabs, Textures
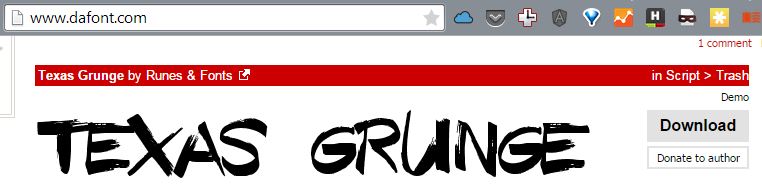
    3. Put all the texture assets to Textures folder
    4. Save the (ctrl +s) scene to Scenes folder with some name
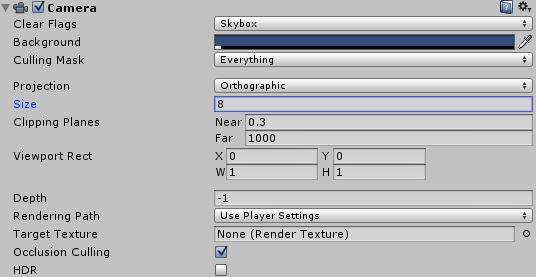
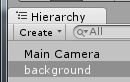
    5. Drag background to Hierarchy
    6. Drag ship to Hierarchy
      1. set y to -4
      2. add Rigidbody2D
      3. check IsKinematic (the gravity doesn’t affect it)
    7. Add script to ship:
      #pragma strict
      // A variable that will contain our bullet prefab
      public var bullet : GameObject;
      public var brzina: int;
      var score : int;
      
      function Start(){
          	score = 0;
      }
      
      function Update() {  
          // Move the spaceship horizontally  
          rigidbody2D.velocity.x = Input.GetAxis("Horizontal") * 10;
          rigidbody2D.velocity.y = Input.GetAxis("Vertical") * 10;
      
      	//add support for mobile phone tilting
      	transform.Translate(Input.acceleration.x*Time.deltaTime*20, 0, 0);
          
          if (Input.GetKeyDown("space") || Input.GetMouseButtonDown(0)) {   
          	Instantiate(bullet, transform.position, Quaternion.identity);
          }    
      }
    8. Add bullet to Hierarchy
      1. add Physics2D -> Rigidbody 2D
      2. add script:
        public var speed : int = 6;
        
        // Gets called once when the bullet is created
        function Start () {  
            // Set the Y velocity to make the bullet move upward
            rigidbody2D.velocity.y = speed;
        }
        
        // Gets called when the object goes out of the screen
        function OnBecameInvisible() {  
            // Destroy the bullet 
            Destroy(gameObject);
        }
      3. add bullet to Prefabs folder and delete it from the Hierarchy
      4. drag the bullet from Prefabs folder to the bullet variable in Inspector when the spaceship is selected
    9. Add an enemy (from Textures) to the Hierarchy
      1. add Rigidbody 2D
      2. set IsKinematic
      3. add script:
        // Public variable that contains the speed of the enemy
        public var speed : int = -5;
        
        // Function called when the enemy is created
        function Start () {  
            // Add a vertical speed to the enemy
            rigidbody2D.velocity.y = speed;
        
            // Make the enemy rotate on itself
            rigidbody2D.angularVelocity = Random.Range(-200, 200);
        
            // Destroy the enemy in 3 seconds,
            // when it is no longer visible on the screen
            Destroy(gameObject, 3);
        }
        
        function OnTriggerEnter2D(obj : Collider2D) {  
            var name = obj.gameObject.name;
        
            // If it collided with a bullet
            if (name == "bullet(Clone)") {
                // And destroy the bullet
                Destroy(obj.gameObject);
                
                handleDestroy(gameObject);
            }
        
            // If it collided with the spaceship
            if (name == "spaceship") {
                handleDestroy(gameObject);
            }
        }
        
        function handleDestroy(gameObject: GameObject){
        	gameObject.Find("ScoreText").SendMessage("Hit");
            Destroy(gameObject);
        }
      4. Add enemy from Hierarchy to Prefabs folder and delete it from Hierarchy
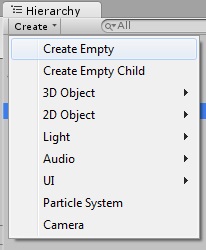
    10. Add spawn object to Hierarchy
      1. position it above the background
      2. add script:
      1. public var enemy : GameObject;
        
        // Variable to know how fast we should create new enemies
        public var spawnTime : float = 1.3;
        
        function Start() {  
            // Call the 'addEnemy' function every 'spawnTime' seconds
            InvokeRepeating("addEnemy", spawnTime, spawnTime);
        }
        
        // New function to spawn an enemy
        function addEnemy() {  
            // Variables to store the X position of the spawn object
            // See image below
            var x1 = transform.position.x - renderer.bounds.size.x/2;
            var x2 = transform.position.x + renderer.bounds.size.x/2;
        
            // Randomly pick a point within the spawn object
            var spawnPoint = new Vector2(Random.Range(x1, x2), transform.position.y);
        
            // Create an enemy at the 'spawnPoint' position
            Instantiate(enemy, spawnPoint, Quaternion.identity);
        }
      2. drag enemy prefab to spawn object
    11. For the spaceship, the enemy prefab, and the bullet prefab do the following
      1. add Component -> Physics 2D -> Box Collider 2D
      2. for enemy Box Collider 2D check IsTrigger and this will give you the OnTriggerEnter2D function
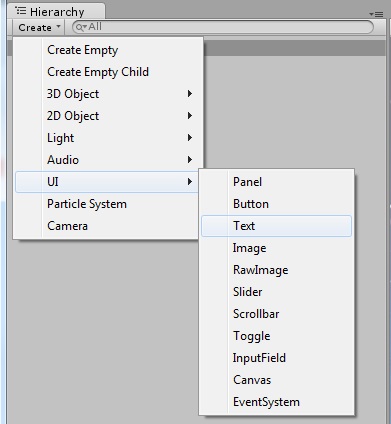
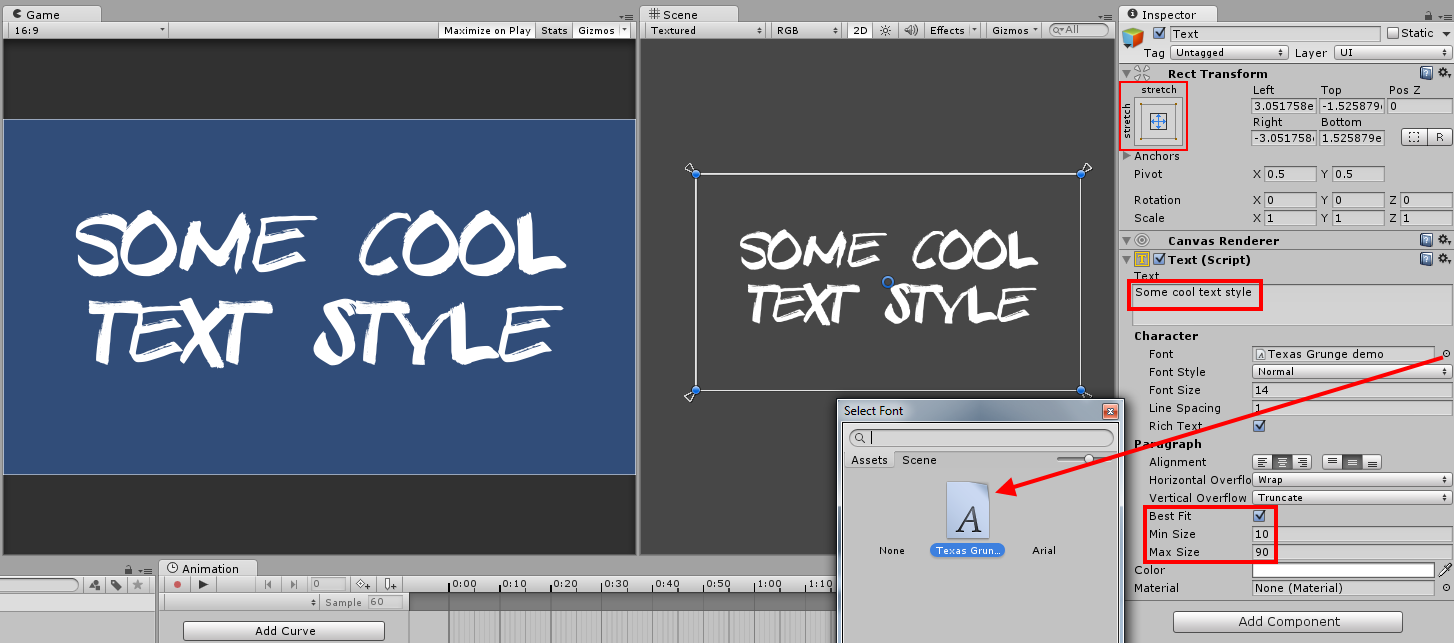
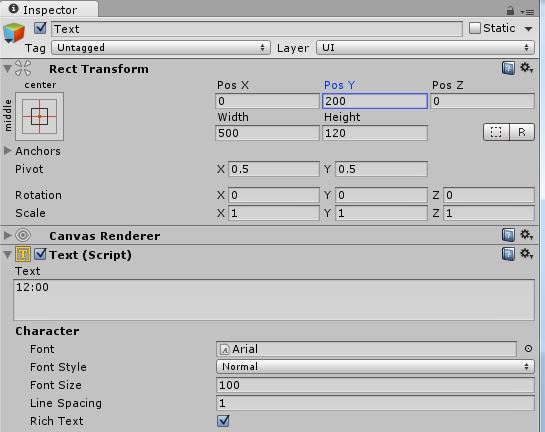
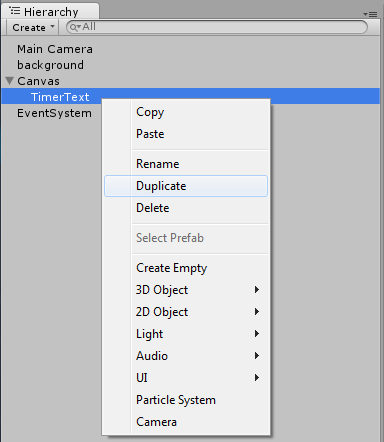
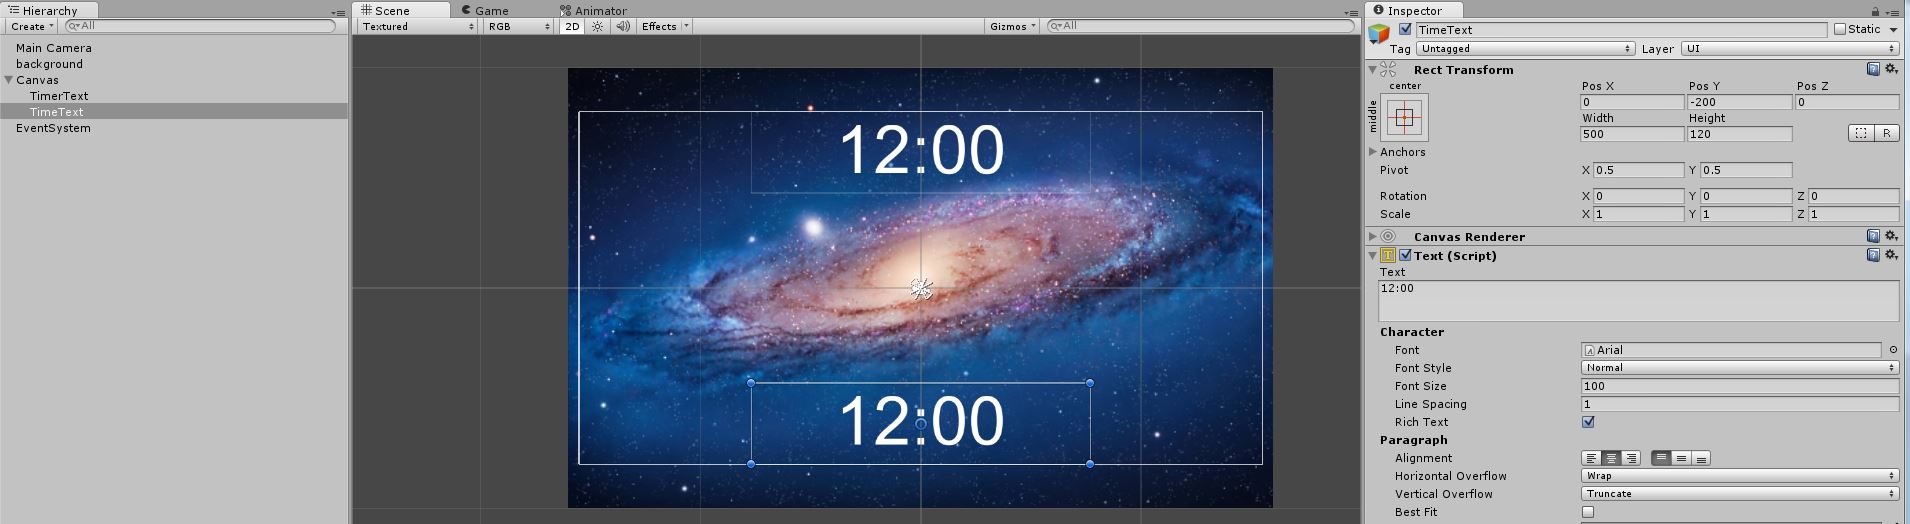
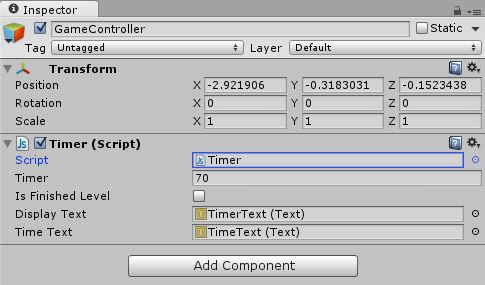
    12. Create -> UI -> Text (name it ScoreText)
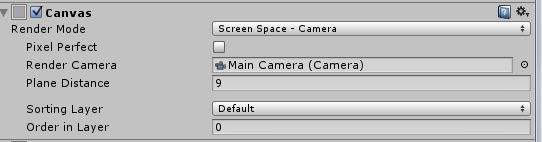
      1. Canvas -> RenederMode -> World space, no camera
      2. Rect transform – 450×340 (WxH)
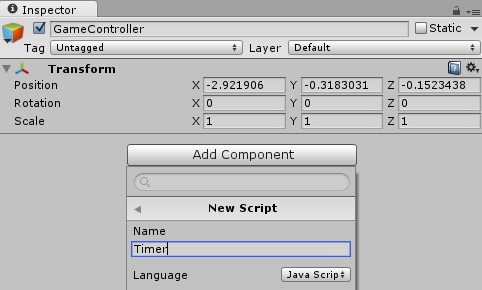
      3. Add -> Script -> ScoreScript.js:

        import UnityEngine.UI.Text;
        
        var Counter : int;
        var text : UnityEngine.UI.Text;
        
        function Start () {
        	text = GetComponent(UnityEngine.UI.Text);
        	Counter = 0;
        }
        
        function Update () {    
             text.text = "Kills: "+Counter;
        }   
                 
        function Hit () {            
            Counter++;
        }
    13. Create -> UI -> Text (name it RocksText)
      1. Add -> Script -> RocksScript.js:

        import UnityEngine.UI.Text;
        
        var Counter : int;
        private var text : UnityEngine.UI.Text;
        
        function Start () {
        	text = GetComponent(UnityEngine.UI.Text);
        	Counter = 0;
        }
        
        function Update () {    
             text.text = "Rocks: "+Counter;
        }   
                 
        function RockAdd () {            
            Counter++;
        }
    14. Create -> UI -> Text (name it EffText)
      1. Add -> Script -> EffScript.js:
        import UnityEngine.UI.Text;
        
        private var Kills : int;
        private var Rocks : int;
        private var Eff : float;
        private var text : UnityEngine.UI.Text;
        
        function Start () {
        	text = GetComponent(UnityEngine.UI.Text);
        	Eff = 0;
        	Kills = 0;
        	Rocks = 0;
        }
        
        function Update () {    
             Kills = gameObject.Find("ScoreText").GetComponent(ScoreScript).Counter;
             Rocks = gameObject.Find("RocksText").GetComponent(RocksScript).Counter;
                  
             if (Kills == 0 || Rocks == 0)
             	Eff = 0;
             else
             	Eff = Kills * 1.0f / Rocks * 100;
             	
             text.text = "Eff: " + Eff.ToString("F0") + "%";
        }
CodeProject, Unity3D

How to make a Unity3D Ball Roller game

I followed http://unity3d.com/learn/tutorials/projects/roll-a-ball, and updated the steps for the newest Unity3D currently available (4.5). You can try the game and download the project on GitHub.

  1. Create a new 3D project and save a scene in a Assets/Scenes folder
  2. Game object – 3d object – Plane, and rename to Ground
  3. Transform – Reset -> sets to 0,0,0 origin point of the world
  4. Edit – Frame selected or character F
  5. Hierarchy -> Create -> 3D object -> Sphere, and again Transform – Reset and again Edit – Frame selected, rename it to Player
  6. Hierarchy -> Create -> Light -> Directional light (name it Main Light)
    1. Rotation x 30, y 60
    2. Shadow – Soft
    3. Very high resolution
  7. Duplicate Main Light and reverse the Rotation x -30, y -60
  8. Color – some blue, intensity 0.1, no shadows
  9. We use Folders in Project tab to organize stuff and Empty game objects in Hierarchy tab
  10. Create empty object and rename to Lighting
    1. reset transform origin, drag other lighting related object in here
    2. set the y position to 100 so that you move the lighting up (they are based on rotation and not position so that if you place it high up it’s just a matter of “not getting in the way” and they will still work as expected)
  11. Player object -> add Component -> Physics -> Rigidbody
  12. [Moving the player] Create a Scripts folder. Create a script (on the Player object add Component -> New Script) and place it in this folder
    1. Update() – here goes the game code (before rendering the frame)
    2. FixedUpdate() – here goes the physics code (before performing any physics calculation)
    3. To read an axis use Input.GetAxis with one of the following default axes: “Horizontal” and “Vertical” are mapped to joystick, A, W, S, D and the arrow keys. “Mouse X” and “Mouse Y” are mapped to the mouse delta. “Fire1”, “Fire2” “Fire3” are mapped to Ctrl, Alt, Cmd keys and three mouse or joystick buttons.
    4. Add this script:
      var speed : float;
      function FixedUpdate () {
      	var moveHorizontal = Input.GetAxis("Horizontal");
      	var moveVertical = Input.GetAxis("Vertical");
      	
      	var movement = Vector3(moveHorizontal, 0.0f, moveVertical);
      	
      	rigidbody.AddForce(movement * speed * Time.deltaTime);
      }
  13. [Moving the camera] Raise the camera a little and tilt it by setting the rotation. Make it the child of the player (drag the Main Camera to Player object). If you run the game at this point you will see all went bazinga. So, we can’t have it as a child – detach it. What we can do however is attach a script to the camera and offset it based on the position of the player object:
    1. Add script to Main Camera:

      var player : GameObject;
      private var offset : Vector3;
      function Start () {
          offset = transform.position;
      }
      
      function LateUpdate () {   
          transform.position = player.transform.position + offset;
      }
  14. [Adding the walls] – Add new empty object Walls
    1. Create -> 3D object -> Cube (rename to West Wall) and add it as a child to Walls
    2. repeat for other 3 walls
  15. [Adding collectible objects]
    1. Create -> 3D object -> Cube (rename to Pickup)
    2. Reset transform origin
    3. Scale to 0.5 on all axes
    4. Rotate 45° on all axes
    5. Add a script (Rotator):
      function Update () {
      	transform.Rotate(Vector3(15,30,45) * Time.deltaTime);
      }
    6. Create a new folder called Prefabs in the root directory and drag the Pickup object inside it in order to, well, create a Prefab which you can think of as a variable which you can then access with all its parameters. So, when you clone the prefab object, it will have all the behavior that the cloned prefab has.
    7. Create an empty object and drag the prefab inside it
    8. Set orientation to global mode and duplicate a few of the collectibles
  16. [Collision detection]
    1. Add the tag ‘PickUp’ to the Pickup prefab
    2. Add the following function to the Player object script:
      function OnTriggerEnter(other : Collider){
          if(other.gameObject.tag == 'PickUp')
              other.gameObject.setActive(false);
      }
    3. Set Box collider Is Trigger to true in the Pickup prefab and this gives you OnTrigger function
    4. Unity caches all the static colliders – everytime we move, rotate or scale the static colliders, the Unity will recalculate the cache – takes resources! We can move, rotate or scale dynamic colliders and Unity will not cache them. Any game object with a collider and a rigid body is considered a dynamic object. Any game object with a collider and no rigid body is considered a static object
    5. Add a rigidbody to the Pickup prefab. If you start the game now, the Pickup object will fall to the ground because of the Gravity. You can uncheck the Gravity option, but a better solution is to keep it and check the Is Kinematic option.
    6. Static colliders shouldn’t move – walls and floors
    7. Dynamic colliders can move and have a rigidbody attached
    8. Standard rigid bodies are moved using physics forces and Kinematic rigid bodies are moved using transform object
  17. [Counting picked up object]
    1. Add a new variable to the PlayerController script and increment it in the OnTriggerEnter function
    2. Add a new empty game object
    3. Choose “Add Component” -> “Rendering” -> “GUIText”
    4. Transform position (x,y,z) = (0,1,0)
    5. Anchor – upper left
    6. Alignment – center
    7. Pixel offset – 5,5
    8. Font size – 20
    9. Add the GUIText variable to the PlayerController script:
      public var scoreText : GUIText;
      function SetCountText(){
      	scoreText.text = 'Score: ' + score.ToString();
      }
    10. Do the same with the winText (create object, add the public variable in PlayerController script) and drag it to the Player object
  18. [Publishing the game]
    1. File -> Build Settings
    2. Select the target platform
    3. Click on the Switch platform button
    4. Click on the Buildbutton
  19. [Added bonus]
    1. To create a Physics Material select Assets->Create->Physics Material from the menu bar. Then drag the Physics Material from the Project View onto a Collider in the scene.
    2. This way you can make the walls bounce the ball

Recent posts

  • Discipline is also a talent
  • Play for the fun of it
  • The importance of failing
  • A fresh start
  • Perseverance

Categories

  • Android (3)
  • Books (114)
    • Programming (22)
  • CodeProject (35)
  • Daily Thoughts (77)
  • Go (3)
  • iOS (5)
  • JavaScript (127)
    • Angular (4)
    • Angular 2 (3)
    • Ionic (61)
    • Ionic2 (2)
    • Ionic3 (8)
    • MEAN (3)
    • NodeJS (27)
    • Phaser (1)
    • React (1)
    • Three.js (1)
    • Vue.js (2)
  • Leadership (1)
  • Meetups (8)
  • Miscellaneou$ (77)
    • Breaking News (8)
    • CodeSchool (2)
    • Hacker Games (3)
    • Pluralsight (7)
    • Projects (2)
    • Sublime Text (2)
  • PHP (6)
  • Quick tips (40)
  • Servers (8)
    • Heroku (1)
    • Linux (3)
  • Stack Overflow (81)
  • Unity3D (9)
  • Windows (8)
    • C# (2)
    • WPF (3)
  • Wordpress (2)

"There's no short-term solution for a long-term result." ~ Greg Plitt

"Everything around you that you call life was made up by people that were no smarter than you." ~ S. Jobs

"Hard work beats talent when talent doesn't work hard." ~ Tim Notke

© since 2016 - Nikola Brežnjak