Nikola Brežnjak blog - Tackling software development with a dose of humor
  • Home
  • Daily Thoughts
  • Ionic
  • Stack Overflow
  • Books
  • About me
Home
Daily Thoughts
Ionic
Stack Overflow
Books
About me
  • Home
  • Daily Thoughts
  • Ionic
  • Stack Overflow
  • Books
  • About me
Nikola Brežnjak blog - Tackling software development with a dose of humor
Ionic

How to add PayPal to Ionic 1 apps

TL;DR

In this tutorial, I’m going to show you how to add the option of paying with PayPal to your Ionic 1 apps.

The demo project is on Github.

How to create this yourself step by step

  • Start a new Ionic 1 project

ionic start IonicPayPalDemo

  • Add the PayPal Cordova Plugin

cordova plugin add com.paypal.cordova.mobilesdk

As the official docs say:

The PayPal SDK Cordova/Phonegap Plugin adds 2 JavaScript files to your project:

  • cdv-plugin-paypal-mobile-sdk.js – a wrapper around the native SDK. The PayPalMobile object is immediately available to use in your .js files. You don’t need to reference it in index.html
  • paypal-mobile-js-helper.js – a helper file which defines the PayPalPayment, PayPalPaymentDetails and PayPalConfiguration classes for use with PayPalMobile

You must add <script type="text/javascript" src="js/paypal-mobile-js-helper.js"></script> to your www/index.html file, after the cordova.js import.

So, following the official advice, our www/index.html file will now look like this:

<!DOCTYPE html>
<html>
<head>
    <meta charset="utf-8">
    <meta name="viewport" content="initial-scale=1, maximum-scale=1, user-scalable=no, width=device-width">
    <title></title>

    <link rel="manifest" href="manifest.json">
    <link href="lib/ionic/css/ionic.css" rel="stylesheet">
    <link href="css/style.css" rel="stylesheet">

    <script src="lib/ionic/js/ionic.bundle.js"></script>
    <script src="cordova.js"></script>
    <script type="text/javascript" src="js/paypal-mobile-js-helper.js"></script>

    <script src="js/app.js"></script>
    <script src="js/controllers.js"></script>
    <script src="js/services.js"></script>
</head>

<body ng-app="starter">
    <ion-nav-bar class="bar-stable">
        <ion-nav-back-button>
        </ion-nav-back-button>
    </ion-nav-bar>
    <ion-nav-view></ion-nav-view>
</body>
</html>

Next, set the contents of the www/templates/tab-dash.html to:

<ion-view view-title="Dashboard">
    <ion-content class="padding">
        <div class="list">
            <label class="item item-input">
                Price:  <input type="text" ng-model="subscriptionPrice"/>
            </label>
            <label class="item item-input">
                Subscription:  <input type="text" ng-model="subscriptionName"/>
            </label>
        </div>

        <button class="button button-positive button-block" ng-click="payWithPayPal()">
            <i class="icon ion-card"></i>
            Pay with PayPal
        </button>
    </ion-content>
</ion-view>

Set the contents DashCtrl controller in the www/js/controllers.js file to:

.controller('DashCtrl', function($scope, PaypalFactory) {
    $scope.subscriptionName = 'Some subscription';
    $scope.subscriptionPrice = 5;

    $scope.payWithPayPal = function() {
        PaypalFactory.initPaymentUI().then(function() {
            PaypalFactory.makePayment($scope.subscriptionPrice, $scope.subscriptionName).then(function(data) {
                console.dir(data);

                //make some additional logic based on returned data like saving to your database, showing a message to the user, etc.
                navigator.notification.alert(
                    "PayPal purchase completed successfully.",
                    null,
                    "Paypal Purchase",
                    "OK"
                );
            }, function(err) {
                console.dir(err);
                navigator.notification.alert(
                    err,
                    null,
                    "Paypal Purchase Canceled",
                    "Try Again"
                );
            });
        });
    };
})

You can see that we’re importing the PaypalFactory through dependency injection. We define this factory in js/services.js file like this:

.factory('PaypalFactory', ['$q', '$filter', '$timeout', '$ionicPlatform', 'APP_CONSTS', function($q, $filter, $timeout, $ionicPlatform, APP_CONSTS) {
        var init_defer;

        var that = {};

        /**
        * @ngdoc method
        * @name initPaymentUI
        * @methodOf app.PaypalFactory
        * @description
        * Inits the payapl ui with certain envs.
        * 
        * @returns {object} Promise paypal ui init done
        */
        that.initPaymentUI = function() {
            init_defer = $q.defer();
            $ionicPlatform.ready().then(function() {

                var clientIDs = {
                    "PayPalEnvironmentProduction": APP_CONSTS.payPalProductionId,
                    "PayPalEnvironmentSandbox": APP_CONSTS.payPalSandboxId
                };
                PayPalMobile.init(clientIDs, that.onPayPalMobileInit);
            });

            return init_defer.promise;
        }

        /**
        * @ngdoc method
        * @name createPayment
        * @methodOf app.PaypalFactory
        * @param {string|number} total total sum. Pattern 12.23
        * @param {string} name name of the item in paypal
        * @description
        * Creates a paypal payment object 
        *
        * @returns {object} PayPalPaymentObject
        */
        var createPayment = function(total, name) {
            // "Sale  == >  immediate payment
            // "Auth" for payment authorization only, to be captured separately at a later time.
            // "Order" for taking an order, with authorization and capture to be done separately at a later time.
            var payment = new PayPalPayment("" + total, "USD", "" + name, "Sale");
            return payment;
        }

        /**
        * @ngdoc method
        * @name configuration
        * @methodOf app.PaypalFactory
        * @description
        * Helper to create a paypal configuration object
        *
        * 
        * @returns {object} PayPal configuration
        */
        var configuration = function() {
            // for more options see `paypal-mobile-js-helper.js`
            var config = new PayPalConfiguration({ merchantName: APP_CONSTS.payPalShopName, merchantPrivacyPolicyURL: APP_CONSTS.payPalMerchantPrivacyPolicyURL, merchantUserAgreementURL: APP_CONSTS.payPalMerchantUserAgreementURL });
            return config;
        }

        that.onPayPalMobileInit = function() {
            $ionicPlatform.ready().then(function() {
                PayPalMobile.prepareToRender(APP_CONSTS.payPalEnv, configuration(), function() {
                    $timeout(function() {
                        init_defer.resolve();
                    });
                });
            });
        }

        /**
        * @ngdoc method
        * @name makePayment
        * @methodOf app.PaypalFactory
        * @param {string|number} total total sum. Pattern 12.23
        * @param {string} name name of the item in paypal
        * @description
        * Performs a paypal single payment 
        *
        * 
        * @returns {object} Promise gets resolved on successful payment, rejected on error 
        */
        that.makePayment = function(total, name) {
            var defer = $q.defer();
            total = $filter('number')(total, 2);
            $ionicPlatform.ready().then(function() {
                PayPalMobile.renderSinglePaymentUI(createPayment(total, name), function(result) {
                    $timeout(function() {
                        defer.resolve(result);
                    });
                }, function(error) {
                    $timeout(function() {
                        defer.reject(error);
                    });
                });
            });

            return defer.promise;
        }

        /**
        * @ngdoc method
        * @name makeFuturePayment
        * @methodOf app.PaypalFactory
        * @description
        * Performs a paypal future payment 
        * 
        * @returns {object} Promise gets resolved on successful payment, rejected on error 
        */
        that.makeFuturePayment = function(total, name) {
            var defer = $q.defer();
            $ionicPlatform.ready().then(function() {
                PayPalMobile.renderFuturePaymentUI(
                    function(authorization) {
                        defer.resolve(authorization);
                    },
                    function(cancelReason) {
                        defer.reject(cancelReason);
                    });
            });

            return defer.promise;
        }

        return that;
    }])

Also, you may notice that here we’re importing APP_CONSTS constant which we have to define in app.js file like this:

.constant('APP_CONSTS', {
    payPalSandboxId: 'Bfiudw1_kauwqxV8vqsPXyWv-6rbudyhnwbKd2Qhb57Rdwoj0NLT8dOGwOYug5g-vHL28aqVWLMkErdVop',
    payPalProductionId: '',
    payPalEnv: 'PayPalEnvironmentSandbox', // for testing: PayPalEnvironmentSandbox, for production PayPalEnvironmentProduction
    payPalShopName: 'Demo Shop',
    payPalMerchantPrivacyPolicyURL: 'https://www.demoshop.com/privacy',
    payPalMerchantUserAgreementURL: 'https://www.demoshop.com/terms'
  })

Of course, these won’t work and for the demo to work you need to change them to your settings. You can get these by registering your application over at PayPal Developers portal.

Running the application

When you run the application you should see a screen like this:

Then, if you click on the Pay with PayPal button you’ll get a nice looking interface:

Cool thing is that it also supports the option to take a picture of your credit card and automatically fill the fields (in case you would pay with a credit card):

Conclusion

Hope this demo app helps to show you how easy it is to add PayPal payments to your Ionic 1 app.

The demo only showcases the usage of a one-time payment. The so-called future payment UI is ready, but to get this fully working, you will need to implement proper functions on the backend as well. You can read more about this here.

How to add PayPal to Ionic 1 apps @ionicframework https://t.co/nwLE2vUxAu

— Nikola Brežnjak (@HitmanHR) October 17, 2017

Programming

Code Complete 2 – Steve McConnell – Using Conditionals

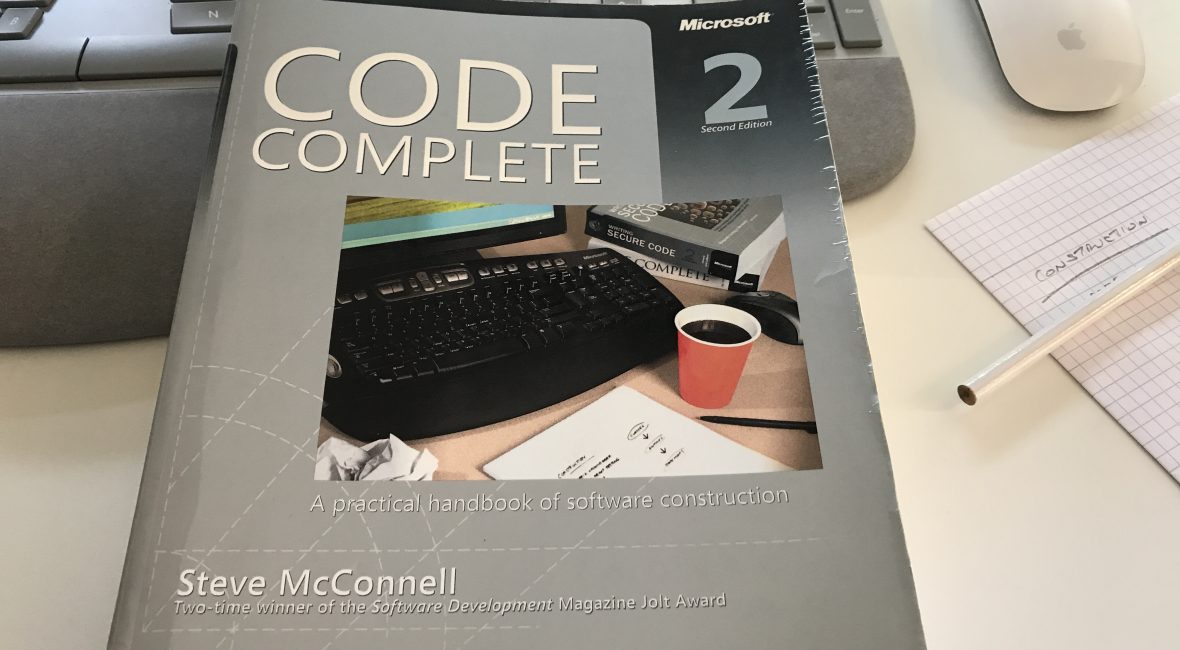
I just love Steve McConnell’s classic book Code Complete 2, and I recommend it to everyone in the Software ‘world’ who’s willing to progress and sharpen his skills.

Other blog posts in this series:

  • Part 1 (Chapters 1 – 4): Laying the Foundation
  • Chapter 5: Design in Construction
  • Chapter 6: Working Classes
  • Chapter 7: High-Quality Routines
  • Chapter 8: Defensive programming
  • Chapter 9: Pseudocode Programming Process
  • Chapter 10: General Issues in Using Variables
  • Chapter 11: General Issues in Using Variables
  • Chapter 12: Fundemental Data Types
  • Chapter 13: Unusual Data Types

A conditional is a statement that controls the execution of other statements; execution of the other statements is “conditioned” on statements such as if, else, case and switch.

Guidelines for if statements

  • Write the normal path through the code first; then write the unusual cases
  • Make sure that you branch correctly on equality – using > instead of >= or < instead of <= is analogous to making an off-by-one error.
  • Put the normal case after the if rather than after the else – put the case you normally expect to process first.
  • Check for reversal of the if and else clauses – a common mistake in programming if-else statements is to flip-flop the code that’s supposed to follow the if clause and the code that’s supposed to follow the else clause or to get the logic of if test backward.

Guidelines for if-else if statements

  • Simplify complicated tests with boolean function calls – To improve readability, you can replace them with calls to boolean functions, here’s example without boolean function calls.
    if ( 
        ('a' <= inputCharacter && inputCharacter <= 'z') || 
        ('A' <= inputCharacter && inputCharacter <= 'Z')    
        ) {
        // do something...
    }
    

    and here is the code simplified:

    if ( isLetter( inputCharacter) ) {
        // do something
    }
    
  • Put the most common cases first – That way you minimize the amount of exception-case handling code someone has to read to find the usual cases. You improve efficiency because you minimize the number of tests the code does to find most common cases.
  • Make sure that all cases are covered – Code the final _else clause with an error message or assertion to catch cases you didn’t plan for.

Case statements

Choosing the most effective ordering of cases

If you have a long _case` statement that handles dozens of events in an event-driven program, the order is significant. Following are some ordering possibilities:
+ Order cases alphabetically or numerically – If cases are equally important, putting them in A-B-C order improves readability.

  • Put the normal case first – If you have a normal case and several exceptions, put the normal case first.

  • Order cases by frequency – Put the most frequently executed cases first and the least frequently executed last.

Tips for using case statements

  • Keep the actions of each case simple – short code following each case helps make the structure of the case statement clear. If actions performed for a case are complicated, write a routine and call the routine from the case rather than putting the code into the case itself.

  • Use the default clause only to detect legitimate defaults – you might sometimes have only one case remaining and decide to code that case as the default clause. Though sometimes tempting, that’s dumb. You lose the automatic documentation provided by case-statement labels, and you lose the ability to detect errors with the default clause.

  • Use the default clause to detect errors – if the default clause is used for some purpose other than error detection, the implication is that every case selector is correct.

  • Avoid dropping through the end of a case statement – languages like C, C++, and Java don’t automatically break out of each case. If you don’t code the end of the case, the program drops through the end and executes the code for the next case.

  • Clearly and unmistakably identify flow-throughs at the end of a case – if you intentionally write code to drop through the end of a case, clearly comment the place at which it happens and explain why it needs to be coded that way. This technique should be avoided.

Programming

Code Complete 2 – Steve McConnell – Unusual Data Types

I just love Steve McConnell’s classic book Code Complete 2, and I recommend it to everyone in the Software ‘world’ who’s willing to progress and sharpen his skills.

Other blog posts in this series:

  • Part 1 (Chapters 1 – 4): Laying the Foundation
  • Chapter 5: Design in Construction
  • Chapter 6: Working Classes
  • Chapter 7: High-Quality Routines
  • Chapter 8: Defensive programming
  • Chapter 9: Pseudocode Programming Process
  • Chapter 10: General Issues in Using Variables
  • Chapter 11: General Issues in Using Variables
  • Chapter 12: Fundemental Data Types

Structures

The term “structure” refers to data that’s build up from other types. You’ll generally want to create classes rather than structures so that you can take advantage of the privacy and functionality offered by classes in addition to the public data supported by structures. But sometimes structures can be useful, here are some reasons for using them:

  • Use structures to clarify data relationships – structures bundle group of related items together
  • Use structures to simplify operations on blocks of data – it’s easier to operate on the structure than to perform the same operation on each of the elements. It’s also more reliable, and it takes fewer lines of code.
  • Use structures to simplify parameter lists
    • Here is an example of a hard way to pass a group of related parameters:
      HardWayRoutine( name, address, phone, gender, salary )
      
    • And here is the easy way:
      EasyWayRoutine ( employee )
      
  • Use structures to reduce maintenance – Because you group related data when you use structures, changing a structure requires fewer changes throughout a program.

Pointers

Pointer usage is one of the most error-prone areas of modern programming, to such an extent that modern languages like Java, C#, and Visual Basic don’t provide a pointer data type.

Even if your language doesn’t require you to use pointers, a good understanding of pointers will help your understanding of how your programming language works. Conceptually, every pointer consists of two parts:

  • a location in memory and
  • a knowledge of how to interpret the contents of that location

General Tips on Pointers

  • Isolate pointer operations in routines or classes
  • Declare and define pointers at the same time
  • Delete pointers at the same scooping level as they were allocated
  • Check pointers before using them – make sure the memory location it points to is reasonable
  • Use extra pointer variables for clarity – the point is made elsewhere that a variable shouldn’t be used for more than one purpose. This is especially true for pointer variables.
  • Simplify complicated pointer expressions
  • Set pointers to null after deleting or freeing them – one reason pointer errors are hard to detect is that sometimes the error doesn’t produce any symptoms. By setting pointers to null after freeing them, you ensure that writing data to a dangling pointer produces an error.

Global Data

Global variables are accessible anywhere in a program. Even if global variables don’t always produce errors, however, they’re hardly ever the best way to program.

Common Problems with Global Data

  • Inadvertent changes to global data – You might change the value of a global variable in one place and mistakenly think that it has remained unchanged somewhere else
  • Bizarre and exciting aliasing problems with global data – “Aliasing” refers to calling the same variable by two or more different names. Here is the example in Visual Basic:
Sub WriteGlobal( ByRef inputVar as Integer )
    inputVar = 0
    globalVar = inputVar + 5
    MsgBox( "Input Variable: " & Str( inputVar ) )
    MsgBox( "Global Variable: " & Str( globalVar ) )
End Sub

Here’s the code that calls the routine with global variable as an argument: WriteGlobal( globalVar )

Here’s the surprising result:

Input Variable: 5
Global Variable: 5

The subtlety here is that globalVar and inputVar are actually the same variable! MsgBox() displays the same variable twice, even though they refer to two different names.
+ Code reuse hindered by global data – if the class you want to reuse reads or writes global data, you can’t just plug it into the new program.
+ Modularity and intellectual manageability damaged by global data – if you use global data, can you concentrate on one routine at a time? No. You have to concentrate on one routine and every other routine that uses the same global data.

Reasons to Use Global Data

  • Preservation of global values
  • Streamlining use of extremely common data
  • Eliminating tramp data – sometimes you pass data to a routine or class merely so that it can be passed to another routine or class.

Using Access Routines Instead of Global Data

Anything you can do with global data, you can do better with access routines. The use of access routines is a core technique for implementing abstract data types and achieving information hiding.

How to Use Access Routines

Hide data in a class. Declare that data by using the static keyword or its equivalent to ensure only a single instance of the data exists. Write routines that let you look at the data and routines that let you change data. Require code outside the class to use the access routines rather than working directly with data.

If you can’t avoid global variables, work with them through access routines. Access routines give you everything that global variables give you, and more.

Quick tips

How to login to Docker hub from the command line

TL;DR

you have to enter your Docker ID, and not your email address ?

!Tl;DR

In this quick tip, I’ll show you (and help me remember forever and always ?) how to login to Docker hub from the command line.

I won’t go into details of why and how Docker is great and why all devs should use it, I’ll leave that for some other post…

I’m using the Docker for Mac desktop app.

You can download a version for your operating system here.

Via the Docker for Mac app I could login without a problem with my email and password.

However, if I typed docker login from the command line, it would constantly keep telling me I provided wrong credentials. On this Github issue I found the solution:

you have to enter your Docker ID, and not your email address ?

How to login to #Docker hub from the #command line https://t.co/kDkBHilEyO

— Nikola Brežnjak (@HitmanHR) October 4, 2017

Programming

Code Complete 2 – Steve McConnell – Fundemental Data Types

I just love Steve McConnell’s classic book Code Complete 2, and I recommend it to everyone in the Software ‘world’ who’s willing to progress and sharpen his skills.

Other blog posts in this series:

  • Part 1 (Chapters 1 – 4): Laying the Foundation
  • Chapter 5: Design in Construction
  • Chapter 6: Working Classes
  • Chapter 7: High-Quality Routines
  • Chapter 8: Defensive programming
  • Chapter 9: Pseudocode Programming Process
  • Chapter 10: General Issues in Using Variables
  • Chapter 11: General Issues in Using Variables

The fundemental data types are the basic building blocks for all other data types.

Numbers in General

Avoid “magic numbers” – if you can program in a language that supports named constants, use them instead. A good rule of thumb is that the only literals that should occur in the body of a program are 0 and 1.

Integers

Bear these considerations in mind when using integers:
+ Check for integer division – when you’re using integers, 7/10 does not equal 0.7. It ussually equals 0
+ Check for integer overflow – you need to be aware of the largest possible integer. The larges possible unsigned integer is often 232.
+ Check for overflow in intermediate results
+ ( 1000000 * 1000000 ) / 1000000 = -727
– That’s because the intermediate result is too large for the integer data type

Floating-Point Numbers

Avoid additions and subtractions on numbers that have greatly different magnitudes, 1,000,000.00 + 0.1 probably produces an answer of 1,000,000.00 because 32 bits don’t give you enough significant digits to encompass the range between 1,000,000 and 0.1.

Change to binary coded decimal (BCD) variables. This is a roll-your-own approach to BCD variables. This is particlarly valuable if the variables you’re using represent dollars and cents or other quantities that must balance precisely.

Boolean Variables

Use boolean variables to document your program. Insted of merely testing a boolean expression, you can assign the expression to a variable that makes the implication of the test unmistakable.

Enumerated Types

An enumerated type is a type of data that allows each member of a class of objects to be described in English. You can use enumerated types for readability. Instead of writing statements like if chosenColor == 1 you can write more readable expressions like if chosenColor == Color_Red.

Anytime you see a numeric literal, ask whether it makes sense to replace it with an enumerated type

If language doesn’t have enumerated types, you can simulate them with global variables or classes.

Class Country {
    private Country {}
    public static final Country China = new Country();
    public static final Country France = new Country();
    public static final Country England = new Country(); 
}

Named Constants

A named constant is like a variable except that you can’t change the constant’s value once you’ve assigned it. Named constanst enable you to refer to fixed quantities, such as the maximum number of employees, by name rather than a number – MAXIMUM_EMPLOYEES rather than, 100, for instance.

Arrays

Arrays are the simplest and most common type of structured data. An array contains a group of items that are all of the same type and that are directly accessed through the use of an array index.

Make sure that array indexes are within the bounds of the array. The most common problem arises when a program tries to access an array element that’s out of bounds.

Creating Your Own Types (Type Aliasing)

Programmer-defined data types are one of the most powerful capabilities a language can give you to clarify your understanding of a program. Here’s how you’d set up the type definition in C++:

typedef float Coordinate;

This type definition declares a new type, Coordinate, that’s functionally the same as the type float. To use the new type, you declare variables with it just as you would with a predefined type such as float.

Coordinate latitude;
Coordinate longitude;
Coordinate elevation;

Here are several reasons to create your own types:
+ To make modifications easier
+ To avoid excessive information distribution
+ To make up for language weakness – C doesn’t have a boolean type, so you can compensate by creating the type yourself: typedef int Boolean

Programming

Code Complete 2 – Steve McConnell – The Power of Variable Names

I just love Steve McConnell’s classic book Code Complete 2, and I recommend it to everyone in the Software ‘world’ who’s willing to progress and sharpen his skills.

Other blog posts in this series:

  • Part 1 (Chapters 1 – 4): Laying the Foundation
  • Chapter 5: Design in Construction
  • Chapter 6: Working Classes
  • Chapter 7: High-Quality Routines
  • Chapter 8: Defensive programming
  • Chapter 9: Pseudocode Programming Process
  • Chapter 10: General Issues in Using Variables

The Most Important Naming Consideration

The name must fully and accurately describe the entity that the variable represents. Names should be as specific as possible. Names like x, temp, and i that are general enough to be used for more than one purpose are not as informative as they could be and are usually bad names.

Variable names should be 10 to 16 characters long.

Computed-Value Qualifiers in Variable Names

Many programs have variables that contain computed values: totals, averages, maximums, and so on. If you modify a name with a qualifier, put the modifier at the end of the name. Try to avoid using num, instead use customerCount for total numbers of customers and customerIndex refers to a specific customer.

By establishing this convention, you avoid the confusion you might create if you were to use both totalRevenue and revenueTotal in the same program.

Naming Status Variables

Think of a better name than flag for status variables.

Here are some examples of flags with bad names:

if ( flag ) ...
if ( printFlag == 16) ...
if ( statusFlag & 0x0F) ...

Statements like statusFlag = 0x80 give you no clue about what the code does unless you wrote the code or have a documentation. Here are equivalent code examples that are clearer:

if ( dataReady ) ...
if ( reportType == ReportType_Annual ) ...
if ( characterType & PRINTABLE_CHAR ) ...

Clearly, characterType = CONTROL_CHARACTER is more meaningful than statusFlag = 0x80.

Naming Temporary Variables

They’re usually called temp, x, or some other vague and non-descriptive name. In general, temporary variables are a sign that the programmer does not yet fully understand the problem. Moreover, because the variables are officially given a “temporary” status, programmers tend to treat them more casually than other variables, increasing the chance of errors.

Naming Boolean Variables

  • Keep typical boolean names in mind:
    • done
    • error
    • found
    • success or ok – if you can, replace success with a more specific name that describes precisely what it means to be successful
  • Give boolean variables names that imply true or false
    • Names like status and sourceFile are poor boolean names because they’re not obviously true or false. What does it mean if status is true? For a better result, replace status with a name like statusOK, and _sourceFile_ with _sourceFileAvailable_ or _sourceFileFound_
  • Use positive boolean variable names – negative names like notFound or notDone are difficult to read when they are negated

Naming Constants

When naming constants, name the abstract entity the constant represents rather than the number the constant refers to. FIVE is a bad name for a constant (regardless of whether the value it represents is 5.0). CYCLES_NEEDED is a good name.

The key is that any convention at all is often better than no convention.

Guidelines for a Language-Independent Convention

  • variableName
  • RoutineName()
  • functionInsideClass()
  • ClassName
  • g_GlobalVariable
  • CONSTANT
  • i or j are integer indexes.

Sematic Prefixes

  • c – Count
  • first – The first element that needs to be dealt with in an array.
  • g – Global variable.
  • i – Index into an array.
  • last – The last element that needs to be dealt with in an array.
  • lim – The upper limit of elements that need to be dealt with in an array. Generally, lim equals last + 1.
  • m – Class-level variable
  • max – The absolute last element in an array or another kind of list. max refers to the array itself rather than to operations on the array
  • min – The absolute first element in an array or another kind of list.
  • p – Pointer.

Advantage of standardized prefixes – they give you all the general advantages of having a naming convention as well as several other advantages. Because so many names are standard, you have fewer names to remember in any single program or class.

Kinds of Names to Avoid

  • Avoid names with similar meanings. For example, input and inputValue
  • Avoid numerals in names. E.g. file1 and file2. You can almost always think of a better way to differentiate between two variables than by adding a 1 or 2 onto the end of the name.
  • Avoid words that are commonly misspelled in English: absense, acummulate, acsend, calender, concieve, defferred, definate, independance, occassionally, prefered, reciept and so on…
Programming

Code Complete 2 – Steve McConnell – General Issues in Using Variables

I just love Steve McConnell’s classic book Code Complete 2, and I recommend it to everyone in the Software ‘world’ who’s willing to progress and sharpen his skills.

Other blog posts in this series:

  • Part 1 (Chapters 1 – 4): Laying the Foundation
  • Chapter 5: Design in Construction
  • Chapter 6: Working Classes
  • Chapter 7: High-Quality Routines
  • Chapter 8: Defensive programming
  • Chapter 9: Pseudocode Programming Process

It’s easy to start using hazardous practices before you’re fully aware of your alternatives and then to continue to use them out of habit even after you’ve learned ways to avoid them.

Implicit Declarations

An implicit declaration is one of the most hazardous features available in any language. For example, if you use a variable in Microsoft Visual Basic without declaring it, the compiler declares it for you automatically (depending on your compiler settings).

What do you do if you program in a language with implicit declarations? Here are some suggestions:
+ Turn off implicit declaration
+ Declare all variables – as you type in a new variable, declare it, even though the compiler doesn’t require you to
+ Use naming conventions – establish a naming convention for common suffixes such as Num and No so that you don’t use two variables when you mean to use one
+ Check variable names – use cross-reference list generated by your compiler or another utility program

Guidelines for initializing variables

Improper data initialization is one of the most fertile sources of error in computer programming. Developing effective techniques for avoiding initialization problems can save a lot of debugging time.

The problem with improper initialization stem from a variable’s containing an initial value that you do not expect it to contain. This can happen for any of several reasons:

  • The variable has never been assigned a value. Its value is whatever bits happened to be in its area of memory when the program started
  • The value of the variable is outdated. The variable was assigned a value at some point, but the value is no longer valid
  • Part of the variable has been assigned a value and part has not. That can happen when you initialize some of the members of an object but not all of them

Guidelines for avoiding initialization problems:

  • Initialize each variable as it’s declared
  • Declare and initialize each variable close to where it’s first used
  • Use final or const when possible
  • Pay special attention to counters and accumulators. A common error is forgetting to reset a counter or an accumulator before the next time it’s used.

Scope

Scope, or visibility, refers to the extent to which your variables are known and can be referenced throughout a program.

One method of measuring how close together the references to a variable are is to compute “span” of a variable. Here’s an example:

a = 0;
b = 0;
c = 0;
a = b + c;

In this case, two lines come between the first reference to a and the second, so a has a span of two. The main advantage of keeping references to variables together is that it improves program readability.

Live time

A concept that’s related to variable span is variable “live time,” the total number of statements over which a variable is live. A variable’s life begins at the first statement in which it’s referenced; its life ends at the last statements in which it’s referenced.

Comments on scope

Many programmers approach to minimizing variables scope depends on their views of the issues of “convenience” and “intellectual manageability.” The difference boils down to a difference in emphasis between writing programs and reading them. Maximizing the scope might indeed make programs easy to write, but a program in which any routine can use any variable at any time is harder to understand.

Using each variable for exactly one purpose

It’s possible to use variables for more than one purpose in several subtle ways. You’re better off without this kind of subtlety.

  • Use each variable for one purpose only – it’s sometimes tempting to use one variable in two different places for two different activities. Usually, the variable is named inappropriately for one of its uses, or a “temporary” variable is used in both cases

  • Avoid variables with hidden meanings

    • The value in the variable pageCount might represent the number of pages printed unless it equals -1, in which case it indicates that an error has occurred
    • The variable bytesWritten might be the number of bytes written to an output file, unless its value is negative, in which case it indicates the number of the disk drive used for the output
  • Make sure all declared variables are used – the opposite of using a variable for more than one purpose is not using it at all

Ionic

Cordova Ionic Plugin for Search Ads App Attribution API

TL;DR

Cordova plugin for reading Search Ads App Attribution on iOS 10.0+ only with an Ionic demo showcasing its usage.

The Search Ads API plugin for Cordova/Ionic didn’t exist, so I created it. You can check out the plugin code on Github, view the Ionic demo app code on Github or read onward for an example on how to use it.

You can also check out the step by step tutorial about How to create a native iOS app that can read Search Ads Attribution API information if you’re not into hybrid solutions ?

What is Search Ads App Attribution?

From Apple’s documentation:

Search Ads App Attribution enables developers to track and attribute app downloads that originate from Search Ads campaigns. With Search Ads App Attribution, iOS developers have the ability to accurately measure the lifetime value of newly acquired users and the effectiveness of their advertising campaigns.

How to use the plugin

If you want to test this on a blank project, you can create a new Ionic project like this:

ionic start ionicSearchAdsDemo tabs

Since the plugin has been added to npm repository, you can simply add it like this:

ionic plugin add cordova-plugin-searchads

Add the following code in the controllers.js file under the DashCtrl controller:

.controller('DashCtrl', function($scope, $ionicPlatform) {
    $scope.data = 'no data';

    $ionicPlatform.ready(function() {
        if (typeof SearchAds !== "undefined") {
            searchAds = new SearchAds();

            searchAds.initialize(function(attribution) {
                console.dir(attribution); // do something with this attribution (send to your server for further processing)
                $scope.data = JSON.stringify(attribution);
            }, function (err) {
                console.dir(err);
            });
        }
    });
})

Replace the content of the templates/tab-dash.html file with this:

<ion-view view-title="Dashboard">
  <ion-content class="padding">
    <div class="card">
      <div class="item item-text-wrap">
        {{data}}
      </div>
    </div>
  </ion-content>
</ion-view>

Prepare the project by executing the following command in your terminal:

ionic prepare ios && open platforms/ios

After this, open up the XCode project (*.xcodeproj) file:

Make sure the iAd.framework has been added to Linked Frameworks and Libraries:

This should have happened automatically when you’ve added the plugin, but it’s good to make sure. Add it yourself if you don’t see it here.

Run the project on your device, and you should get something like this:

Hope this proves to be useful to someone! ?

#Cordova #Ionic Plugin for Search Ads App Attribution API https://t.co/D4yMevINOf

— Nikola Brežnjak (@HitmanHR) September 14, 2017

iOS

How to create a native iOS app that can read Search Ads Attribution API information

TL;DR

In this post, I’ll show you how easy it is to create a native iOS app that can read Search Ads Attribution API information.

You can check out the full working code on Github.

What is Search Ads App Attribution?

From Apple’s documentation:

Search Ads App Attribution enables developers to track and attribute app downloads that originate from Search Ads campaigns. With Search Ads App Attribution, iOS developers have the ability to accurately measure the lifetime value of newly acquired users and the effectiveness of their advertising campaigns.

Steps to recreate this yourself

  • Create a new blank project in Xcode
  • Add a label on the Main.storyboard:

  • Create an Interface Builder Outlet for this label and name it searchAdsInfoLabel. For those not familiar with iOS development, this is done by pressing Ctrl and dragging the label into the ViewController.swift file.

  • Once done, you should see this in your ViewController.swift file:
import UIKit

class ViewController: UIViewController {
    @IBOutlet weak var searchAdsInfoLabel: UILabel!

    override func viewDidLoad() {
        super.viewDidLoad()
    }

    override func didReceiveMemoryWarning() {
        super.didReceiveMemoryWarning()
        // Dispose of any resources that can be recreated.
    }
  • Next, import iAd to your project:

  • import iAd in your ViewController.swift file: import iAd.

Add the following function to the ViewController.swift file:

func getSearchAdsInfo() {
    ADClient.shared().requestAttributionDetails({ (attributionDetails, error) in
        if error == nil {
            for (type, adDictionary) in attributionDetails! {
                print(type);
                print(adDictionary);

                let attribution = adDictionary as? Dictionary<AnyHashable, Any>;

                let iadAdgroupId = attribution?["iad-adgroup-id"] as? String
                let iadAdgroupName = attribution?["iad-adgroup-name"] as? String
                let iadAttribution = attribution?["iad-attribution"] as? String
                let iadCampaignId = attribution?["iad-campaign-id"] as? String
                let iadCampaignName = attribution?["iad-campaign-name"] as? String
                let iadClickDate = attribution?["iad-click-date"] as? String
                let iadConversionDate = attribution?["iad-conversion-date"] as? String
                let iadCreativeId = attribution?["iad-creative-id"] as? String
                let iadCreativeName = attribution?["iad-creative-name"] as? String
                let iadKeyword = attribution?["iad-keyword"] as? String
                let iadLineitemId = attribution?["iad-lineitem-id"] as? String
                let iadLineitemName = attribution?["iad-lineitem-name"] as? String
                let iadOrgName = attribution?["iad-org-name"] as? String

                self.searchAdsInfoLabel.text = "iad-adgroup-id: \(iadAdgroupId ?? "")\niad-adgroup-name: \(iadAdgroupName ?? "")\niad-attribution: \(iadAttribution ?? "")\niad-campaign-id: \(iadCampaignId ?? "")\niad-campaign-name: \(iadCampaignName ?? "")\niad-click-date: \(iadClickDate ?? "")\niad-conversion-date: \(iadConversionDate ?? "")\niad-creative-id: \(iadCreativeId ?? "")\niad-creative-name: \(iadCreativeName ?? "")\niad-keyword: \(iadKeyword ?? "")\niad-lineitem-id: \(iadLineitemId ?? "")\niad-lineitem-name: \(iadLineitemName ?? "")\niad-org-name: \(iadOrgName ?? "")"
            }
        }
    })
}

Call this function in the viewDidLoad() method.

The full code listing, of the ViewController.swift file should now look like this:

import UIKit
import iAd

class ViewController: UIViewController {
    @IBOutlet weak var searchAdsInfoLabel: UILabel!

    override func viewDidLoad() {
        super.viewDidLoad()

        getSearchAdsInfo();
    }

    override func didReceiveMemoryWarning() {
        super.didReceiveMemoryWarning()
        // Dispose of any resources that can be recreated.
    }

    func getSearchAdsInfo() {
        ADClient.shared().requestAttributionDetails({ (attributionDetails, error) in
            if error == nil {
                for (type, adDictionary) in attributionDetails! {
                    print(type);
                    print(adDictionary);

                    let attribution = adDictionary as? Dictionary<AnyHashable, Any>;

                    let iadAdgroupId = attribution?["iad-adgroup-id"] as? String
                    let iadAdgroupName = attribution?["iad-adgroup-name"] as? String
                    let iadAttribution = attribution?["iad-attribution"] as? String
                    let iadCampaignId = attribution?["iad-campaign-id"] as? String
                    let iadCampaignName = attribution?["iad-campaign-name"] as? String
                    let iadClickDate = attribution?["iad-click-date"] as? String
                    let iadConversionDate = attribution?["iad-conversion-date"] as? String
                    let iadCreativeId = attribution?["iad-creative-id"] as? String
                    let iadCreativeName = attribution?["iad-creative-name"] as? String
                    let iadKeyword = attribution?["iad-keyword"] as? String
                    let iadLineitemId = attribution?["iad-lineitem-id"] as? String
                    let iadLineitemName = attribution?["iad-lineitem-name"] as? String
                    let iadOrgName = attribution?["iad-org-name"] as? String

                    self.searchAdsInfoLabel.text = "iad-adgroup-id: \(iadAdgroupId ?? "")\niad-adgroup-name: \(iadAdgroupName ?? "")\niad-attribution: \(iadAttribution ?? "")\niad-campaign-id: \(iadCampaignId ?? "")\niad-campaign-name: \(iadCampaignName ?? "")\niad-click-date: \(iadClickDate ?? "")\niad-conversion-date: \(iadConversionDate ?? "")\niad-creative-id: \(iadCreativeId ?? "")\niad-creative-name: \(iadCreativeName ?? "")\niad-keyword: \(iadKeyword ?? "")\niad-lineitem-id: \(iadLineitemId ?? "")\niad-lineitem-name: \(iadLineitemName ?? "")\niad-org-name: \(iadOrgName ?? "")"
                }
            }
        })
    }
}

After you run the project (make sure you run it on your device, as you won’t get any data back on the simulator) you should get some stub data that Apple returns:

Conclusion

If you’re utilizing Apple’s Search Ads, then I hope this helped you see how easy it is to fetch Search Ads App Attribution information in your app.

Of course, once you get the data, you should send this to your server for saving and further analysis.

How to create a #native #iOS app that can read Search Ads Attribution API information #SearchAdsAttribution https://t.co/6HDQBtzmM7

— Nikola Brežnjak (@HitmanHR) September 10, 2017

Programming

Code Complete 2 – Steve McConnell – Pseudocode Programming Process

I just love Steve McConnell’s classic book Code Complete 2, and I recommend it to everyone in the Software ‘world’ who’s willing to progress and sharpen his skills.

Other blog posts in this series:

  • Part 1 (Chapters 1 – 4): Laying the Foundation
  • Chapter 5: Design in Construction
  • Chapter 6: Working Classes
  • Chapter 7: High-Quality Routines
  • Chapter 8: Defensive programming

The benefits you can expect from using the pseudocode:

  • makes reviews easier – you can review detailed designs without examining the source code
  • supports the idea of iterative refinement
  • makes changes easier – a few lines of pseudocode are easier to change than a page of code
  • it’s easier to maintain than other forms of design documentation

Steps in building a routine

  1. Design the routine
  2. Code the routine
  3. Check the code
  4. Clean up loose ends
  5. Repeat as needed

1. Design the routine

  • Check the prerequisites to see that the job of the routine is well defined and fits cleanly into the overall design
  • Define the problem the routine will solve
  • Name the routine – good routine names are one sign of a superior program and they’re not easy to come up with
  • Decide how to test the routine
  • Research functionality available in the standard libraries – the single biggest way to improve both the quality of your code and your productivity is to reuse good code
  • Think about error handling – think about all the things that could possibly go wrong in the routine
  • Think about efficiency – in a vast majority of systems, efficiency isn’t critical. Design your routine so that it will meet its resource and speed goals
  • Research the algorithms and data types – if functionality isn’t available in the available libraries, it might still be described in an algorithms book
  • Write the pseudocode – you might not have much in writing after you finish the preceding steps. The main purpose of the steps is to establish a mental orientation that’s useful when you actually write the routine
  • Think about the data
  • Check the pseudocode – once you’ve written the pseudocode and designed the data, take a minute to review the pseudocode you’ve written. Back away from it, and think about how you would explain it to someone else
  • Try a few ideas in pseudocode, and keep the best (iterate)

2. Code the routine

  • Start with pseudocode
  • Write the routine declaration
    • Turn the original header comment into a programming-language code comment above declaration
  • Write the first and last statements, and turn the pseudocode into high-level comments
    /* Header comment about what routine does */
    Status ReportErrorMessage(
        ErrorCode errorToReport
    ) {
        //set the default status to "fail"

        //if the error code is valid, display the error message 
        //and declare success

        //if the error code isn't valid, notify the user that an internal 
        //error has been detected

        //return status information
    }
  • Fill in the code below each comment
/* Header comment about what routine does */
Status ReportErrorMessage(
    ErrorCode errorToReport
) {
    //set the default status to "fail"
    Status errorMessageStatus = Status_Failure;

    //if the error code is valid, display the error message 
    //and declare success
    if ( errorMessage.ValidCode() ) {
        DisplayMessage( errorMessage.Text() );
        errorMessageStatus = Status_Success;
    }

    //if the error code isn't valid, notify the user that an internal 
    //error has been detected
    else {
        DisplayMessage( "Internal Error: Invalid error code in ReportErrorMessage()" );
    }

    //return status information
    return errorMessageStatus;
}

Each comment should normally expand to about 2 to 10 lines of code.

3. Check the code

  • Mentally check the routine for errors

A working routine isn’t enough. If you don’t know why it works, study it, discuss it, and experiment with alternative designs until you do.

Compile the routine after reviewing it. It might seem inefficient to wait this long to compile. You’ll benefit in several ways, however, by not compiling until late in the process. After the first compile, you step up the pressure: “I’ll get it right with just one more compile.” The “Just One More Compile” syndrome leads to hasty, error-prone changes that take more time in the long run.

  • Step through the code in the debugger
  • Test the code

4. Clean up leftovers

  • Check the routine’s interface. Make sure that all input and output data is accounted for and that all parameters are used
  • Check for general design quality. Make sure the routine does one thing and does it well, that it’s loosely coupled to other routines, and that it’s designed defensively
  • Check the routine’s variables (inaccurate variable names, unused objects, undeclared variables, and so on)
  • Check routine’s statements and logic
  • Remove redundant comments

Alternatives to the PPP

  • Test-first development – popular development style in which test cases are written before writing any code
  • Refactoring – development approach in which you improve code through a series of semantic preserving transformation
  • Design by contract – development approach in which each routine is considered to have preconditions and postconditions
  • Hacking? – some programmers try to hack their way toward working code rather than using a systematic approach like the PPP. If you’ve ever found that you’ve coded yourself into a corner in a routine and have to start over, that’s an indication that the PPP might work better
Page 16 of 51« First...10«15161718»203040...Last »

Recent posts

  • Discipline is also a talent
  • Play for the fun of it
  • The importance of failing
  • A fresh start
  • Perseverance

Categories

  • Android (3)
  • Books (114)
    • Programming (22)
  • CodeProject (35)
  • Daily Thoughts (77)
  • Go (3)
  • iOS (5)
  • JavaScript (127)
    • Angular (4)
    • Angular 2 (3)
    • Ionic (61)
    • Ionic2 (2)
    • Ionic3 (8)
    • MEAN (3)
    • NodeJS (27)
    • Phaser (1)
    • React (1)
    • Three.js (1)
    • Vue.js (2)
  • Leadership (1)
  • Meetups (8)
  • Miscellaneou$ (77)
    • Breaking News (8)
    • CodeSchool (2)
    • Hacker Games (3)
    • Pluralsight (7)
    • Projects (2)
    • Sublime Text (2)
  • PHP (6)
  • Quick tips (40)
  • Servers (8)
    • Heroku (1)
    • Linux (3)
  • Stack Overflow (81)
  • Unity3D (9)
  • Windows (8)
    • C# (2)
    • WPF (3)
  • Wordpress (2)

"There's no short-term solution for a long-term result." ~ Greg Plitt

"Everything around you that you call life was made up by people that were no smarter than you." ~ S. Jobs

"Hard work beats talent when talent doesn't work hard." ~ Tim Notke

© since 2016 - Nikola Brežnjak