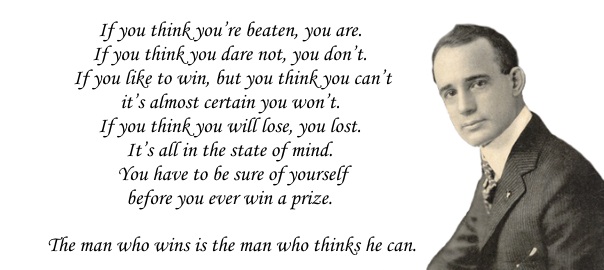
This is the new section that I’ll be posting in Programming category (parent Books); whenever I read a book I always take notes, so here they are now for easier access and search.
All in all I gave this book 5/5 in my Shelfari account as I think that it’s great, for beginners especially. This StackOverflow question may be useful if you’re searching for a good book on learning WPF.
WPF is an API for building graphical user interfaces (UI) for desktop applications with the .NET Framework.
WPF differs fundamentally in that it builds on top of DirectX. It also means that WPF will take advantage of hardware acceleration when it is available.
Graphics in WPF are vector based, in contrast to raster based. A general rule of thumb is that vector graphics are good for geometrical or cartoonish images and that raster is better for photographs and realistic images.
There are two types of templates in WPF: control templates and data templates.
WPF requires the .NET Framework 3.0 or later.
XAML (pronounced zammel) is the language used for creating user interfaces in WPF.
When you create a WPF application with Visual Studio, the XAML used in the application is compiled into the resulting executable.
Element in XAML is an instance of an object and attributes are properties on that object.
x:Name is not a property on the Button class. Instead, it’s a special attribute that provides a unique identifier for the object for accessing it in code. It is important to understand that any XAML element you want to reference, in code or elsewhere in the XAML, must have a unique value for x:Name. It’s pretty easy to get into trouble using the Name property, though, and unless you have a specific need, we recommend sticking with x:Name. It’s the convention that is generally adopted.
The child element is referred to as a property element. Property elements take the form of <ClassName.PropertyName />.
<Button Background=”{StaticResource ResourceKey=myColor}” Content=”Click Me” />
Markup extensions are indentified by the presence of curly brackets ({})
App.xaml represents the application itself. It is not visual, and it is primarily used to store resources that will be used throughout an application. App.xaml also defines which window opens when the application launches.
MainWindow.xaml is the main window for the application. Its markup contains all the visual elements that represent the application on the screen, as well as declaring our application’s behavior.
The concept of partial classes was introduced with .NET 2.0. The essential idea is that a single class can be defined across multiple files. Each file contains a portion of the class. The files can even be of different file types; such as .cs and .xaml. The compiler is responsible for dynamically combining the code into a single class as it is compiled.
Refactoring code means that you improve the maintainability of the code without changing the behavior.
Margin, present on all FrameworkElements, represents the amount of space around the outside of the element. Padding – amount of space inside itself.
Every Panel has a Children collection. This collection can be used to add or remove controls from the panel’s layout at runtime.
StackPanel organizes its child elements by stacking them one on top of the other. StackPanel also has an Orientation property that can be set to Horizontal, causing the panel to stack its children from left to right.
DockPanel is capable of attaching its children to any of its four sides and is often used as the root layout control of an application’s UI.
The Grid is WPF’s all-purpose layout panel. It can achieve most of the same behavior as the previous controls and much more. This power comes with a price; the requirement of additional XAML and more attached properties.
<Grid ShowGridLines=”True” TextBlock.FontSize=”20”>
    <Grid.RowDefinitions>
        <RowDefinition />
        <RowDefinition />
    </Grid.RowDefinitions>

    <Grid.ColumnDefinitions>
	<ColumnDefinition />
	<ColumnDefinition />
    </Grid.ColumnDefinitions>

    <Button Content=”0,0” />
    <Button Grid.Column=”1” Content=”0,1” />
    <Button Grid.Row=”1” Content=”1,0” />
    <Button Grid.Row=”1” Grid.Column=”1” Content=”1,1” />
</Grid>
<ColumnDefinition Width=”34” />
<ColumnDefinition Width=”1.5*” />
<ColumnDefinition Width=”2*” />
<ColumnDefinition Width=”auto” />
In this case, the first column would be 34 pixels wide, the last column would auto size to content and the middle columns would split the remaining space with the ratio 1.5:2.
The GridSplitter is a special control capable of letting a user resize rows or columns of a Grid at runtime.
WrapPanel is like a StackPanel, but it has the ability to “wrap” what it is stacking to the next line or column if it runs out of space.
Canvas does not add any special dynamic layout behavior to its child controls. A canvas must have an exact Width and Height, and all its child elements must have an exact size and position as well. Canvas arranges controls at strict Left (x) and Top (y) positions using attached properties. Although most panels will size to fit their children, if no size is declared for a Canvas it will collapse to zero.
Decorators – Border and Viewbox.
A Panel has a collection of Children that it arranges according to various rules, based on the type of panel. A Decorator, on the other hand, has only one Child to which it applies some additional set of behavior.
TextBlock has many options (note LineBreak for, well, new line):
<TextBlock FontSize=”14” TextWrapping=”Wrap”>
    <Bold><Italic>Instructions:</Italic></Bold>
    <LineBreak />
    Select a <Underline>font</Underline> to view from the list
    <Italic>below</Italic>.
    <Span FontSize=”10”>You can change the text by typing in the region at the bottom.</Span>
</TextBlock>
Allow ENTER, TAB and wrap:
<TextBox x:Name="additionalNotes"
                 Grid.Row="3"
                 Grid.Column="1"
                 MinLines="5"
                 AcceptsReturn="True"
                 AcceptsTab="True"
                 TextWrapping="Wrap" />
In <Window definition make a habit of adding this:
FocusManager.FocusedElement=”{Binding ElementName=firstName}”
Use Label rather than TextBlock for forms as they provide shortcuts if you press Alt on the keyboard. In the listing below, the F would be underlined when Alt would be pressed.
<Label Content="_First Name:" Target="{Binding ElementName=firstName}" />
Using the tooltip:
<TextBox x:Name="SampleText" DockPanel.Dock="Bottom" MinLines="4" Margin="8 0" TextWrapping="Wrap">
            <TextBox.ToolTip>
                <TextBlock>
					<Italic Foreground="Red">Instructions: </Italic>
					Type here to change the preview text.
                </TextBlock>
            </TextBox.ToolTip>

            The quick brown fox jumps over the lazy dog.
</TextBox>
Data binding is a means of connecting the elements of a user interface with the underlying data that the application is interested in. Data binding is declarative rather than imperative. Declarative means that instead of writing a series of commands to be executed, you describe the relation that the data has to the elements in the UI.
Markup extensions are identified by curly brackets ({}), and a data binding extension always begins with the word Binding.
Two way binding:
<TextBox Text="{Binding ElementName=mySlider,Path=Value,Mode=TwoWay}" />
<Slider x:Name="mySlider" Minimum="0" Maximum="100" TickFrequency="1" IsSnapToTickEnabled="True"/>
{x:Static Fonts.SystemFontFamilies} – this markup extension is used for referencing static value members on a class (fields, properties, constants, and enumeration values).
The WPF property system allows properties to participate in data binding, styling, animation, and several other exciting features. A property that is registered with the WPF property system is called a dependency property. A property must be a dependency property to be the target of a data binding.
<TextBox Text=”{Binding Path=FirstName,Mode=TwoWay}” Margin=”4”/>

public Window1()
{
    InitializeComponent();
    DataContext = new Person(); //new class with only FirstName property
}
Remember, WPF automatically looks for an event based on the property’s name.
public string FirstName {get; set;}

public event EventHandler FirstNameChanged;
private void OnFirstNameChanged()
{
    if (FirstNameChanged != null)
        FirstNameChanged(this, EventArgs.Empty);
}
For dynamic size of the text inside the TextBlock, wrap it with a ViewBox, but without any additional sizes (width, height, font) set:
<Viewbox>
    <TextBlock TextWrapping="Wrap" Text="Some Text" />
</Viewbox>
XAML application, FontViewer for example, can work in IE if you change Window tag to Page and remove the IntegerUpDown control.
User controls are similar to windows and pages. They allow you to easily define your own controls that can be reused throughout your application. Do not confuse them with custom controls. Custom controls are another way to create reusable elements for the UI, but I do not recommend them for a newcomer to WPF.
Open MainWindow.xaml and add the following Xml Namespace declaration to the Window: xmlns:local=”clr-namespace:TextEditor” in order to be able to load user controls like this:
<local:TextEditorToolbar x:Name=”toolbar” DockPanel.Dock=”Top” />
A TextRange represents a concrete selection of content within a document.
_currentFile = dlg.FileName;
using (Stream stream = dlg.OpenFile())
{
    TextRange range = new TextRange(
        _textBox.Document.ContentStart,
        _textBox.Document.ContentEnd
    );

    range.Load(stream, DataFormats.Rtf);
}
An application in WPF consists of many elements in a tree. If a user clicks the Image in our preceding example, WPF would route the event along the tree of elements until a handler was found. If no handler is implemented, the event continues beyond the Border all the way to the root element (which can be a Window or a Page).
Routed events are handled the same way except that the basic signature uses a
RoutedEventArgs.
void Handle_RoutedEvent(object sender, RoutedEventArgs e)
So how does PreviewKeyDown differ from the KeyDown event, which is also owned by
UIElement? Both of these are routed events, but the difference between the two is that one bubbles and the other tunnels. Remember we mentioned earlier that bubbling means the event is moving up toward the root element, and tunneling means the event is moving down toward its origin. The prefix Preview is a convention adopted in WPF to show that an event is a counterpart to another event. Thus PreviewKeyDown is the counterpart to KeyDown. When you press a key with an element in focus, first the PreviewKeyDown event is raised by the root element and tunnels down the tree to the actual element that was
in focus; then the KeyDown event is raised and bubbles back up to the root.
In WPF, a command is a function or action that can be bound to an input gesture. WPF binds the EditingCommands. ToggleBold command to the keyboard gesture Ctrl+B by default.
<ToggleButton x:Name=”boldButton” Command=”EditingCommands.ToggleBold” ToolTip=”Bold”>
<MenuItem Header=”_Edit”>
    <MenuItem Command=”ApplicationCommands.Undo” />
    <MenuItem Command=”ApplicationCommands.Redo” />

    <Separator />

    <MenuItem Command=”ApplicationCommands.Cut” />
    <MenuItem Command=”ApplicationCommands.Copy” />
    <MenuItem Command=”ApplicationCommands.Paste” />
    <MenuItem Command=”EditingCommands.Delete” />
</MenuItem>
<Window.InputBindings>
    <MouseBinding Gesture=”Control+WheelClick” Command=”ApplicationCommands.SaveAs” />
</Window.InputBindings>
<Window.CommandBindings>
    <CommandBinding Command=”ApplicationCommands.New” Executed=”NewDocument” />
</Window.CommandBindings>
<Window.InputBindings>
    <KeyBinding Key=”S” Modifiers=”Shift” Command=”ApplicationCommands.SaveAs” />
</Window.InputBindings>
We have talked about dependency properties before, but have not detailed how to create
them. We typically use this technique only when we need a property on a Window, UserControl, or custom control that must support data binding or other FrameworkElement-related features, such as animation or styling. The typical procedure for creating a dependency property is to declare a public, static field using
DependencyProperty.Register. It is advised that you append the word “Property” onto the field name. There are several overloads of the Register method, but at a minimum you must declare the actual property name, type, and owning type. You should then create instance getters and setters by using the static GetValue and SetValue methods inherited from DependencyObject. Use your dependency property’s field as the key to these methods.
Use Path.Combine to safely and correctly build up directory and file paths.
All elements that are renderable must inherit from Visual.
MVC, despite its popularity, is commonly misunderstood. This may be because it tends to manifest itself differently in different scenarios—that is, web versus desktop applications.
Controllers traditionally functioned as mediators between the human and the application by handling user input from the mouse or keyboard. Controller doesn’t seem to fit exactly with modern UI toolkits like WPF. Very rarely would one need to write code to manually handle user input. What is really needed is an application-centric component that
can mediate between the View and the Model. This component would be capable of
responding to View interactions and translating those into application commands.
In the context of a contact manager, these commands would be actions like
SaveContact, DeleteContact, Search, and the like.
The mismatch between the MVC pattern and modern UI frameworks has been recognized by many people. Over time a new pattern called Model-View-Presenter has evolved from MVC.
Start a new project and add the following folders to the solution: Model, Presenters, Resources, UserControls and Views.
<TextBlock Text="Contacts" FontSize="14" FontWeight="Bold">
    <TextBlock.LayoutTransform>
        <RotateTransform Angle="90" />
    </TextBlock.LayoutTransform>
</TextBlock>
The Expander is a simple control whose primary purpose is to allow the user to collapse or expand a named region of the interface.
To serialize to disk .NET requires the [Serializable] attribute on the classes.
The important part of a repository is that it abstracts away the actual data store so that other parts of the application are able to work with a high-level API and not concern themselves with how the data is stored.
In a typical application, there is a need for an Application Controller or Application Presenter. This special type of presenter provides common application-level functionality to other presenters and manages various other cross-presenter issues.
This technique is known as constructor injection and is a specific type of dependency injection. DI is a technique that is commonly used to help enforce the principle of Separation of Concerns (SoC).
WPF uses a special type called a ResourceDictionary to store reusable “pieces” of an application. Everything that inherits from FrameworkElement has a Resources property. Colors cannot be applied to most WPF element properties like Background or
Foreground. These properties require the use of a Brush.
<SolidColorBrush x:Key=”brownBrush” Color=”{StaticResource brownColor}” />

<Color x:Key=”brownColor”>#FF513100</Color>
You will recall from earlier hours that Binding is a markup extension. Binding, along with StaticResource, make up the two most common extensions that you will use in WPF.
Refactoring the Resource files; in App.xaml instead of having all the mumbo jumbo, refactor to another file:
<ResourceDictionary>
    <ResourceDictionary.MergedDictionaries>
        <ResourceDictionary Source=”Resources\ColorsAndBrushes.xaml” />
    </ResourceDictionary.MergedDictionaries>
</ResourceDictionary>
Simply put, DynamicResource allows the resource to change after the point of reference, whereas StaticResource does not. This most often applies when you’re using system resources. For example, if you wanted to use a color from SystemColors, you would use a DynamicResource. This allows for the scenario where the user changed the system color theme while your application was running. If a DynamicResource was used, your application would update its colors on-the-fly whereas they would remain the same with a StaticResource. Because of the dynamic nature of the so-named resource, it is more resource intensive and less performant than StaticResource. You should prefer to use StaticResource and fall back to DynamicResource only when you need the special capabilities it offers.
A Style resource is a special case because its key can be implicitly based on its TargetType value.
<Style x:Key=”header” TargetType=”{x:Type Border}”>
<Setter Property=”Background” Value=”{StaticResource darkBlueBrush}” />
</Style>
<Border DockPanel.Dock=”Top” Style=”{StaticResource header}”>
WPF has a simple facility for letting you inherit styles one from another by using the BasedOn property:
<Style x:Key=”baseControlStyle” TargetType=”{x:Type Control}”>
    <Setter Property=”FontFamily” Value=”Arial” />
    <Setter Property=”FontSize” Value=”12” />
</Style>

<Style TargetType=”{x:Type Label}” BasedOn=”{StaticResource baseControlStyle}”>
    <Setter Property=”HorizontalAlignment” Value=”Right” />
    <Setter Property=”FontWeight” Value=”Bold” />
</Style>
By using the BasedOn property you can reference other styles and effectively enable
style inheritance. The basic constraint is that you must determine a compatible base
class for all the styles involved. In this case, both Button and Label inherit from
Control.
When WPF needs to find a resource, it first examines the Resources of the current element. If the resource with the requested Key is not found, WPF will look at that element’s parent’s Resources. WPF will follow this pattern until it reaches the root element in the UI. If the resource has not yet been found, it will look at the Application.Resources.
Styles can be applied by TargetType or Key. If an element has a specific style declared with a key, that style will override all other styles applied to that element. If no style is explicitly set, WPF will search for a style defined with a matching TargetType and apply it if found within the visible scopes; otherwise, the WPF default style will be used. A developer can always override individual aspects of a style by explicitly setting the properties on an element.
Binding headerBinding = new Binding(presenter.TabHeaderPath);

is equal to

{Binding Path=TabHeader}
Data templates are one of the two types of templates used in WPF. They provide a way to describe how data should be visualized in terms of UI elements. This is different from deciding how to render a DateTime value, or formatting a telephone number.
Styles are the simplest of the three, so if you are able to achieve what you want using styles, that is the best choice. Keep in mind that styles allow you to set nonvisual properties as well.
Control templates define the UI elements that compose a given control. That’s a lot more complicated than merely setting some properties. You should use control templates only when you really need to.
Data templates resemble control templates in that they allow you to compose UI elements. They are often used with list controls to define how items in a list
should be rendered.
We could state that the primary difference between these two base classes is that ContentControl supports the rendering of a single item, whereas ItemsControl supports the rendering of multiple items.
The important part is the call to Application. Current.Dispatcher.Invoke. This method executes the delegate on the UI thread according to the specified DispatcherPriority. This is important because WPF is not guaranteed to work properly with events firing on threads other than the UI thread.
Transformations:
<Canvas Height="600" Width="800">
    <TextBlock Text="No Transform" />

    <TextBlock Canvas.Left="200" Canvas.Top="100" Text="Skew Transform">
        <TextBlock.RenderTransform>
            <SkewTransform AngleX="45" />
        </TextBlock.RenderTransform>
    </TextBlock>
</Canvas>
When applying multiple transforms by using a TransformGroup, remember that
the order of the transforms can have a strong impact on the result.
Using a LayoutTransform allows an element to be transformed while still playing by the layout rules of the Panel in which it lives. WPF has such rich layout capabilities that it would be unfortunate if all transforms broke the layout rules. Essentially, a LayoutTransform occurs before a Panel performs layout; thus, any transforms that occur are taken into account when the Panel arranges its children. A RenderTransform happens independently of the layout mechanism.
Every UIElement has a BitmapEffect property that can be used to add various special shader-like effects to the element:
<Button Content="Blur">
    <Button.BitmapEffect>
        <BlurBitmapEffect Radius="4" />
    </Button.BitmapEffect>
</Button>
Control templates:
<Window.Resources>
    <Canvas x:Key=”Smiley” Width=”48” Height=”48”>
        <Ellipse Width=”48” Height=”48” Fill=”Yellow” />
        <Ellipse Width=”8” Height=”8” Canvas.Top=”12” Canvas.Left=”12” Fill=”Black”/>
        <Ellipse Width=”8” Height=”8” Canvas.Top=”12” Canvas.Right=”12” Fill=”Black” />
        <Path Data=”M10,30 C18,38 30,38 38,30” Stroke=”Black” />
    </Canvas>
</Window.Resources>

<Button HorizontalAlignment=”Center” VerticalAlignment=”Center”>
	<Button.Template>
		<ControlTemplate>
			<Border Background=”Black” Padding=”4” CornerRadius=”4” Child=”{StaticResource Smiley}” />
		</ControlTemplate>
	</Button.Template>
</Button>
Anytime you implement a control template, you’ll have to handle these effects yourself with triggers.
Templates are composed out of UI elements. Templates need to be explicitly told what type of control they are targeting. Use the TargetType attribute to do this. Templates need to know what to do with the control content. We used the ContentPresenter element to handle this for a button.
In style:
<Style TargetType=”{x:Type Slider}”>
	<Setter Property=”Template”>
		<Setter.Value>
			<ControlTemplate TargetType=”{x:Type Slider}”>
				<Grid x:Name=”root”>
					<Border Height=”4” CornerRadius=”2” Background=”{StaticResource sliderBg}”>
					</Border>

					<Track x:Name=”PART_Track”>
						<Track.Thumb>
							<Thumb />
						</Track.Thumb>
					</Track>
				</Grid>
			</ControlTemplate>
		</Setter.Value>
	</Setter>
</Style>
We can bind elements in a template to the actual control:
<ControlTemplate x:Key=”CircleButton” TargetType=”{x:Type Button}”>
	<Grid HorizontalAlignment=”Center” VerticalAlignment=”Center” MinHeight=”36” MinWidth=”36”>
		<Ellipse Fill=”{TemplateBinding Background}” />
		<ContentPresenter />
	</Grid>
</ControlTemplate>
In this example, the Fill property on the Ellipse will be set to the Background property of the button that the template is applied to.
It is a common practice to keep a control template flexible through the use of template
binding. The idea is that you create a default style for your controls that sets the control template. However, you use template binding and set as many of the properties as possible in the style. That way, you can inherit from the default style, overriding specifics as needed, while retaining your control template.
This data binding:
{Binding RelativeSource={RelativeSource TemplatedParent}, Path=Background}
is the equivalent of this template binding:
{TemplateBinding Background}
Triggers are a special feature of Style, ControlTemplate, DataTemplate, and FrameworkElement. Through the careful use of triggers, you can declaratively enable your UI and graphics to respond to mouse events, changes in dependency properties, and even changes in your application’s data model.
<ControlTemplate.Triggers>
	<Trigger Property="IsMouseOver" Value="True">
		<Setter TargetName="highlight" Property="Visibility" Value="Visible" />
	</Trigger>

	<Trigger Property="IsPressed" Value="True">
		<Setter TargetName="highlight" Property="Opacity" Value="0.5" />
	</Trigger>
</ControlTemplate.Triggers>
If multiple triggers alter the same UI properties, the last one wins.
<Style.Triggers>
	<DataTrigger Binding="{Binding Path=IsMuted, ElementName=mediaElement}" Value="True">
		<Setter Property="Visibility" Value="Visible" />
	</DataTrigger>
</Style.Triggers>
EventTrigger is the final type of trigger that WPF currently offers
<ControlTemplate.Triggers>
	<EventTrigger RoutedEvent=”UIElement.MouseEnter”>
		<BeginStoryboard>
			<Storyboard Storyboard.TargetName=”chromeEdge” Storyboard.TargetProperty=”RenderTransform.Angle”>
				<DoubleAnimation To=”90” Duration=”0:0:0.10” />
			</Storyboard>
		</BeginStoryboard>
	</EventTrigger>

	<EventTrigger RoutedEvent=”UIElement.MouseLeave”>
		<BeginStoryboard>
			<Storyboard Storyboard.TargetName=”chromeEdge” Storyboard.TargetProperty=”RenderTransform.Angle”>
				<DoubleAnimation To=”0” Duration=”0:0:0.10” />
			</Storyboard>
		</BeginStoryboard>
	</EventTrigger>
</ControlTemplate>
Notice the important RoutedEvent property, which is used to declare which event will trigger the action.
Sometimes a situation arises in which a simple Trigger can’t express the conditions under which a collection of setters should be applied. For these scenarios, WPF provides the MultiTrigger and the MultiDataTrigger. These represent more advanced versions of Trigger and DataTrigger, respectively. Instead of having a simple Property or Binding and a Value, they each have a collection called Conditions. To leverage this functionality, you add multiple Condition instances to this collection.
<DataTemplate.Triggers>
	<MultiDataTrigger>
		<MultiDataTrigger.Conditions>
			<Condition Binding=”{Binding Organization}” Value=”Blue Spire Consulting, Inc.” />
			<Condition Binding=”{Binding Address.City}” Value=”Tallahassee” />
		</MultiDataTrigger.Conditions>

		<MultiDataTrigger.Setters>
			<Setter TargetName=”border” Property=”Background” Value=”Blue” />
		</MultiDataTrigger.Setters>
	</MultiDataTrigger>
</DataTemplate.Triggers>
At its root, an animation is a series of images shown in rapid succession to give the illusion of motion. The individual images in an animation are referred to as frames. The number of frames per second (fps) is called the frame rate. Most television and film is somewhere between 20 and 30fps. The higher the frame rate, the smoother the animation will seem. Computer graphics generally target a frame rate around 60fps. Key frames are
the frames that represent significant points in the motion, such as the start and end points. All the remaining frames, those in between the key frames, are called tweens. A timeline is a segment of time; it has a beginning point and duration.
<Window x:Class="LearningAnimation.MainWindow" xmlns="http://schemas.microsoft.com/winfx/2006/xaml/presentation" xmlns:x="http://schemas.microsoft.com/winfx/2006/xaml" Title="Window1" Height="300" Width="300">
    <Window.Triggers>
        <EventTrigger RoutedEvent="Window.Loaded">
            <BeginStoryboard>
                <Storyboard Storyboard.TargetName="Ball" Storyboard.TargetProperty="(Canvas.Left)">
                    <DoubleAnimation By="300" Duration="0:0:07.5"/>
                </Storyboard>
            </BeginStoryboard>
        </EventTrigger>
    </Window.Triggers>

    <Canvas>
        <Ellipse x:Name="Ball" Width="20" Height="20" Fill="Red" Canvas.Top="50" Canvas.Left="0"></Ellipse>
    </Canvas>
</Window>
The Storyboard has a single child. It’s a DoubleAnimation because Canvas.Left is of type double.
<DataTemplate x:Key="PictureDataTemplate">
        <Image Source="{Binding Path=Thumbnail}" Width="75" Height="75" Margin="4">
            <Image.Triggers>
                <EventTrigger RoutedEvent="Image.MouseEnter">
                    <BeginStoryboard>
                        <Storyboard Storyboard.TargetProperty="Width">
                            <DoubleAnimation By="25" Duration="0:0:0.25" />
                        </Storyboard>
                    </BeginStoryboard>
                </EventTrigger>
                <EventTrigger RoutedEvent="Image.MouseLeave">
                    <BeginStoryboard>
                        <Storyboard Storyboard.TargetProperty="Width">
                            <DoubleAnimation To="{TemplateBinding Width}" Duration="0:0:0.25" />
                        </Storyboard>
                    </BeginStoryboard>
                </EventTrigger>
            </Image.Triggers>
        </Image>
    </DataTemplate>
Very basically a ControlTemplate describes how to display a Control while a DataTemplate describes how to display Data.
Any element can trigger an animation. In addition to this technique, animations can be triggered from styles, control templates, and data templates. Inside of a Style, you cannot use Storyboard.TargetName. When you create an animation in a style, it will always target the element that the style is applied to. Likewise, you cannot specify the SourceName on a trigger. On the whole, a storyboard inside a style cannot reference dynamic resources or data bind.
<DoubleAnimation By=”300” AccelerationRatio=”0.4” DecelerationRatio=”0.4” Duration=”0:0:10”/>
With this markup, the ball will start at a speed of 0 and accelerate for 4 seconds. Then, beginning at the sixth second, it will slow down for 4 seconds.
<Button x:Name="button" Content="mybutton">
            <Button.Triggers>
                <EventTrigger RoutedEvent="Button.Click">
                    <BeginStoryboard>
                    <Storyboard Storyboard.TargetName="Ball" Storyboard.TargetProperty="(Canvas.Top)">
                        <DoubleAnimation By="300" Duration="0:0:07.5"/>
                    </Storyboard>
                </BeginStoryboard>
                <BeginStoryboard>
                    <Storyboard Storyboard.TargetName="Ball" Storyboard.TargetProperty="(Canvas.Left)">
                        <DoubleAnimation By="300"
AccelerationRatio="0.4"
DecelerationRatio="0.4"
Duration="0:0:10"/>
                    </Storyboard>
                </BeginStoryboard>
            </EventTrigger>
            </Button.Triggers>
        </Button>
        <Ellipse x:Name="Ball" Width="20" Height="20" Fill="Red" Canvas.Top="50" Canvas.Left="0"></Ellipse>
    </Canvas>
<Window.Triggers>
        <EventTrigger RoutedEvent="Window.Loaded">
            <BeginStoryboard x:Name="BallStoryboard">
                <Storyboard Storyboard.TargetName="Ball" Storyboard.TargetProperty="(Canvas.Left)">
                    <DoubleAnimation By="300" Duration="0:0:07.5"/>
                </Storyboard>
            </BeginStoryboard>
        </EventTrigger>
        <EventTrigger RoutedEvent="Button.Click" SourceName="Pause">
            <PauseStoryboard BeginStoryboardName="BallStoryboard" />
        </EventTrigger>
        <EventTrigger RoutedEvent="Button.Click" SourceName="Resume">
            <ResumeStoryboard BeginStoryboardName="BallStoryboard" />
        </EventTrigger>
    </Window.Triggers>
    <StackPanel>
        <StackPanel Orientation="Horizontal">
            <Button x:Name="Pause">Pause</Button>
            <Button x:Name="Resume">Resume</Button>
        </StackPanel>
        <Canvas>
            <Ellipse x:Name="Ball" Width="20" Height="20" Fill="Red" Canvas.Top="50" Canvas.Left="0"></Ellipse>
        </Canvas>
    </StackPanel>
Setting animation in code behind:
var animation = new ColorAnimation
{
From = Colors.Blue,
To = Colors.Yellow,
Duration = new Duration(TimeSpan.FromSeconds(2))
};
var button = new Button();
button.BeginAnimation(Button.BackgroundProperty,animation);
Ortogonality – things that are independent of one another.
Single Responsibility Principle – there should never be more than one reason for a class to change.
Separation of Concerns – embodies a “divide and conquer” approach to programming. Rather than having huge, complex classes, our system should be built from smaller, more focused components that work together.
Don’t Repeat Yourself – the key point is if you find yourself writing the same sort of
code over and over again, there’s something wrong.
Inversion of Control => The constructor signature is shown next:
public ApplicationPresenter(Shell view, ContactRepository contactRepository)
ApplicationPresenter is dependent on both a Shell view and a ContactRepository. It cannot function without these other components, yet it doesn’t take the responsibility of creating them. This is called Inversion of Control, often abbreviated IoC.
Dependency Injection – the control of dependency creation is inverted because the presenter has given up its right to create the components it depends on. It is relying on some outside source to hand it the pieces it needs to work. These dependencies are then
injected into the class via the constructor. This is known as Dependency Injection, or
DI, and it adds a great deal of flexibility and extensibility to your software design.
Ya Aren’t Gonna Need It – well, you just ain’t so why bother feature-stacking?