Nikola Brežnjak blog - Tackling software development with a dose of humor
  • Home
  • Daily Thoughts
  • Ionic
  • Stack Overflow
  • Books
  • About me
Home
Daily Thoughts
Ionic
Stack Overflow
Books
About me
  • Home
  • Daily Thoughts
  • Ionic
  • Stack Overflow
  • Books
  • About me
Nikola Brežnjak blog - Tackling software development with a dose of humor
CodeProject, Ionic

Introduction to TDD in Ionic framework

TL;DR

In this rather long post, I’m going to give you an introduction to Test Driven Development in Ionic. First ,I’m going to cover some basic theory concepts and then we’ll see how to apply this on few examples. First in plain Javascript and then finally in Ionic.

At the end of this tutorial, you’ll have a clear path on how to start practicing TDD in your JavaScript and Ionic applications. Also, at the bottom, you’ll see a full ‘resources dump’ of all the resources that I’ve gone through in trying to learn about TDD myself.

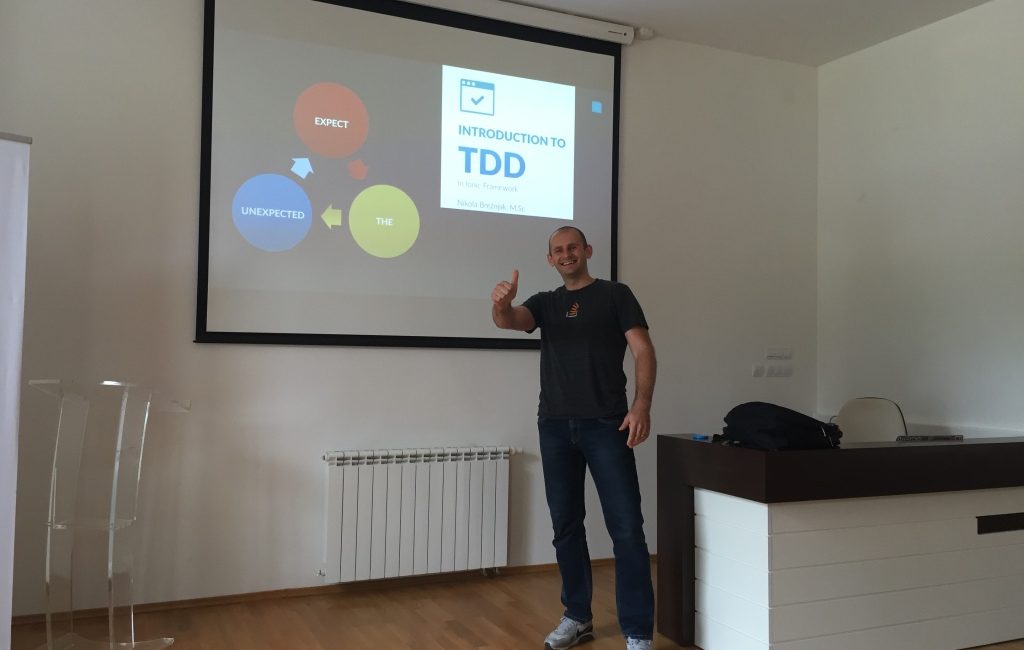
The presentation slides, in case someone is interested, can be viewed here.

Let’s answer some tough questions

How many of you actually test your code? Don’t worry; this is a rhetorical question, you don’t need to raise your hands.

Well, if we’re honest here, in my case (since I’m writing mostly JavaScript lately) up until recently I was practicing a so-called CLTDD. Which, of course, stands for console.log TDD.

We all know we should do something to make this better, but far too often we do it like this gentleman here:

Ok, jokes aside, let me try to emphasize on why testing may actually be useful to you. Just think about the following questions:

  • Have you ever fixed a bug, only to find that it broke something in another part of the system?
  • Have you ever been afraid to touch a complicated piece of code for fear that you might break?
  • Have you ever found a piece of code that you’re pretty sure wasn’t being used anymore and should be deleted, but you left it there just in case?

Well, if the answer to any of these questions is yes, then you’ll see value in what TDD can bring to the table if practiced correctly.

What is TDD?

Since most of us here are developers I bet you’ve heard about unit testing. However, unit testing is not the same thing as TDD. Unit tests are a type of test. TDD is a coding technique. Meaning that if you write unit tests, you don’t actually consequently do TDD.

TDD is an approach to writing software where you write tests before you write application code. The basic steps are:

  • Red – write a test and make sure it fails
  • Green – write the easiest possible code to make the test pass
  • Refactor – simplify/refactor the application code, making sure that all the tests still pass

At this point you may be like:

Wait, now I have to write code to test the code that I still haven’t written?!”

Yes, you write more code, but studies have shown objectively that good test coverage with TDD can reduce bug density by 40% – 80%.

Why bother with tests?

So, why would you want to test your code in the first place? Isn’t it enough that you have a deadline approaching, and now you should spend your precious time writing a test, instead of the actual application code?

Well, as features and codebases grow, manual QA becomes more expensive, time-consuming, and error-prone.

Say for example if you remove some function from the code, do you remember all of its potential side-effects? Probably not. But with unit tests, you don’t even have to. If you removed something that is a requirement somewhere else, that unit test will fail, and you’ll know you did something wrong.

So basically, we test our code to verify that it behaves as we expect it to. As a result of this process, you’ll find you have better feature documentation for yourself and other developers.

Also, as James Sinclair argues, practicing TDD forces one to think, as you have to think first and then write a test. Also, it makes debugging easier and programming more fun.

5 Common Misconceptions About TDD & Unit Tests

There are 5 Common Misconceptions About TDD & Unit Tests based on Eric Elliot.

  • TDD is too Time Consuming
  • You Can’t Write Tests Until You Know the Design, & You Can’t Know the Design Until You Implement the Code
  • You Have to Write All Tests Before You Start the Code
  • Red, Green, and ALWAYS Refactor?
  • Everything Needs Unit Tests

Also, he holds a rather strong point about mocking in TDD:

Here’s a tip that will change your life: Mocking is a code smell.

Demo time

OK, enough with the theory, now let’s see some code!

Prerequisites

To be able to follow this tutorial you need to have Node.js installed. Also, via npm you’ll need to install globally the following packages:

  • Karma
  • Jasmine
  • PhantomJS

I picked Karma as an environment for running the tests and Jasmine for the actual test cases because these frameworks seem to me as the most reliable for this task and seem to be in widespread use. However, keep in mind that there are many other options. Few worth mentioning are Mocha, Chai, Sinon, Tape, etc.

What I would like to add here is that these days (especially in the JavaScript world) you have a vast number of options. Choosing one option and actually starting is way better than endlessly weighing the options.

With Jasmine, we’ll be using a so-called Behaviour Driven Development (BDD) style to write the tests. This is a variation on TDD where tests are written in the form:

  • describe [thing]
  • it should [do something]

The [thing] can be a module, class, or a function. Jasmine includes built-in functions like describe() and it() to make writing in this style possible. Also, Jasmine offers some other cool stuff like spies, which we won’t cover here, but you can learn more about it from the official documentation.

The JavaScript demo

In this demo, I’ll show you a simple step by step TDD approach to building a simple calculator library. This will be a simple file with just two functions (add and sub). This will be nothing fancy; it’s just to illustrate how this process would go.

Folder structure and dependencies

Let’s start by creating a new folder called jstdd and inside it a folder app:

mkdir jstdd && cd jstdd && mkdir app && cd app

Also, create an index.js file inside the app folder:

touch index.js

Next, execute npm init in the jstdd directory. This will create a package.json file for us, where all the other dependencies (which we’ll install shortly) will be saved to. On every question in the npm init command you can safely press ENTER by leaving the default values.

Next, install all the needed dependencies:

npm install karma karma-jasmine jasmine-core karma-phantomjs-launcher --save-dev

For those who aren’t too familiar with Node and npm, with the --save-dev switch we save these dependencies to our package.json file that was created with the aforementioned npm init command.

Next, create a new folder called tests and a file index.spec.js inside it:

mkdir tests && cd tests && touch index.spec.js

Setting up Karma

Basically, we have everything set up now. But, before we actually start writing our tests, we have to configure Karma. So, in the root of our application (folder jstdd) we have to execute

karma init

The answers to the questions should be:

  • use Jasmine as a testing framework
  • don’t use Require.js
  • use PhantomJS instead of Chrome (use TAB key on your keyboard to switch between options). This is because we want to run our tests in the console
  • use app/*.js and tests/*.spec.js when asked for source files and test files. We can use glob patterns, meaning that star (*) matches anything
  • when asked for which files to exclude, just skip by pressing ENTER
  • finally, choose yes to have Karma watch all the files and run the tests on change

With this process being done, Karma generated the karma.conf.js file, which (without the comments) should look like this:

module.exports = function(config) {
    config.set({
        basePath: '',
        frameworks: ['jasmine'],

        files: [
            'app/*.js',
            'tests/*.spec.js'
        ],

        exclude: [],
        preprocessors: {},
        reporters: ['spec'],

        port: 9876,
        colors: true,
        logLevel: config.LOG_INFO,

        autoWatch: true,
        browsers: ['PhantomJS'],
        singleRun: false,

        concurrency: Infinity
    });
};

Finally let’s write some tests

At this point we have everything set up and we can start writing our tests. We will write our tests in index.spec.js file.

To remind you, our goal here is to create a simple calculator library. So, we start by writing a test.

When we’re using Jasmine to test our code we group our tests together with what Jasmine calls a test suite. We begin our test suite by calling Jasmine’s global describe function.

So we’re going to write (in index.spec.js file):

describe ("Calculator", function (){

});

This function takes two parameters: a string and a function. The string serves as a title and the function is the code that implements our test.

Within this describe block we’ll add so-called specs. Within our it block is where we put our expectations that test our code.

So, for example, the first thing that we’re going to test is that we indeed have an add function:

it('should have an add function', function() {
    expect(add).toBeDefined();
});

Don’t worry about the syntax; that can be easily learned by going through Jasmine’s documentation. And, besides, the good news is that all of the test tools have more or less similar syntax.

Ok, so we wrote our test, but now what? Well, we run the test in the terminal by running karma start.

You should see something like:

And, what do we see here? We see that we have a failing test. So, what do we do now? We move to the next step, and we make the test pass in the simplest possible way. So, how are we going to do that? We write a add function in the index.js file:

function add() {}

And now we have a passing test. Great. Can we refactor (3rd step) something? Most probably not at this stage, therefore we move onward.

So what’s the next thing we expect from our add function? Well, we expect that, for example, if we pass numbers 1 and 2 to it, that it will return number 3. So how do we write a test for this? Well, exactly as we said. So:

it ("should return 3 when passed 1, 2", function (){
    expect(3).toEqual(add(1,2));
});

Now we have a failing test and we go and fix it. At this point we ask ourselves:

What’s the fastest way to pass this test?

Well, the answer to this questions is to return 3 from our function:

function add(){
    return 3;
}

And, yet again we have a passing test.

However, say we want to make another test where we say that we expect 5 when passed in 3 and 2:

it ("should return 5 when passed 3, 2", function (){
    expect(5).toEqual(add(3,2));
});

Well, one way we could make this pass is to check for the parameters and create some switch cases… But, as you can see this is growing and, to be honest, it’s not the way should do things, so we refactor.

So, rule of thumb, the third step is REFACTOR and make sure the tests are still passing.

In the moment of inspiration we write (in index.js file):

function add (a, b){
    return a + b;
}

and with that we now have a passing test and refactored code.

Making the output prettier

At this point it may not be so nicely presented what all specs we have as passing. And, if you want to see that, you can install:

npm install karma-spec-reporter --save-dev
npm install jasmine-spec-reporter --save-dev

And then, in the karma.conf.js file just change the reporter to spec, like this:

reporters: ['spec']

Now when we run karma start we will have a nice output like:

Calculator
    ✓ should have an add function
    ✓ should return 3 when passed 1, 2
    ✓ should return 5 when passed 3, 2

PhantomJS 2.1.1 (Mac OS X 0.0.0): Executed 3 of 3 SUCCESS (0.002 secs / 0.002 secs)
TOTAL: 3 SUCCESS

Just a quick note on how to skip a certain test, by adding x before it:

xit ("should return 5 when passed 3, 2", function (){
    expect(5).toEqual(add(3,2));
});

Karma then reports this in the console log:

Calculator
    ✓ should have an add function
    ✓ should return 3 when passed 1, 2
    - should return 5 when passed 3, 2

indicating that the last test was skipped.

Full source and test code listing

Just for reference, this is how the index.spec.js file would look like when we add the tests for the sub function:

describe ("Calculator", function (){

    describe ("add function", function (){
        it('should have an add function', function() {
            expect(add).toBeDefined();
        });

        it ("should return 3 when passed 1, 2", function (){
            expect(3).toEqual(add(1,2));
        });

        it ("should return 5 when passed 3, 2", function (){
            expect(5).toEqual(add(3,2));
        });
    });

    describe ("sub function", function (){
        it('should have an sub function', function() {
            expect(sub).toBeDefined();
        });

        it ("should return -1 when passed 1, 2", function (){
            expect(-1).toEqual(sub(1,2));
        });

        it ("should return 1 when passed 3, 2", function (){
            expect(1).toEqual(sub(3,2));
        });
    });

});

This is the contents of the index.js file:

function add(a, b) {
    return a + b;
}

function sub(a, b) {
    return a - b;
}

And, this is what Karma would output to the console once run at this point:

Calculator
    add function
      ✓ should have an add function
      ✓ should return 3 when passed 1, 2
      ✓ should return 5 when passed 3, 2
    sub function
      ✓ should have an sub function
      ✓ should return -1 when passed 1, 2
      ✓ should return 1 when passed 3, 2

If you want to take a look at the whole code, you can fork it on Github.

Wallaby

This all is preety cool and you can have your terminal oppened up and see how your test turn green. However, as with everything these days, there are better tools out there. One such tool is Wallabyjs. And, let me just show you what it can do.

First you have to install Wallaby for your editor. They support Visual Studio Code, Atom, Submlime, Webstorm, etc.

After you’ve installed it, you have to set its config file. Let’s create a new file and name it wallaby.js and place it in the root of our app. Copy/Paste the following code into it:

module.exports = function (wallaby) {
  return {
    files: [
      'app/*.js'
    ],

    tests: [
      'tests/*.spec.js'
    ],
    debug: true
  };
};

You may have to restart your editor at this point. At this point you just run Wallaby from withing your editor. In Sublime it’s done by pressing CMD + SHIFT + P and selecting Wallaby.js: Start. There is also a handy shortcut in sublime: CMD + . followed by CMD + R.

As you will see, you now have information about your tests passing (green rectangles on the left-hand side) or failing inside the actual editor:

There are actually a lot more features to Wallaby, which I’ll leave to you to explore. I’m not affiliated with them in any way; I just happen to like it. But, just so you don’t say I didn’t mention it; as every great tool, it has its price. And, if you’re contemplating (or even complaining) about whether or not you should pay for certain software, please read this awesome post by Ambrose Little on How Much Is Your Productivity Worth?.

Ok, so this was the JavaScript tutorial. Let’s now take a look how would we setup up Jasmine and Karma in the Ionic framework application.

The Ionic framework demo

You need to have Ionic and Cordova packages installed globally with npm in order to follow this part of the tutorial. You can learn more about how to do that in Ionic Framework: A definitive 10,000 word guide.

Starting a new project and installing prerequisites

First, we start a new Ionic project:

ionic start ionic-tdd tabs

Next, we go inside this folder and install the necessary prerequisites.

cd ionic-tdd
npm install karma karma-jasmine karma-phantomjs-launcher jasmine-core --save-dev

Setting up Karma

Please make sure you have Karma installed globally from the previous JavaScript section. If you don’t you can do this simply with:

npm install -g karma-cli

Also, at this point, we have to run npm install to install all the prerequisites from the Ionic package.json file.

Finally, we need to install angular-mocks with bower:

bower install angular-mocks --save-dev

since we’ll use that to mock certain Angular controllers.

Once this is done we create a new folder in our project’s root directory. Let’s call it tests:

mkdir tests

Also, let’s run karma init command (run this command in your terminal, once in the root directory of your project).

You can follow the same instructions for Karma as in the JavaScript section, just don’t enter the location of the source and test files, we’ll add them separatelly.

Now we have to open up the karma.conf.js file and add our source and test files:

files: [
        'www/lib/angular/angular.js',
        'www/js/*.js',
        'www/lib/angular-mocks/angular-mocks.js',
        'tests/*.spec.js'
],
browsers: ['PhantomJS']

In the next step, we’ll configure our gulpfile.js file, so that we’ll be able to run our test via Gulp, since Ionic uses it as it’s task runner. We import Karma at the top of the file:

var karmaServer = require('karma').Server;

And we write a new task called test:

gulp.task('test', function(done) {
    new karmaServer({
        configFile: __dirname + '/karma.conf.js',
        singleRun: false
    }).start();
});

Now, we can run gulp with the test parameter like this: gulp test.

Testing the controller

First, let’s create a new tests/controllers.spec.js file in the tests folder.

Please note that this now isn’t a TDD approach, since we already have the code in our controller written. But, if you ever come to a project that hasn’t got unit tests this is what you’ll be doing. Plus, all the refactoring to make the code testable, but that’s a different story for some other time…

We start by writing our describe function:

describe('Controllers', function(){

});

Next, since this is Angular, we’ll have a local scope variable (var scope). And before each test we have to load the starter.controller module:

beforeEach(module('starter.controllers'));

How do we know we have to set this module? Well, if you take a look at the controllers.js file, you’ll see the name of the module there on the top as starter.controllers.

Also, we need to inject Angular’s scope variable and set the controller.

beforeEach(inject(function($rootScope, $controller) {
    scope = $rootScope.$new();
    $controller('AccountCtrl', {$scope: scope});
}));

To put this all in one place, you should have a controllers.spec.js file that looks like this:

describe('Controllers', function(){
    var scope;

    beforeEach(module('starter.controllers'));

    beforeEach(inject(function($rootScope, $controller) {
        scope = $rootScope.$new();
        $controller('AccountCtrl', {$scope: scope});
    }));
});

This is a boilerplate code that you’ll have to write in every test, so though it may seem strange at first, it becomes something you don’t think about after you’ve worked with it for some time.

Again, if you wonder how we came to the AccountCtrl, just take a look at the controllers.js file and the name of the controller we’re trying to test.

Finally, we come to our test. And, say we want to test if the enableFriends property on the settings object is set to true, we would write a test like this:

it('should have enableFriends property set to true', function(){
    expect(scope.settings.enableFriends).toEqual(true);
});

Now we run our tests with gulp test and we can see our test is passing.

Testing the service/factory

Now we’re going to write a test for our factory Chats. As you can see, the factory has three functions for getting all chats (that are currently hard-coded), removing a chat and getting a specific chat.

First, we’ll create a new file in the tests folder called services.spec.js and add our describe function:

describe('Chats Unit Tests', function(){

});

Next, we’re going to set the module and inject the Chats factory:

var Chats;
beforeEach(module('starter.services'));

beforeEach(inject(function (_Chats_) {
    Chats = _Chats_;
}));

Now, we can write our first test, and well, let’s first test if our Chats factory is defined:

it('can get an instance of my factory', inject(function(Chats) {
    expect(Chats).toBeDefined();
}));

Then, we can check if it returns five chats

it('has 5 chats', inject(function(Chats) {
    expect(Chats.all().length).toEqual(5);
}));

If at this point, we also want to see a nicer spec reports, we should kill the currently running gulp process. Install the required packages:

npm install karma-spec-reporter --save-dev
npm install jasmine-spec-reporter --save-dev

adjust the karma.conf.js file:

reporters: ['spec'],

and rerun gulp with gulp test.

To put this all in one place, you should have services.spec.js file that looks like this:

describe('Chats Unit Tests', function(){
    var Chats;
    beforeEach(module('starter.services'));

    beforeEach(inject(function (_Chats_) {
        Chats = _Chats_;
    }));

    it('can get an instance of my factory', inject(function(Chats) {
        expect(Chats).toBeDefined();
    }));

    it('has 5 chats', inject(function(Chats) {
        expect(Chats.all().length).toEqual(5);
    }));
});

If you want to take a look at the whole code, you can fork it on Github.

Wallaby

If you want to try Wallaby in Ionic you just need to create the wallaby.js file and set the configuration:

module.exports = function (wallaby) {
  return {
    files: [
        'www/lib/angular/angular.js',
        'www/js/*.js',
        'www/lib/angular-mocks/angular-mocks.js',
    ],

    tests: [
        'tests/*.spec.js'
    ],
    debug: true
  };
};

Conclusion

My personal takeaway from this so far is that even if you don’t adopt this whole TDD mantra, I’m urging you to start using Unit tests at least, as you’ve seen how valuable they can be. As for the whole TDD mantra, I’m yet to see how all this pans out, as I feel that adopting this properly requires a certain discipline until implemented properly.

Of course, all this is just a tip of the iceberg. I just touched the Unit tests and what Jasmine can do as your test environment. I hope that some time from now I’ll be able to share with you some best practices and some advanced techniques. Until then, I hope this was useful to some of you to at least get you going.

Demo projects can be looked up on Github:

  • JavaScript demo
  • Ionic framework demo

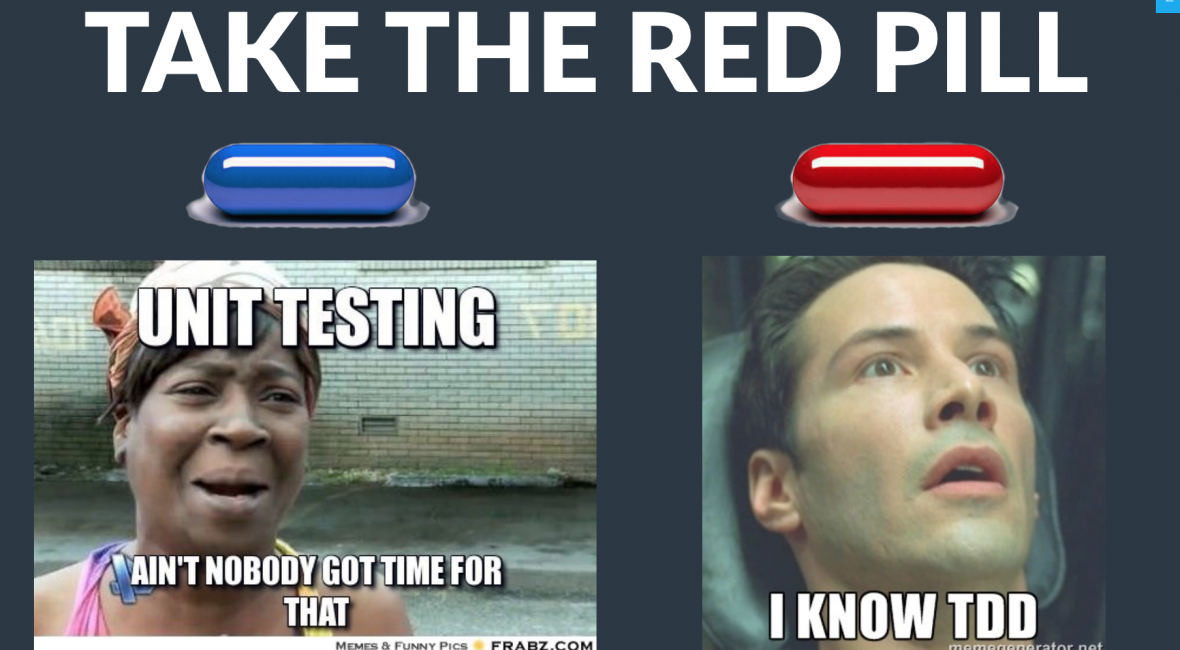
And yes, take the red pill 😉


In case someone is interested, below is my path to the ever so slightly awesome TDD regarding read materials and the notes I collected along the way.

Treehouse course

  • Use E2E test sparringly (this is in line with the Google post)
  • suits and specs
  • mocha --reporter nyan
  • "scripts": {"test":mocha, "test:watch":"mocha --watch ./test ./"}
  • npm run test:watch

Books on the topic

  • Test Driven Development, Kent Beck
  • Refactoring: Improving the Design of Existing Code
  • Ionic in action – chapter about TDD in Ionic

Blog posts

Introduction to JS TDD

Advantages of TDD:

  • It forces one to think
  • It makes debugging easier
  • It makes coding more fun

TDD is an approach to writing software where you write tests before you write application code. The basic steps are:

  • Red – write a test and make sure it fails
  • Green – write the simplest, easiest possible code to make the test pass
  • Refactor – optimize and/or simplify the application code, making sure that all the tests still pass

You have to think first, then write a test.

// flickr-fetcher-spec.js
'use strict';
var expect = require('chai').expect;

describe('FlickrFetcher', function() {
    it('should exist', function() {
        var FlickrFetcher = require('./flickr-fetcher.js');
        expect(FlickrFetcher).to.not.be.undefined;
    });
});

We are using a Behaviour Driven Development (BDD) style to write the tests. This is a variation on TDD where tests are written in the form:

  • Describe [thing]
  • It should [do something]

The [thing] can be a module, or a class, or a method, or a function. Mocha includes built-in functions like describe() and it() to make writing in this style possible.

No module code until there’s a failing test. So what do I do? I write another test.

The rule of thumb is, use equal when comparing numbers, strings, or booleans, and use eql when comparing arrays or objects. Note: eql is named deepEqual in some other testing frameworks. However, note that Jasmine has only toEqual.

Introduction to JS TDD Part 2

The fakeFetcher() function I’ve used to replace $.getJSON() is known as a stub. A stub is a piece of code that has the same API and behaviour as the ‘real’ code, but with much reduced functionality. Usually this means returning static data instead of interacting with some external resource.

Typical stubs might replace things like:

  • Queries to a relational database
  • Interaction with the file system
  • Accepting user input
  • Complex computations that take a long time to calculate

TDD should be fun

  • functional tests (E2E)
  • integration tests, more often than E2E

The ever so slightly famous Eric Elliot on the subject of JS testing

  • Unit tests, integration tests, and functional tests are all types of automated tests which form essential cornerstones of continuous delivery, a development methodology that allows you to safely ship changes to production in days or hours rather than months or years.
  • The cost of a bug that makes it into production is many times larger than the cost of a bug caught by an automated test suite. In other words, TDD has an overwhelmingly positive ROI.
  • You don’t choose between unit tests, functional tests, and integration tests. Use all of them, and make sure you can run each type of test suite in isolation from the others.

  • Unit tests
    • ensure that individual components of the app work as expected. Assertions test the component API
  • Integration tests
    • ensure that component collaborations work as expected. Assertions may test component API, UI, or side-effects (such as database I/O, logging, etc…)
  • Functional tests
    • ensure that the app works as expected from the user’s perspective. Assertions primarily test the user interface

For example, your app may need to route URLs to route handlers. A unit test may be written against the URL parser to ensure that the relevant components of the URL are parsed correctly. Another unit test might ensure that the router calls the correct handler for a given URL.
However, if you want to test that when a specific URL is posted to, a corresponding record gets added to the database, that would be an integration test, not a unit test.

Yes, you write more code, but studies have shown objectively that good test coverage with TDD can reduce bug density by 40% – 80%.

Another two posts from him:

5 Common Misconceptions About TDD & Unit Tests

  • TDD is too Time Consuming. The Business Team Would Never Approve
  • You Can’t Write Tests Until You Know the Design, & You Can’t Know the Design Until You Implement the Code
  • You Have to Write All Tests Before You Start the Code
  • Red, Green, and ALWAYS Refactor?
  • Everything Needs Unit Tests

Here’s a tip that will change your life: Mocking is a code smell.

5 Questions Every Unit Test Must Answer

  • What’s in a good test failure bug report?
  • What were you testing?
  • What should it do?
  • What was the output (actual behavior)?
  • What was the expected output (expected behavior)?

Few general good blog posts

  • Google’s take on E2E, Integration and Unit tests
  • TDD is dead, long live testing
  • Test-Driven Development Isn’t Testing
  • Triangulation in TDD
  • Introduction to Test Driven Development in JavaScript
  • Making your functions pure
  • Writing great unit tests
    • Unit testing is not about finding bugs but it is excellent when refactoring
  • Testing services in Angular for fun and Profit
    • If there was a way to reduce the number of defects in the code you write (or manage), improve the quality and time to market of deliverables, and make things easier to maintain for those who come after you- would you do it?
    • How many times have you heard some variant on, “Writing tests isn’t as important as delivering finished code?” If you’re like me, it’s way too many, and god help you if you’re working with no tests at all. Programmers are human and we all make mistakes. So test your code. The number of times testing my code has helped me catch unforeseen issues before they became flat-out bugs, prevent future regressions, or simply architect better is pretty amazing. And this is coming from a guy who used to hate writing tests for code. Hated it.
    • Jasmine is a Behavior-Driven-Development framework, which is sort of a roundabout way of saying that our tests include descriptions of the sections that they are testing and what they are supposed to do.
    • You can create stubbed objects quite easily in JavaScript, so if there’s no need to introduce the extra complexity of a spy, then do so.
    • Always code as if the person who ends up maintaining your code is a violent psychopath who knows where you live.
  • One Weird Trick That Will Change The Way You Code Forever: Javascript TDD
    • Have you ever fixed a bug, only to find that it broke something horribly in another part of the system? And you had no idea until the client called support in a panic?
    • Have you ever been afraid to touch a complicated piece of code for fear that you might break it and never be able to fix it again? … Even though you wrote it?
    • Have you ever found a piece of code that you’re pretty sure wasn’t being used any more and should be deleted? But you left it there just in case?
    • TDD is not about testing. It is a way of thinking and coding that just-so-happens to involve tests.
    • TDD is not the same thing as unit tests. Unit tests are a type of test. TDD is a coding technique.
      • Red—write a little test that doesn’t work, perhaps doesn’t even compile at first
      • Green—make the test work quickly, committing whatever sins necessary in the process
      • Refactor—eliminate all the duplication created in just getting the test to work

Finally, Ionic (Angular) related TDD posts

How To Write Automated Tests For Your Ionic App

  • In the example for Unit Tests we saw that we need to mock the dependencies. For Integration Tests, depending on which units you want to test together, you could still mock certain dependencies, or none at all.

TDD with ionic

  • Short tutorial showcasing how to run Karma with Jasmine

Unit Testing Your Ionic Framework App

This tutorial was actually great (which I can't say for the previous two) and I've learned the most out of it and finally set up a test environment.

Fun fact: I added `npm install --save-dev karma-nyan-reporter` and now am running my tests like this: `karma start tests/my.conf.js --reporters nyan

Some other AngularJS TDD blog posts

  • Unit Testing an AngularJS Ionic App with Codeship Continuous Integration, Jasmine, and Karma
  • Unit Testing Best Practices in AngularJS
  • Official AngularJS Unit Testing Guide
    • Underscore notation: The use of the underscore notation (e.g.: _$rootScope_) is a convention wide spread in AngularJS community to keep the variable names clean in your tests. That’s why the $injector strips out the leading and the trailing underscores when matching the parameters. The underscore rule applies only if the name starts and ends with exactly one underscore, otherwise no replacing happens.
  • Add Karma And Jasmine To An Existing Ionic Project
  • Unit testing AngularJS applications
  • Testing AngularJS with Jasmine and Karma

My notes

  • npm install phantomjs-prebuilt was needed in order to get Karma running with PhantomJS.

  • Had to change the actual Angular mocks 1.5.1 error in the code (https://github.com/angular/angular.js/issues/14251).

At this point the tests finally passed!

Tools

Wallabyjs – An awesome tool

Introduction to #TDD in #Ionic framework https://t.co/RUyy0rc0h8 @Ionicframework pic.twitter.com/tw22XMmhzn

— Nikola Brežnjak (@HitmanHR) June 28, 2016

Miscellaneou$, Quick tips

Gitflow – a successful Git branching model

edit 14.4.2017: I made a 2.5k+ word post about Gitflow, Pull Requests and Code Reviews which goes way deeper in the topic. The post is here if you want to check it out: Git branching done right with Gitflow & improving code quality with code reviews.

Before I started working on my newest project, I took the time to finally delve into the proper way of doing branching. Not long into the research gitflow popped up as the more/less something that community loves.

After checking it out, I’m amazed how awesome this is.

So, first things firs; the original article was written by Vincent Driessen: A successful Git branching model goes into the details of this workflow.

Later I found out that community built the git-flow command line program that provides high-level repo operations for Vincent Driessen’s branching model.

Tutorial

  • 15min video

Installation

Simple brew install git-flow if you’re on Mac.

Git-flow command completion

Use tabs to auto-complete the git-flow commands: https://github.com/bobthecow/git-flow-completion. Completions available for both bash and zsh.

Gitflow – a successful Git branching model https://t.co/1ecyQ5qlTd

— Nikola Brežnjak (@HitmanHR) June 14, 2016

Miscellaneou$

Weblica 2016

This was the 2nd Weblica conference in my Međimurje county (I wrote about the first one here).

Again, the entrance was free and every attendee got a T-Shirt, loads of stuff to eat and drink. The talks were interesting and informative, and for all this a big two thumbs up to the organizers. Also, active participants got a cool snake puzzle (here’s a link on how to solve it :)).

This year I had the honor to present about Ionic framework. You can watch the whole conference on this Youtube video (in case you’re wondering, my talk starts at 6:46):

I won’t go into the details of every presentation, you can take a look at them yourself :), I’ll just add pictures I took:


All in all, a great conference and hope to see you next year (I’ll be talking about Ionic 2 hopefully :D)…

@weblicahr another awesome conference! #weblica https://t.co/GhKFv3hG5T

— Nikola Brežnjak (@HitmanHR) May 15, 2016

Miscellaneou$

Shutterstock doesn’t offer money back

Shutterstock doesn’t offer any money back policy if you wish to downgrade on the video size (OFC, consequently price as well) but they’re absolutely delighted to upgrade you to the more expensive option. And, they don’t have that in written form anywhere (at least so the support rep said, as you can see below in the chat). Some businesses just make me sick… Oh, and btw, in case you don’t know, we should all be putting 300+ MB files for our video backgrounds…

Francesco D: Thank you for reaching out! I’ll be glad to help…
Francesco D: Hello Nikola.
Me: Hey Francesco?
Francesco D: What seems to be the issue?
Me: Hey Francesco
Francesco D: Hi.
Me: well, it turns out I made a mistake and bought the SD instead of clearly the web version
Francesco D: Ok.
Francesco D: Do you need teh HD?
Francesco D: Let me understand.
Francesco D: You needed the web instead?
Me: yes. because, at first I thought I need the sd version
Me: but it turns out that the size is just to damn big and loading takes forever
Francesco D: Unfortunately we are unable to downgrade the purchase.
Francesco D: I understand.
Francesco D: We are unable to refund the purchase Nikola.
Francesco D: We can only help you upgrading the format.
Me: do you have that in written form somewhere?
Francesco D: No.
Me: oh, really? A big firm like yourself and you don’t have a return policy? Now that’s interesting
Francesco D: We can only refund files that are corrupted Nikola.
Francesco D: When you download a file you acquire the license and the artist gets paid immediately.
Me: And, you’re saying you don’t have that in the rules or somewhere?!?
Francesco D: We do not.
Francesco D: When you download a file you acquire the license and the artist gets paid immediately.
Francesco D: Since the file is not corrupted we are unable to refund it.
Me: and you haven’t been sued for this already? LOL
Me: ok, I don’t mean to be hostile here but, tbh, this is just not how you do stuff these days
Francesco D: No we haven’t.
Francesco D: You could have checked before making the purchase.
Me: as I said, I’m not trying to be an ass I’m just trying to save you from some customer that will have a better law background
Francesco D: I understand.
Francesco D: is there anything else I can help you with?
Francesco D: That is very kind of you Nikola.
Francesco D: if you needed to upgrade the clip we could have refunded it after you purchased the HD.
Francesco D: How are you using the clip by the way Nikola?
Me: you see but this right here strikes me as odd, as why then we can’t do it the same for downgrade. I mean, forget it, I’ll find my way, but I’ll blog about this as well, so that others don’t do the same mistake
Francesco D: I am sorry you feel that way, I would suggest you check with us before you make the purchase though Nikola.
Me: ok, I’m checking then now (sorry this is turning into a drag now). For the video clip to be used on the web, but fullscreen, what do you suggest??
Francesco D: Nikola don’t be sorry I am just here to advise you.
Francesco D: SD and web are mostly used for projects where the video won’t fill the screen.
Francesco D: HD will provide high quality and sharp definition for many video projects where quality needs to be high.
Francesco D: For full screen teh HD is what we suggest.
Me: seriously? like I mean, lol, who would wait that long for the download??
Francesco D: Taht is what we suggest Nikola.
Me: you’re seriously telling me you’re recommending your users when they need a background video that they take the 300MB monster. oh dear
Francesco D: I am seriously telling you that SD and web are mostly used for projects where the video won’t fill the screen.
Me: ok 🙂
Francesco D: Do you have any further questions?
Francesco D: Are you still there Nikola?
Me: meh, I better stop with my questions
Me: so, wish you less angry customers like me 😉
Me: have a great one
Me: bye
Francesco D: I am happy to answer your questions.
Francesco D: Have a great day too.
Francesco D: Bye now Nikola.

#Shutterstock doesn't offer #money #back https://t.co/5FP0XXvjq8 pic.twitter.com/vou4ppcirc

— Nikola Brežnjak (@HitmanHR) May 15, 2016

Ionic, Stack Overflow

How to Launch an Ionic Web App – Where Should Ionic Server be Running?

In this StackOverflow question I answered how to launch an Ionic web app

profile for Nikola at Stack Overflow, Q&A for professional and enthusiast programmers
I’m a big fan of Stack Overflow and I tend to contribute regularly (am currently in the top 0.X%). In this category (stackoverflow) of posts, I will be posting my top rated questions and answers. This, btw, is allowed as explained in the meta thread here.

As you may know, I’m really into Ionic framework lately and am helping out on StackOverflow with the knowledge I gained so far with the framework. I’m currently #3 in the top All time answerers list.

I answered this question by user bharat batra:

I am building an ionic app for prototyping purposes. For the first version I want it to simply be a web based app. I know how to run the app locally on my computer – I simply type ionic serve and the app runs. However, to actually have remote clients, I am not sure how to run this app. DO I need to have the ionic server running at a port on my main server, and then have the clients all make requests to that port on the server IP address? How do I actually do this?

My answer was simple:

You just take everything from your www folder and place it on your web server. That’s all there is to it.

Say your web server address is bharat.com and say you placed the www folder in your web server root. In that case, your Ionic app will be visible at bharat.com/www

How to Launch an #Ionic Web App – Where Should Ionic Server be Running? https://t.co/A6iGuaOJ9w

— Nikola Brežnjak (@HitmanHR) May 3, 2016

Ionic

How to use Exis to Create a Chat App in Ionic

This is a guest blog post from Exis where they explain how to use Exis to create a chat app in Ionic.

Exis is a BaaS startup based out of the same hometown as Ionic (Madison, Wisconsin, USA). Exis is a platform that offers developers an easy set of tools for quickly developing their application and getting it out to market easier and with less errors.

Exis provides a set of free microservices such as user login and authentication, plug and play NoSQL-based cloud storage, cloud hosting of custom Node.JS backends, and a unique take on WebSockets that offers fully authenticated bi-directional messaging both peer-to-peer and with backend components.

Exis has created and released ngRiffle, a client-side library that integrates with Ionic and has recently been teaming up with Ionic to show just how simple app development can be when you combine the two services.

Following this blog-tutorial results in creating a simple chat app using Exis + Ionic. This tutorial will showcase some of the core features that make using Exis + Ionic an excellent choice for app development including publish and subscribe messaging, and running a simple Node.js server hosted on Exis.

Step 1

Register for a free Exis account or login if you already have one.

Step 2

Create a new app named “chat”

Step 3

Add an Auth appliance

Use the options: Temporary (name, no password) for the User account type

This appliance controls who is allowed to communicate with your backend.

Step 4

Clone the Ionic App

git clone https://github.com/exis-io/ExisChatIonic.git
cd ExisChatIonic
bower install

Step 5

Link your Ionic App to the Exis App you just created

Replace USERNAME with your Exis username in xs.demo.USERNAME.chat in www/js/app.js line 43:

.config(function($riffleProvider){
$riffleProvider.SetDomain("xs.demo.USERNAME.chat");
})

Step 6

Run the Ionic App!

ionic serve

Open the app in multiple tabs and chat away!

Congrats on building a chat app using Exis + Ionic! A step by step explanation of our code is provided below.

Learn How It Works!

  1. The Code
  2. Launching A Node.js Backend

The Code

Let’s take a quick look at the main logic of the chat app which is in www/js/controller.js

angular.module('exisChat.controller', [])

.controller('HomeCtrl', function($scope, $riffle, $ionicScrollDelegate) {

    $scope.msgs = [];

    //Login anonymously to Exis (requires Auth appliance level 0)
    $riffle.login();

    //subscribe to the chat channel
    $riffle.subscribe('exisChat', gotMsg);

    //handle messages here
    function gotMsg(msg) {
        msg.received = true;
        displayMsg(msg);
    }

    //publish message
    $scope.sendMsg = function(text) {
        var msg = { username: $riffle.user.username(), msg: text }
        $riffle.publish('exisChat', msg);
        $scope.input.msg = '';
        displayMsg(msg);
    }

    //display our msg
    function displayMsg(msg) {
        $scope.msgs.push(msg);
        $ionicScrollDelegate.scrollBottom();
    }
});

That’s it! Seriously. That is what a chat app looks like with Exis + Ionic. Let’s dive in a little!

Here are the basics.

line 8: $riffle.login() anonymously logs in the user as long as there is an Auth appliance with level 0 attached to the app.

line 11: $riffle.subscribe(‘exisChat’, gotMsg) subscribes our gotMsg function to handle events publish to the exisChat channel.
gotMsg simply receives the msg marks it as a received message and displays it. You can look at the view code in www/templates/home.html

line 22: $riffle.publish(‘exisChat’, msg) publishes the message we are sending to anyone subscribed to the exisChat channel.
It’s called inside the sendMsg function which is bound to the send button in the view and it simply creates the message object, publishes it, and displays it.

line 28: displayMsg is simply a utility function used to add the msg the $scope.msgs array which is bound to the view. It also scrolls the screen down as new messages are received or sent.

And there you have it! Pretty simple right?!? There is a couple more things you can do below if you want to get a little fancy!

Launching a Node.JS Backend

Let’s take a quick look at how you could attach your own Node.js backend if you wanted. The simple backend we wrote will simply listen to messages that people are publishing and log them, but you can fork our repo and and add whatever cool imaginative logic you’d like. We’ll start with our simple logging server though.

Fork the ExisChatBackend Repo

Go to the Appliance Store and attach the Container appliance to your app.

Container

Go to Container Management

Build the image by passing in your forked repo URL of ExisChatBackend from above, name it exischat

Build Image

Create the image from the dropdown on the left, call it logger

Create Image

Start the container by pressing the Start button below.

Start Image

Now messages you send on your Exis + Ionic chat app will be logged by your backend! To verify this you can send a few messages and then go to the Logs tab on your container.
Assuming you forked our repo like we suggested you can modify the server.js code locally and push your changes to your forked repo on Github and then simply update the image to see your
changes reflected.

Thanks for following this blog-tutorial! Feel free to fork the repos and modify this app! And if you’d like to show us what you did or you have any questions feel free to email us at [email protected]

Ionic, Stack Overflow

When is it appropriate to use ion-pane in Ionic Framework?

In this StackOverflow question I answered when it is appropriate to use ion-pane in Ionic Framework

profile for Nikola at Stack Overflow, Q&A for professional and enthusiast programmers
I’m a big fan of Stack Overflow and I tend to contribute regularly (am currently in the top 0.X%). In this category (stackoverflow) of posts, I will be posting my top rated questions and answers. This, btw, is allowed as explained in the meta thread here.

As you may know, I’m really into Ionic framework lately and am helping out on StackOverflow with the knowledge I gained so far with the framework. I’m currently #3 in the top All time answerers list.

I answered this question by user qizzacious:

This is a simple enough question.

After taking a look at the documentation for ion-pane it states:

A simple container that fits content, with no side effects. Adds the ‘pane’ class to the element.

What does it mean when it states “no side effects”? What are the use cases for ion-pane?

My answer was:

Honestly, I never used ion-pane before, but this question intrigued me so I went searching. As it seems, and you can see on this Codepen: http://codepen.io/anon/pen/JGwJKv?editors=1010, if the content is too big (if you try to resize the browser window to very small) it will not show it. Opposed to the ion-content which will add scroll bars and allow you to use ion-refresher and some other options (tapping into scroll delegate, etc.).

So, to be honest, I never stumbled upon a need for such a use-case, so would probably never use ion-pane. The lacking documentation about it, kind of suggests the same…

When is it appropriate to use ion-pane in Ionic Framework? https://t.co/3o9LVRoJxc

— Nikola Brežnjak (@HitmanHR) April 26, 2016

Ionic

60th SQL/DEV User Group meeting

Finally, I got my 5 minutes (well, OK, 45 to be exact) of fame 🙂

I was presenting Ionic Framework to  fellow developers on the 60th SQL/DEV UG meeting in Čakovec.

At this meeting there were actually two speeches:

  • Introduction to hybrid mobile app development with Ionic Framework
  • Electron

Introduction to hybrid mobile app development with Ionic Framework

  • presenter: yours truly
  • link to the presentation
  • picture time:
  • And (drums in the background) I’m very excited to announce that I’ll be speaking at the Weblica conference on 14.5.2016. Here, my name on the poster:
    thumb_IMG_6340_1024

Electron

  • presenter: Dejan Kovač
  • picture time:
    thumb_IMG_6192_1024
  • Electron website
  • Some cool apps have been built with it:
    Screenshot 2016-04-23 23.08.27
  • Electron is awesome, to be honest! We just have to wait some time so that it matures fully.
  • It’s the best time ever to be a web developer, as you now have access to every platform with the knowledge you already have

60th SQL/DEV User Group meeting #weblica https://t.co/6OVjLChKbk

— Nikola Brežnjak (@HitmanHR) April 23, 2016

Ionic

How to build a shopping app with Ionic Framework and Firebase

The sixth post about Ionic framework for Pluralsight was about making use of Firebase when building a real-time shopping TODO application.

You can see the post here: How to build a shopping app with Ionic Framework and Firebase.

You can try the app in your browser here: http://shopping-todo.com/.

You will learn how to build an app with the following features:

  • Login with Facebook or email
  • Add as many projects as you like
  • Invite as many users to your projects as you like
  • Track your expense on the go
  • View the updates live as they happen

Here are few screenshots:

In case you want to learn more about Ionic Framework, you can download (for free if you wish) my blog2book via Leanpub.

IonicBook

If you have any questions please don’t hesitate to ask, and please share if you like it.

How to build a shopping app with Ionic Framework and Firebase https://t.co/pyLYCXwWBp

— Nikola Brežnjak (@HitmanHR) April 23, 2016

Ionic, Stack Overflow

Showcasing Ionic Apps For a Portfolio Without Publishing Them to App Stores

In this StackOverflow question I answered how to showcase your Ionic apps for a portfolio without publishing them to App Stores

profile for Nikola at Stack Overflow, Q&A for professional and enthusiast programmers
I’m a big fan of Stack Overflow and I tend to contribute regularly (am currently in the top 0.X%). In this category (stackoverflow) of posts, I will be posting my top rated questions and answers. This, btw, is allowed as explained in the meta thread here.

As you may know, I’m really into Ionic framework lately and am helping out on StackOverflow with the knowledge I gained so far with the framework. I’m currently #3 in the top All time answerers list.

I answered this question by user Jubl:

I have a few Ionic apps that I made that I want to add to my portfolio site for potential employers to check out. However, I would like to upload them somewhere so that when a visitor clicks on my link, it will take them to a website showcasing my app. I don’t want to push my apps to the actual stores, but still make them publicly viewable. Is this possible to do with an Ionic application?

I understand that Ionic View exists, but I have to send out email permissions for people to try my app (from what I know). I’d rather my apps just be uploaded somewhere and be easily accessible through links.

My answer was:

Actually, with Ionic View you can just share its ID number (see the image below) and anyone with this number will be able to download your app (via Ionic View) without you having to send them the invitation.

Your second option, but maybe a bit harder to do is to host your application on your server. So, you would take all the content from the www folder and simply put it on your server in a certain folder and your app would then be accessible from the web as well. What I usually do is I create an iPhone image and create an iframe in which I then show the Ionic app. I won’t go into details here, there are similar questions that cover this particular topic already.

Anyways, hope this helps, and clearly for the least effort, the Ionic View seems like the best option.

#Showcasing #Ionic Apps For a Portfolio Without Publishing Them to App Stores https://t.co/3npCjin5rG

— Nikola Brežnjak (@HitmanHR) April 23, 2016

Page 23 of 51« First...1020«22232425»304050...Last »

Recent posts

  • When espanso Breaks on Long Replacement Strings (and How to Fix It)
  • 2024 Top Author on dev.to
  • Hara hachi bun me
  • Discipline is also a talent
  • Play for the fun of it

Categories

  • Android (3)
  • Books (114)
    • Programming (22)
  • CodeProject (36)
  • Daily Thoughts (78)
  • Go (3)
  • iOS (5)
  • JavaScript (128)
    • Angular (4)
    • Angular 2 (3)
    • Ionic (61)
    • Ionic2 (2)
    • Ionic3 (8)
    • MEAN (3)
    • NodeJS (27)
    • Phaser (1)
    • React (1)
    • Three.js (1)
    • Vue.js (3)
  • Leadership (1)
  • Meetups (8)
  • Miscellaneou$ (78)
    • Breaking News (8)
    • CodeSchool (2)
    • Hacker Games (3)
    • Pluralsight (7)
    • Projects (2)
    • Sublime Text (2)
  • PHP (6)
  • Quick tips (41)
  • Servers (8)
    • Heroku (1)
    • Linux (3)
  • Stack Overflow (81)
  • Unity3D (9)
  • Windows (8)
    • C# (2)
    • WPF (3)
  • Wordpress (2)

"There's no short-term solution for a long-term result." ~ Greg Plitt

"Everything around you that you call life was made up by people that were no smarter than you." ~ S. Jobs

"Hard work beats talent when talent doesn't work hard." ~ Tim Notke

© since 2016 - Nikola Brežnjak