Nikola Brežnjak blog - Tackling software development with a dose of humor
  • Home
  • Daily Thoughts
  • Ionic
  • Stack Overflow
  • Books
  • About me
Home
Daily Thoughts
Ionic
Stack Overflow
Books
About me
  • Home
  • Daily Thoughts
  • Ionic
  • Stack Overflow
  • Books
  • About me
Nikola Brežnjak blog - Tackling software development with a dose of humor
CodeProject, MEAN

How to add a comment field to MEAN.js Article example

MEAN_Grunt_604x270

If you happen to like the image above, and you’re thinking to yourself how cool it would look like as a sticker, take a look at a few that I made.

TL;DR

In my previous tutorial about the MEAN stack, I showed you how to get your MEAN stack up and running in less than a minute. In this tutorial I’m going to show you how to add a comment field to an existing MEAN.js Article example. You can see the finished application on http://mean.nikola-dev.com, and you can clone the source on GitHub.

I actually answered the question Adding comments to MEAN.JS articles on StackOverflow, and this posts is kind of an addition to that answer, with pictures (everyone likes pictures, right? 😉).

[toc]

Starting point

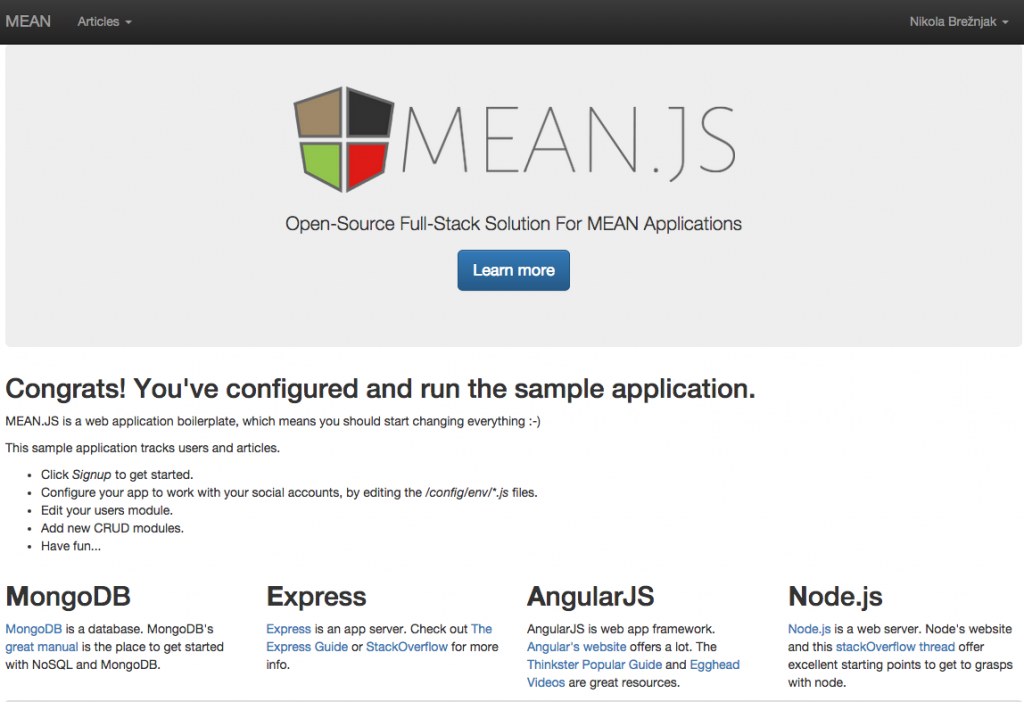
So, if you’ve followed the (ah, yet again mentioned) previous tutorial you have a running MEAN.js example on your DigitalOcean Droplet, whose front page looks like the image below if you’re logged in. You can simply register via mail (I didn’t implement any other methods like Facebook, Google, LinkedIn or GitHub for this tutorial).

Screen Shot 2015-06-28 at 14.32.35

Please note that yes, you can run this example locally on your computer too, but you would have to manually install the whole MEAN stack (namely MongoDB, Express.js and Node.js). If you wish to do so, you can take a look at the steps needed to do this from a rather popular tutorial How to get started on the MEAN stack. Rest of the tutorial, however, assumes you are testing this on DigitalOcean Droplet.

How to add a subdomain for Nodejs application on DigitalOcean droplet

When I was preparing this post I bought a domain just for testing purposes called nikola-dev.com and I wanted to have Node.js apps running on this VPS (behind a NGINX running as proxy, as we set it up in previous tutorial) but that they would be accessible from different subdomains (for example mean.nikola-dev.com). Below are the steps I needed to take in order to make this happen:

  1. Buy a domain (clearly you have done so smileyGlasses)
  2. Edit the Nameserver information in the admin dashboard of your domain provider (where you bought the domain) to the following three records:
    ns1.digitalocean.com, ns2.digitalocean.com, ns3.digitalocean.com
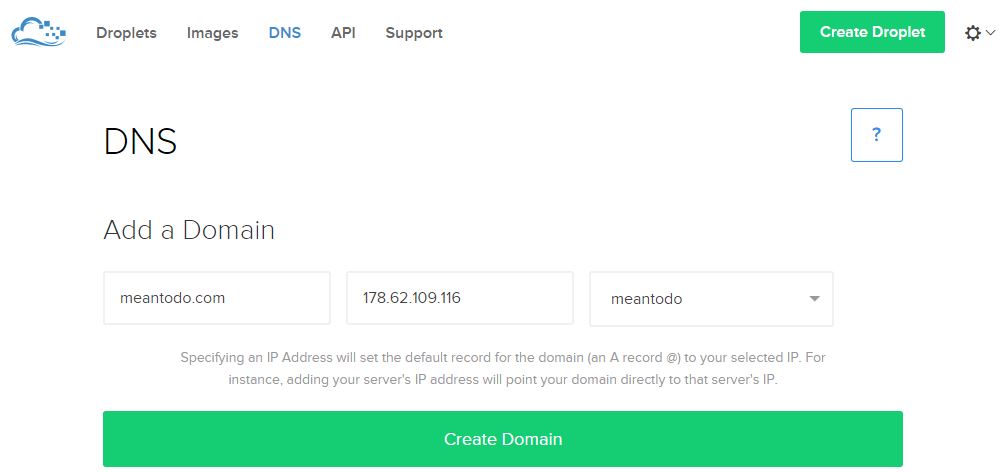
  3. Add the domain on DigitalOcean DNS settings page:
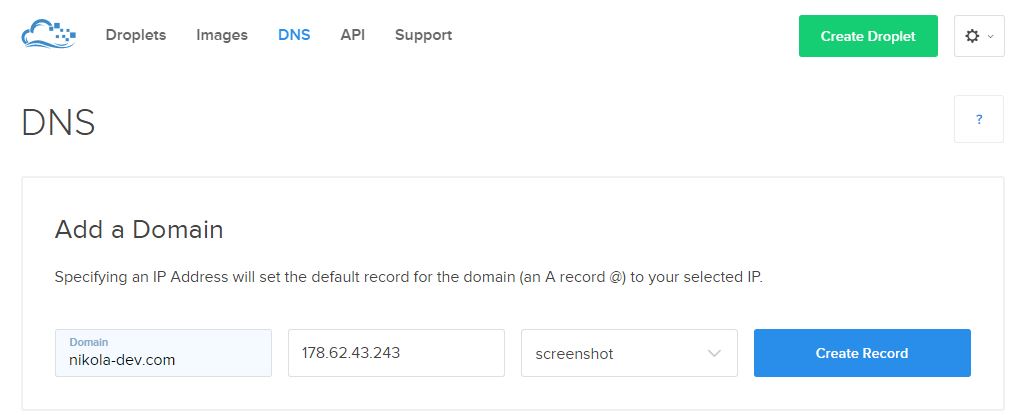
    digitalOcean_dns
  4. Delete /etc/nginx/sites-enabled/default
  5. Create /etc/nginx/sites-available/nikola-dev.com file with the following content (this will be a simple single HTML file which will list the available test apps on this server):
    server {
        listen 80;
        server_name nikola-dev.com;
        root /var/www/nikola-dev.com/public_html;
    }
  6. Create /etc/nginx/sites-available/mean.nikola-dev.com file with the following content (this will serve the actual Node.js app that we’re building in this tutorial):
    server {
        listen 80;
    
        server_name mean.nikola-dev.com;
    
        location / {
            proxy_pass http://127.0.0.1:3000;
            proxy_http_version 1.1;
            proxy_set_header Upgrade $http_upgrade;
            proxy_set_header Connection 'upgrade';
            proxy_set_header Host $host;
            proxy_cache_bypass $http_upgrade;
        }
    }
  7. Restart NGINX:
    sudo service nginx restart

Adding a comment field to Article example

  1. In the file app/models/article.server.model.js add:
    comment: {
    	type: String,
    	default: '',
    	trim: true
    },

    For the reference, the whole app/models/article.server.model.js file contents should look like this:

    'use strict';
    
    /**
     * Module dependencies.
     */
    var mongoose = require('mongoose'),
            Schema = mongoose.Schema;
    
    /**
     * Article Schema
     */
    var ArticleSchema = new Schema({
            created: {
                    type: Date,
                    default: Date.now
            },
            title: {
                    type: String,
                    default: '',
                    trim: true,
                    required: 'Title cannot be blank'
            },
            content: {
                    type: String,
                    default: '',
                    trim: true
            },
            user: {
                    type: Schema.ObjectId,
                    ref: 'User'
            },
            comment: {
                    type: String,
                    default: '',
                    trim: true
            }
    });
    
    mongoose.model('Article', ArticleSchema);
  2. In the file public/modules/articles/views/create-article.client.view.html add the following content before the submit button:
    <div class="form-group">
    	<label class="control-label" for="comment">Comment</label>
    	<div class="controls">
    		<textarea name="comment" data-ng-model="comment" id="comment" class="form-control" cols="30" rows="10" placeholder="Comment"></textarea>
    	</div>
    </div>

    For the reference, the whole public/modules/articles/views/create-article.client.view.html file contents should look like this:

    <section data-ng-controller="ArticlesController">
            <div class="page-header">
                    <h1>New Article</h1>
            </div>
            <div class="col-md-12">
                    <form name="articleForm" class="form-horizontal" data-ng-submit="create()" novalidate>
                            <fieldset>
                                    <div class="form-group" ng-class="{ 'has-error': articleForm.title.$dirty && articleForm.title.$invalid }">
                                            <label class="control-label" for="title">Title</label>
                                            <div class="controls">
                                                    <input name="title" type="text" data-ng-model="title" id="title" class="form-control" placeholder="Title" required>
                                            </div>
                                    </div>
                                    <div class="form-group">
                                            <label class="control-label" for="content">Content</label>
                                            <div class="controls">
                                                    <textarea name="content" data-ng-model="content" id="content" class="form-control" cols="30" rows="10" placeholder="Content"></textarea>
                                            </div>
                                    </div>
    
    								<div class="form-group">
    								        <label class="control-label" for="comment">Comment</label>
    								        <div class="controls">
    								                <textarea name="comment" data-ng-model="comment" id="comment" class="form-control" cols="30" rows="10" placeholder="Comment"></textarea>
    								        </div>
    								</div>
    								
                                    <div class="form-group">
                                            <input type="submit" class="btn btn-default">
                                    </div>
                                    <div data-ng-show="error" class="text-danger">
                                            <strong data-ng-bind="error"></strong>
                                    </div>
                            </fieldset>
                    </form>
            </div>
    </section>
  3. In the file public/modules/articles/controllers/articles.client.controller.js adjust the create function to be:
    var article = new Articles({
    title: this.title,
    content: this.content,
    comment: this.comment
    });

    For the reference, the whole public/modules/articles/controllers/articles.client.controller.js file contents should look like this:

    'use strict';
    
    angular.module('articles').controller('ArticlesController', ['$scope', '$stateParams', '$location', 'Authentication', 'Articles',
            function($scope, $stateParams, $location, Authentication, Articles) {
                    $scope.authentication = Authentication;
    
                    $scope.create = function() {
                            var article = new Articles({
                                    title: this.title,
                                    content: this.content,
                                    comment: this.comment
                            });
                            article.$save(function(response) {
                                    $location.path('articles/' + response._id);
    
                                    $scope.title = '';
                                    $scope.content = '';
                            }, function(errorResponse) {
                                    $scope.error = errorResponse.data.message;
                            });
                    };
    
                    $scope.remove = function(article) {
                            if (article) {
                                    article.$remove();
    
                                    for (var i in $scope.articles) {
                                            if ($scope.articles[i] === article) {
                                                    $scope.articles.splice(i, 1);
                                            }
                                    }
                            } else {
                                    $scope.article.$remove(function() {
                                            $location.path('articles');
                                    });
                            }
                    };
    
                    $scope.update = function() {
                            var article = $scope.article;
    
                            article.$update(function() {
                                    $location.path('articles/' + article._id);
                            }, function(errorResponse) {
                                    $scope.error = errorResponse.data.message;
                            });
                    };
    
                    $scope.find = function() {
                            $scope.articles = Articles.query();
                    };
    
                    $scope.findOne = function() {
                            $scope.article = Articles.get({
                                    articleId: $stateParams.articleId
                            });
                    };
            }
    ]);
    
  4. In the file public/modules/articles/views/view-article.client.view.html add this just before the closing section tag:
    <p data-ng-bind="article.comment"></p>

    For the reference, the whole public/modules/articles/views/view-article.client.view.html file contents should look like this:

    <section data-ng-controller="ArticlesController" data-ng-init="findOne()">
            <div class="page-header">
                    <h1 data-ng-bind="article.title"></h1>
            </div>
            <div class="pull-right" data-ng-show="authentication.user._id == article.user._id">
                    <a class="btn btn-primary" href="/#!/articles/{{article._id}}/edit">
                            <i class="glyphicon glyphicon-edit"></i>
                    </a>
                    <a class="btn btn-primary" data-ng-click="remove();">
                            <i class="glyphicon glyphicon-trash"></i>
                    </a>
            </div>
            <small>
                    <em class="text-muted">
                            Posted on
                            <span data-ng-bind="article.created | date:'mediumDate'"></span>
                            by
                            <span data-ng-bind="article.user.displayName"></span>
                    </em>
            </small>
            <p class="lead" data-ng-bind="article.content"></p>
            <p data-ng-bind="article.comment"></p>
    </section>
  5. This is it, now you have a new field comment for each article:
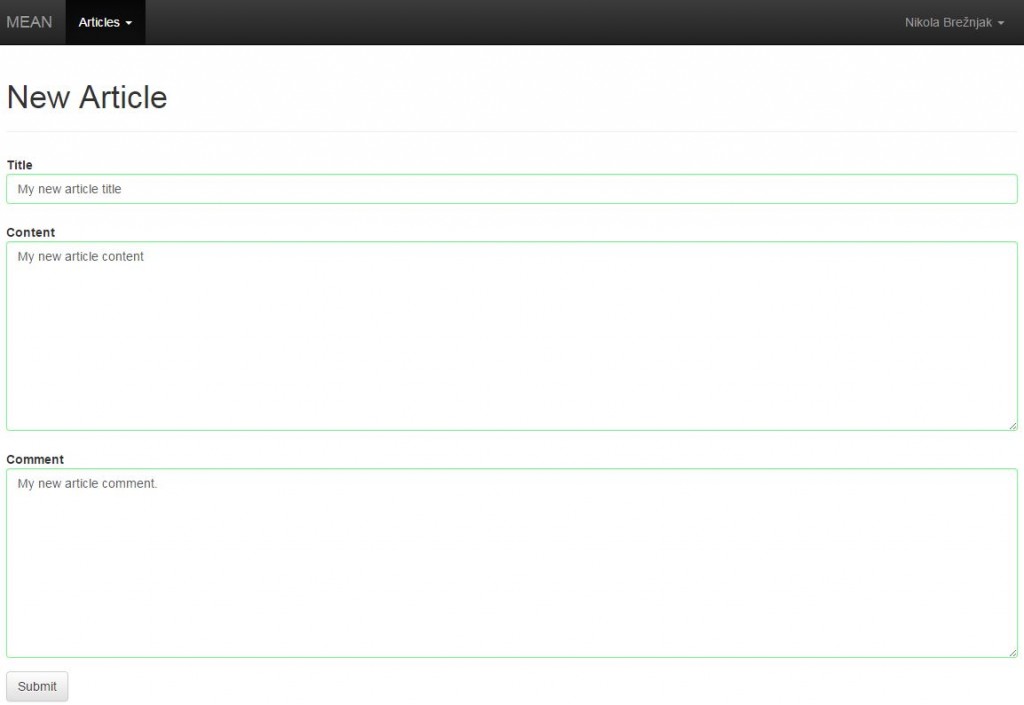
    meanCommentAddingOnce added, you’ll see the comment in the article list:meanCommentAddedJPG
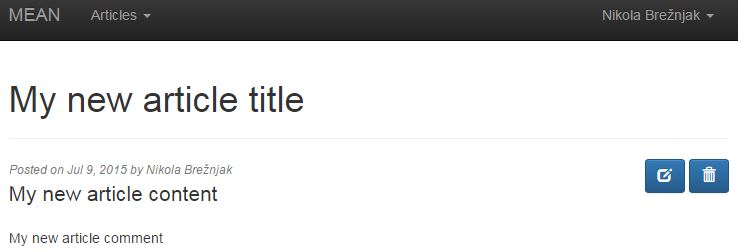
  6. What you should do now, and I hope it’s clear form these instructions here, is alter the editing part of the articles, so that they include the comment field.

Where to go from here?

This tutorial should have given you the basic understanding on how to add additional fields to the MEAN.js Article example, and you should be confident enough to starting adding your own fields and altering the example to your liking.

In the next tutorial we’ll take a look at how to add Image CRUD module to MEAN.js application with a single Yeoman command (I will update the link here once the tutorial is finished).

If you want to learn more about the MEAN stack, take a look at the blog2book Getting MEAN with MEMEs (yes, you can download it for free, though a coffee would be nice smileyGlasses).

CodeProject, MEAN

How to get your MEAN stack up and running in less than a minute

Over the past year I’ve tried lots of options for hosting my MEAN applications, and finally I’ve settled for DigitalOcean. It’s true what they advertise – that you can have a SSD cloud server up and running in less than 55 seconds. However, you don’t have to go spending your hard earned cash just yet – I have a special deal with DigitalOcean and you can signup via this link and get 10$ immediately, which will be enough for 2 full months of non stop server running. They even provide you with API so that you can control your server, and this tutorial shows you how.

I don’t want to make it look like I’m pushing you on DigitalOcean – you can sign up with someone else if you like, I just recommend them because I had a good experience with them in the past and because it’s so easy to get a MEAN stack all pre-installed (more on this in a bit) and ready for use.

Create a droplet

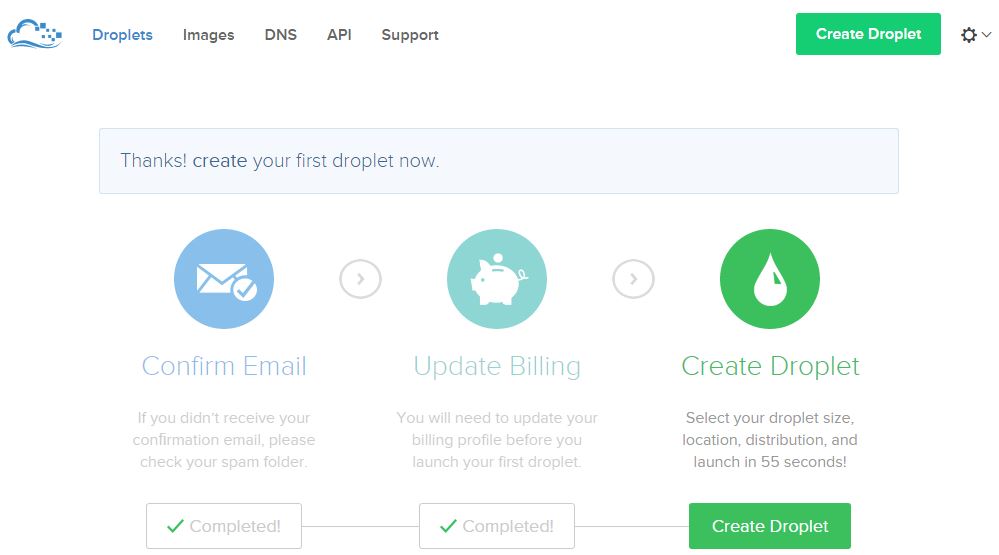
Once you complete the sign up on DigitalOcean  you will be presented with a similar screen, as show on the image below, where you have to click on the Create Droplet button:

DO_1_createDroplet

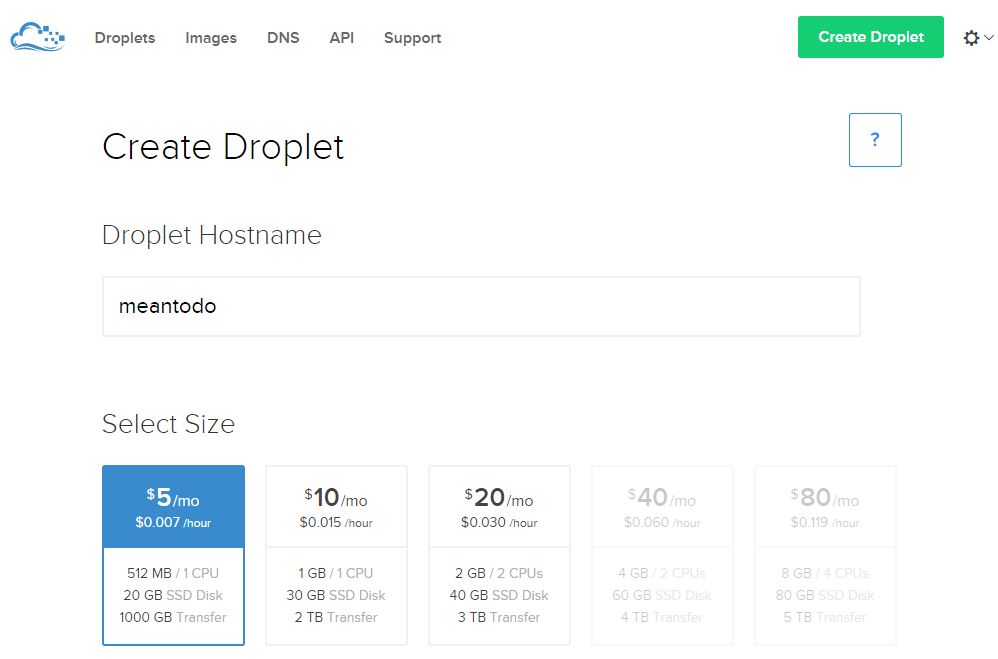
Next, you have to name your droplet (cool name the folks at DigitalOcean chose to call their server instances) and select the size (the smallest one will be just fine here), just as it’s shown on the image below:

DO_2_nameAndSize

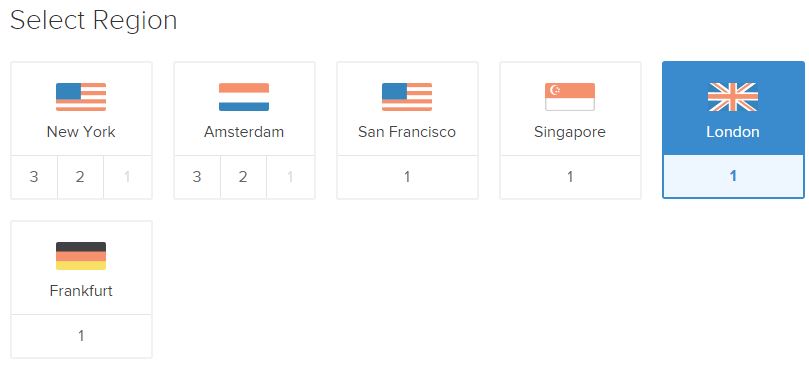
After this, you have to choose a region, as shown on the image below. Naturally, you’ll want to choose some location which is closer to your targeted audience.

DO_3_region

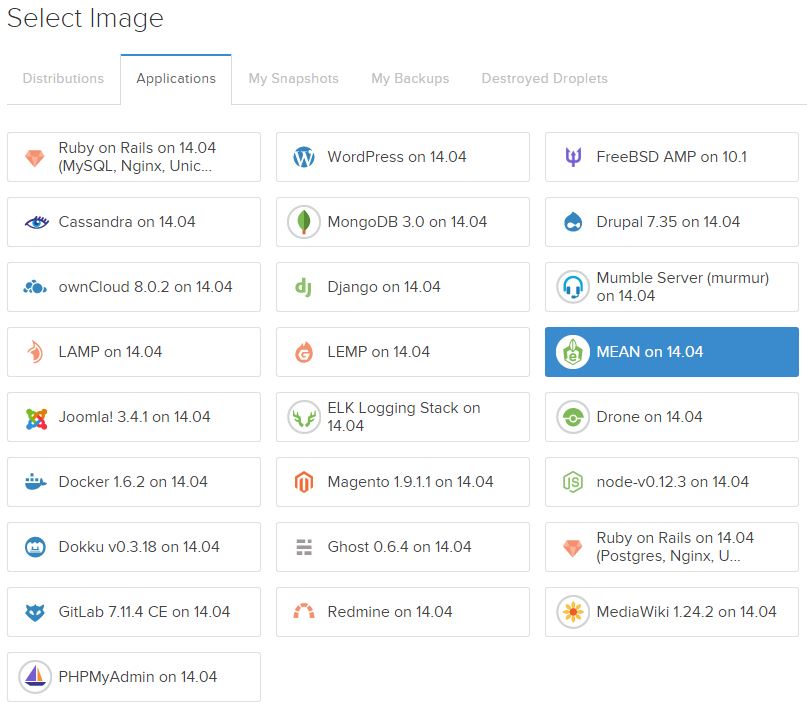
Now comes the most awesome part. In Select Image section you have tons of options ranging from the barebones distributions (Centos, Ubuntu, Debian, etc.), to the pre-built stacks (LAMP, LEMP, WordPress, ROR, MEAN, etc.) like shown on the image below. Here you have to choose the MEAN on 14.04 option (YMMV on the exact number), and this is awesome because with this droplet you won’t have to go through the hassle of installing Node.js, Express and MongoDB as we did in the first tutorial – it will be already done and waiting for you! B-E-A-utiful!

DO_4_image

Then, just wait a few seconds and your droplet will be ready:

DO_5_waiting

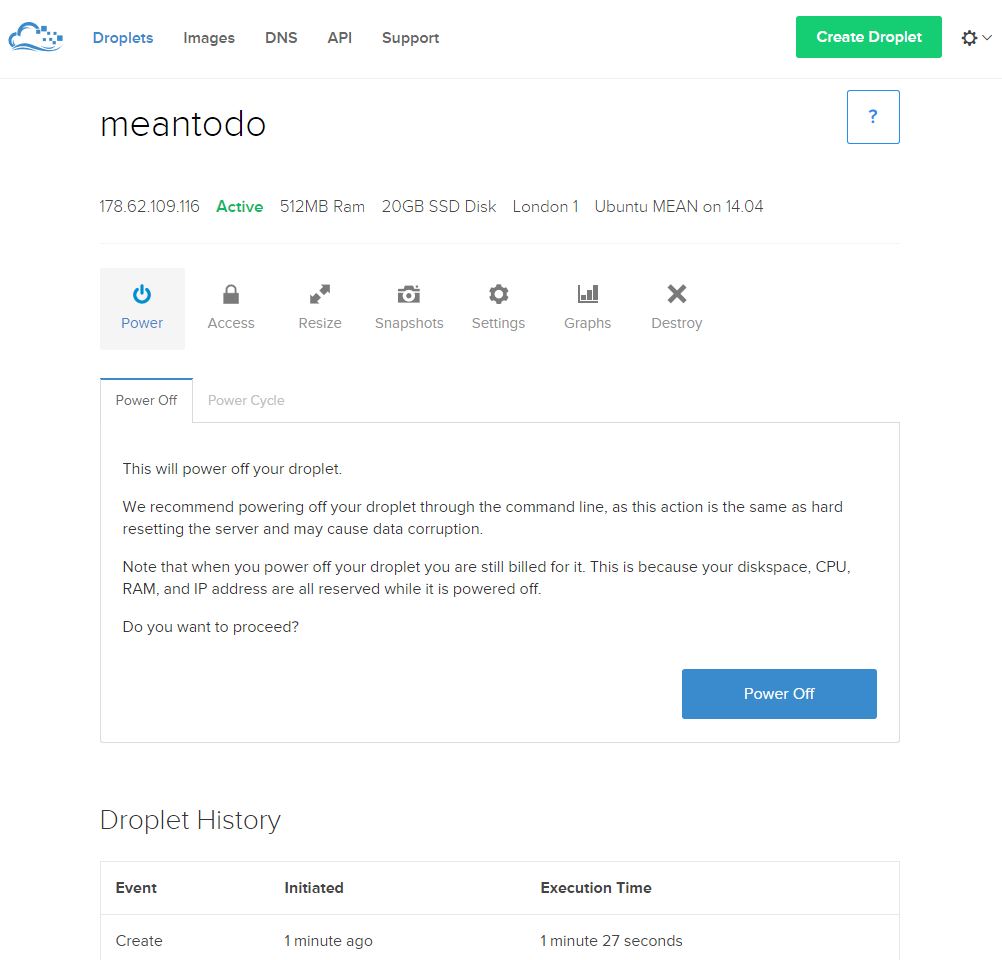
You’ll be redirected to the dashboard (once the droplet is created) which will look something like the image below:

DO_6_created

Connect to the droplet

On your email address you will receive instructions which will look something like on the image below:

DO_7_email

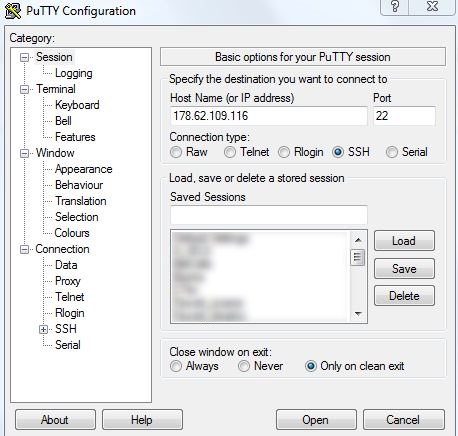
Now, using a SSH client of your choice (I’m currently on Windows so not much leeway here :)) connect to the droplet. The image below shows the setting from the Putty SSH client on Windows:

DO_8_putty_2

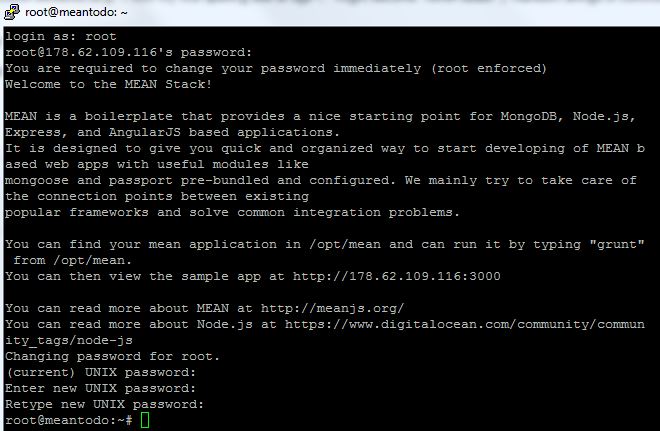
You have to connect with the root user and the password that was emailed to you. However, immediately upon logging in you will get a notification that you have to change the root’s password, as shown on the image below:

DO_9_rootLogin

Create a new user

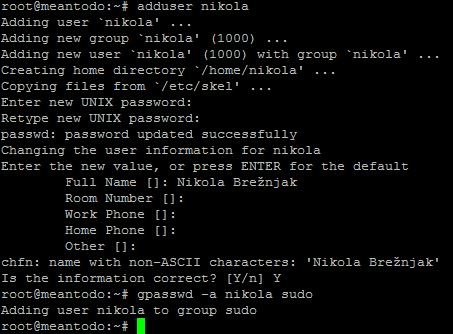
Using root user in linux is bad practice, so now you’re going to create a new user with the following command:

useradd nikola

Of course, you can use any username you want. After this add the user to the sudo group by executing the following command:

gpasswd -a nikola sudo

The sudo group enables the user nikola to use the sudo command when using some commands that are restricted to root user. You can learn more about sudo here. The image below shows the example of the commands I just listed:

DO_10_userAdd

Run

Now just run

grunt

and if you visit your ip address on port 3000 you should see:

Screen Shot 2015-06-28 at 14.32.35

What you now have running is a well known MEAN.js framework. You may have also heard about MEAN.io and you can learn about the difference in my post about MEAN.io vs MEAN.js.

Use your own domain

In case you bought (or have somewhere hanging in the closet from the 90’s .com boom) a domain that you would like to use to point to your droplet you have to go to the DNS settings and add a domain like shown on the image below:

DO_11_DNS

Also, in your domain registrar (where you bought your domain – think Godaddy, Namecheap, Hostgator, etc.) you have to set the corresponding nameservers to:

  • ns1.digitalocean.com
  • ns2.digitalocean.com
  • ns3.digitalocean.com

You can learn more about this on the official Digital Ocean guide.

Using PM2

Running your Node.js application by hand is, well, not the way we roll. Imagine restarting the app every time something happens, or god forbid application crashes in the middle of the night and you find about it only in the morning – ah the horror. PM2 solves this by:

  • allowing you to keep applications alive forever
  • reloading applications without downtime
  • facilitating common system admin tasks

To install PM2, run the following command:

sudo npm install pm2 -g

To start your process with PM2, run the following command (once in the root of your application):

pm2 start server.js

As you can see from the output shown on the image below, PM2 automatically assigns an App name (based on the filename, without the .js extension) and a PM2 id. PM2 also maintains other information, such as the PID of the process, its current status, and memory usage.

PM2

As I mentioned before, the application running under PM2 will be restarted automatically if the application crashes or is killed, but an additional step needs to be taken to get the application to launch on system startup (boot or reboot). The command to do that is the following:

pm2 startup ubuntu

The output of this command will instruct you to execute an additional command which will enable the actual startup on boot or reboot. In my case the note for the additional command was:

sudo env PATH=$PATH:/usr/local/bin pm2 startup ubuntu -u nikola

If you want to learn more about the additional PM2 options you can take a look at this post.

Using NGINX as a Reverse proxy in front of your Node.js application

Though this step is not mandatory, there are several benefits of doing so, as answered in this Stack Overflow question:

  • Not having to worry about privileges/setuid for the Node.js process. Only root can bind to port 80 typically. If you let nginx/Apache worry about starting as root, binding to port 80, and then relinquishing its root privileges, it means your Node app doesn’t have to worry about it.
  • Serving static files like images, CSS, js, and HTML. Node may be less efficient compared to using a proper static file web server (Node may also be faster in select scenarios, but this is unlikely to be the norm). On top of files serving more efficiently, you won’t have to worry about handling eTags or cache control headers the way you would if you were servings things out of Node. Some frameworks may handle this for you, but you would want to be sure. Regardless, still probably slower.
  • More easily display meaningful error pages or fall back onto a static site if your node service crashes. Otherwise users may just get a timed out connection.
  • Running another web server in front of Node may help to mitigate security flaws and DoS attacks against Node. For a real-world example, CVE-2013-4450 is prevented by running something like Nginx in front of Node.

So, with being convinced that having NGINX in front of Node.js application is a good thing, following are the steps on how to install and configure it.

First, update the apt-get package lists with the following command:

sudo apt-get update

Then install NGINX using apt-get:

sudo apt-get install nginx

Now open the default server block configuration file for editing:

sudo vi /etc/nginx/sites-available/default

and add this to it:

server {
    listen 80;

    server_name meantodo.com;

    location / {
        proxy_pass http://127.0.0.1:3000;
        proxy_http_version 1.1;
        proxy_set_header Upgrade $http_upgrade;
        proxy_set_header Connection 'upgrade';
        proxy_set_header Host $host;
        proxy_cache_bypass $http_upgrade;
    }
}

This configures the web server to respond to requests at its root. Assuming our server is available at http://meantodo.com, accessing it via a web browser would send the request to the application server’s private IP address on port 3000, which would be received and replied to by the Node.js application.

Once you’re done with the setting you have to run the following command which will restart NGINX:

sudo service nginx restart

You can learn more about additional NGINX setting from quite a load of tutorials.

Faking RAM with swap

Since we chose the smallest droplet version of 512 MB we can use swap to make this droplet perform better. Swap is an area on a hard drive that has been designated as a place where the operating system can temporarily store data that it can no longer hold in RAM. For a more indepth tutorial on this you may want to check out official DigitalOcean guide.

In order to allocate a swap file space execute the following command:

sudo fallocate -l 1G /swapfile

Then restrict it to only root user by executing:

sudo chown 600 /swapfile

With the next two commands you actually setup the swap space and enable it:

sudo mkswap /swapfile
sudo swapon /swapfile

To view the swap space information you can execute:

sudo swapon -s

To enable swap automatically when the server restarts you have to add the following content to the /etc/fstab file:

/swapfile   none    swap    sw    0   0

Additionally, there are two more settings worth changing:

  • swappiness  – parameter which determines how often your system swaps data out of RAM to the swap space. The value is between 0 and 100 and represents a percentage (60 is the default, but we’ll use 10 since we’re on a VPS)
  • vfs_cache_pressure – parameter which determines how much the system will choose to cache inode and dentry information over other data (default value is 100, but we’ll use 50)

In order to make this change append the /etc/sysctl.conf file with the following content:

vm.swappiness=10
vm.vfs_cache_pressure = 50

Other security concerns

If you want to learn more on how to secure your droplet I advise you to go over the steps in the initial server setup with Ubuntu on official DigitalOcean tutorial.

A freakin’ 150+ page MEAN tutorial PDF

This is actually an excerpt from the 4 part tutorial series I wrote for HackHands. If you like you can also take a look at all those posts combined into one big PDF file via LeanPub:

Screen Shot 2015-06-28 at 14.45.42


P.S. It’s an intentional typo, since if you’re proud of getting something in production then it’s called a prouduction 😉

P.P.S. You can enter any amount (yes, even 0$) and I won’t take it against you ;), though a coffee would be nice smileyGlasses

hand_rock_n_roll on!

MEAN

MEAN T-shirt graphic, presentation and video

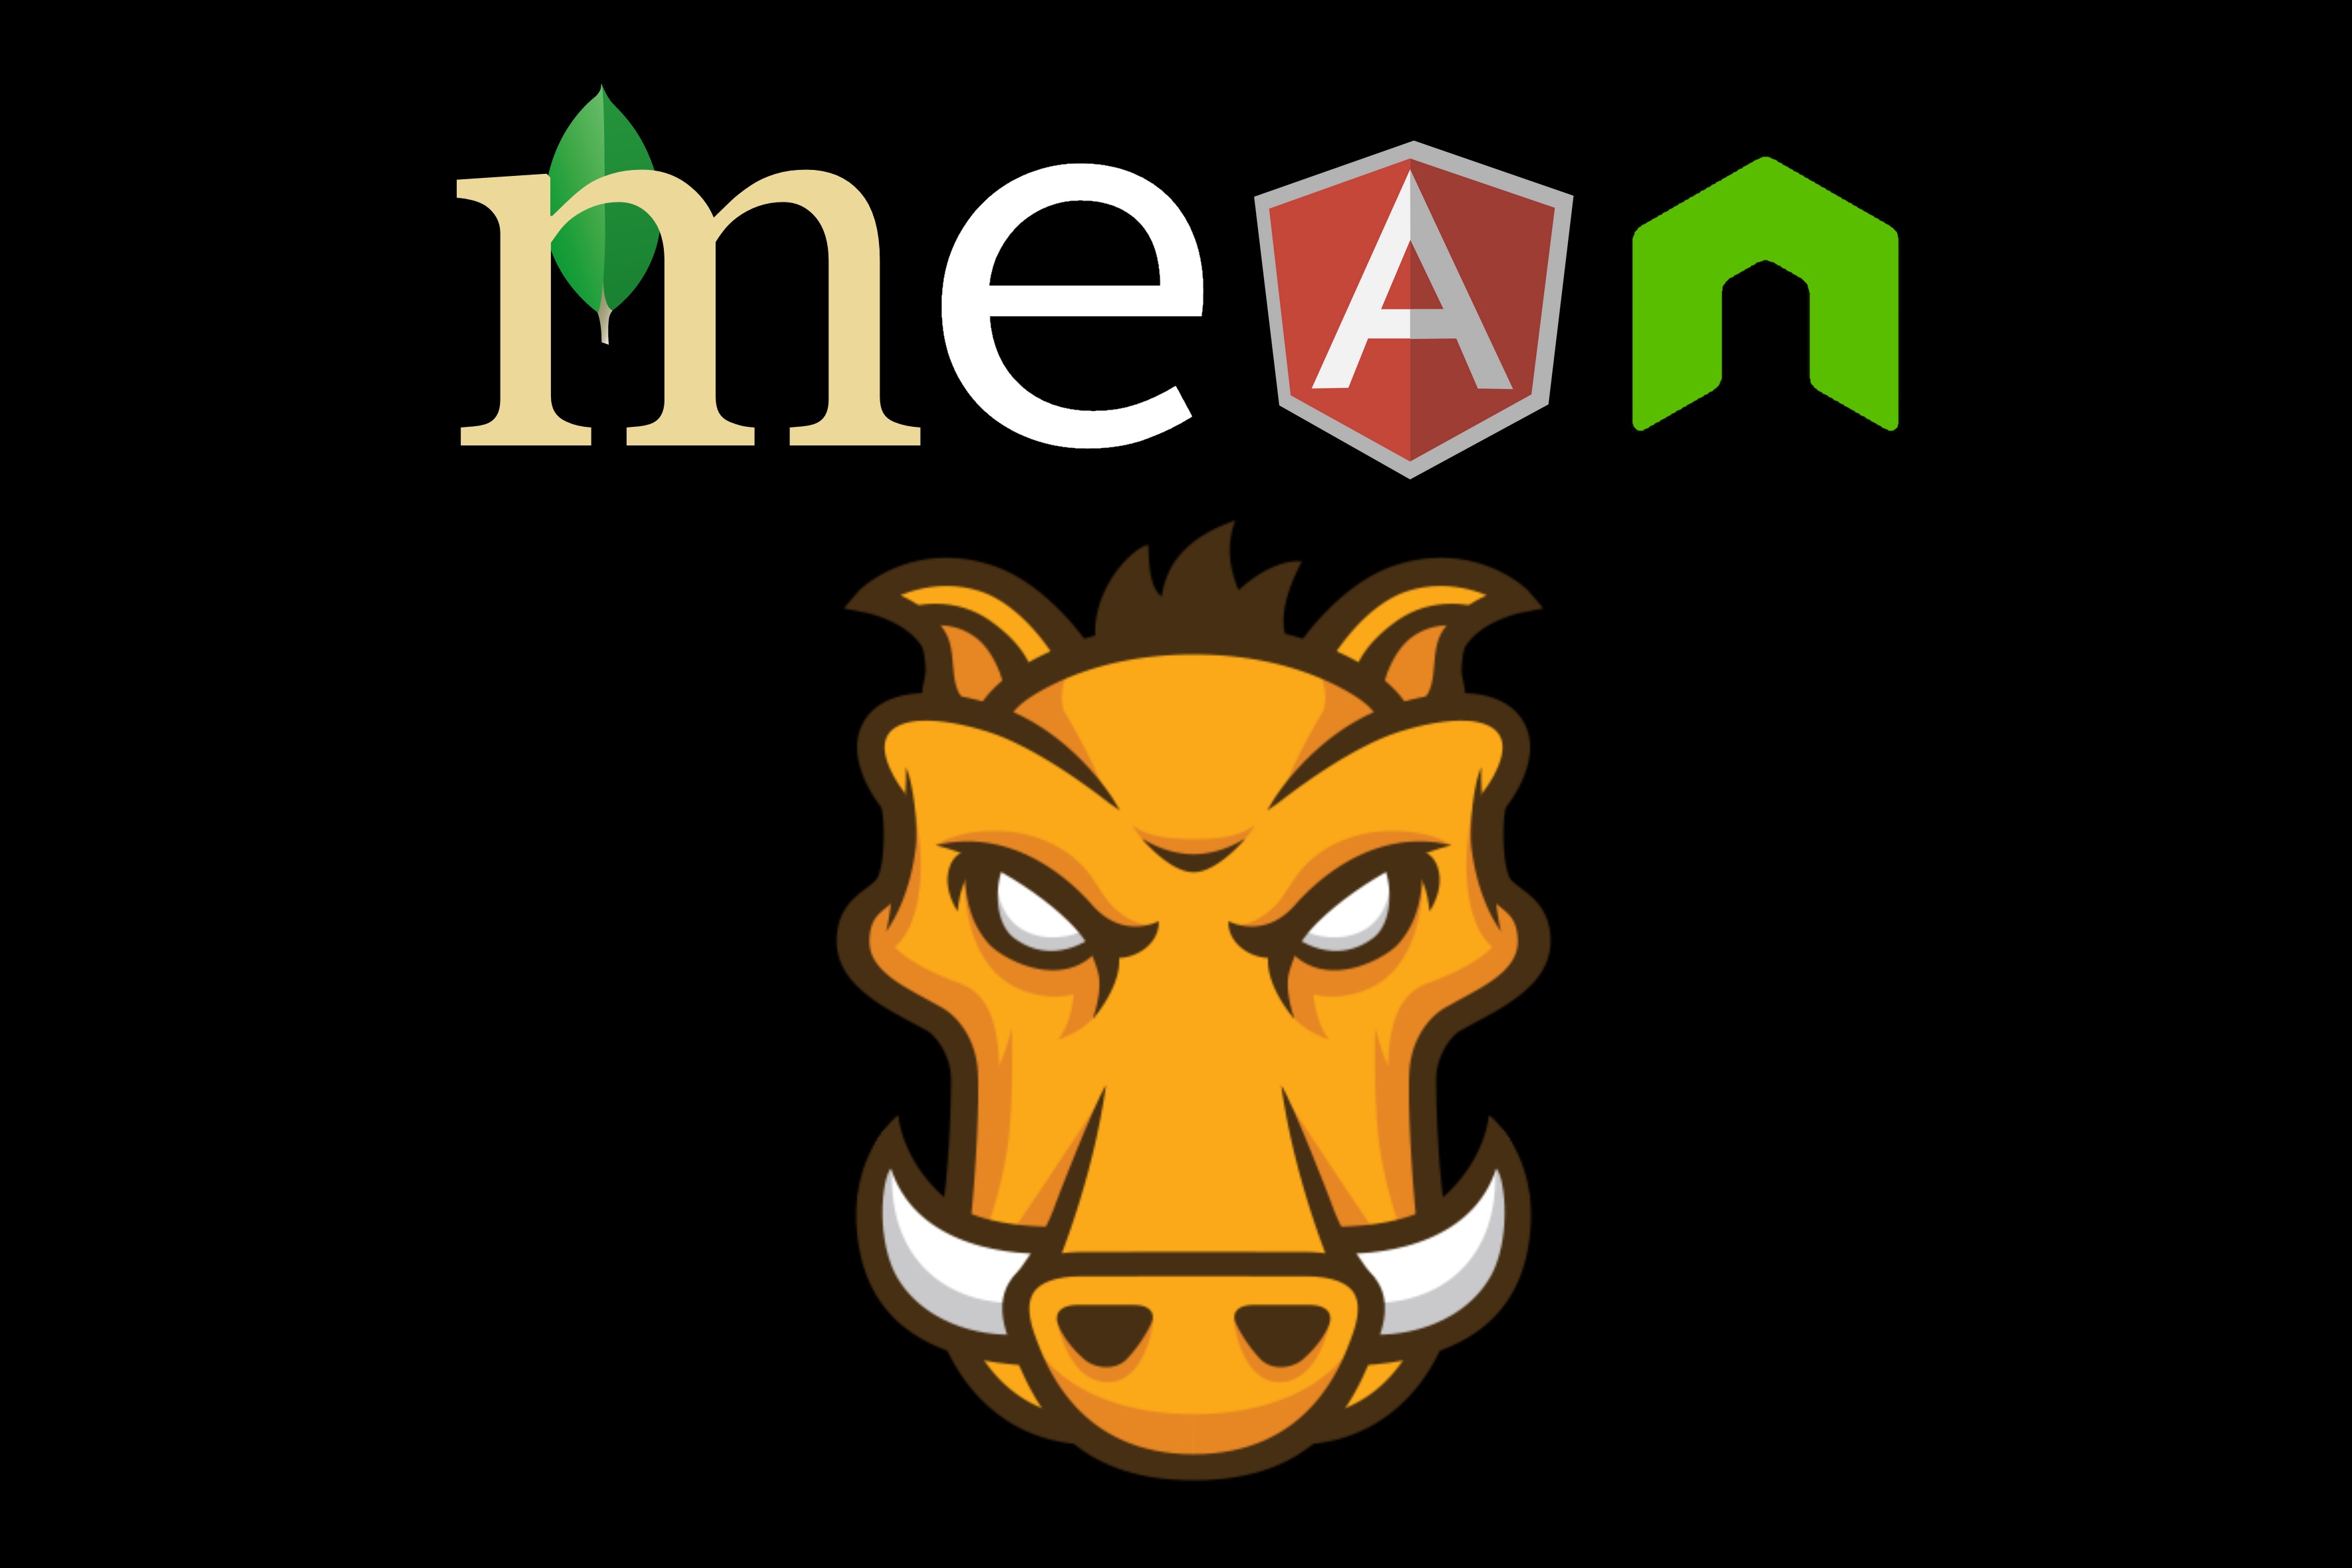
Since I’m all into MEAN stack lately, I made a custom graphic for a MEAN T-shirt. Also, I made the presentation and a talk for hack.hands().

I’m giving the image here freely without any restrictions, yada, yada, use it whatever way you like, just don’t sue me if someone will tell you you’re a mean person :P. You can send the image to your local T-shirt makers, or you can order it from my SpreadShirt store.

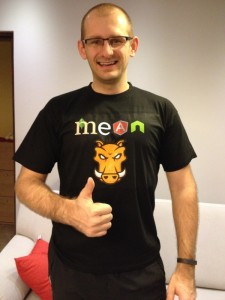
The T-shirt looks like this on me:

IMG_2617

Desktop background version can be downloaded here (Right click, Save Image As):MEAN_1_black

And a transparent PNG version ideal for a black T-shirt can be downloaded here (Right click, Save Image As):

MEAN_1

I got a t-shirt made at a reasonable price here in Croatia at t-shirtmania.hr.

The video of the talk in full on youtube below, and the two posts in a series of getting started on a MEAN stack are here:

  • https://hackhands.com/how-to-get-started-on-the-mean-stack/
  • https://hackhands.com/delving-node-js-express-web-framework/

Recent posts

  • Discipline is also a talent
  • Play for the fun of it
  • The importance of failing
  • A fresh start
  • Perseverance

Categories

  • Android (3)
  • Books (114)
    • Programming (22)
  • CodeProject (35)
  • Daily Thoughts (77)
  • Go (3)
  • iOS (5)
  • JavaScript (127)
    • Angular (4)
    • Angular 2 (3)
    • Ionic (61)
    • Ionic2 (2)
    • Ionic3 (8)
    • MEAN (3)
    • NodeJS (27)
    • Phaser (1)
    • React (1)
    • Three.js (1)
    • Vue.js (2)
  • Leadership (1)
  • Meetups (8)
  • Miscellaneou$ (77)
    • Breaking News (8)
    • CodeSchool (2)
    • Hacker Games (3)
    • Pluralsight (7)
    • Projects (2)
    • Sublime Text (2)
  • PHP (6)
  • Quick tips (40)
  • Servers (8)
    • Heroku (1)
    • Linux (3)
  • Stack Overflow (81)
  • Unity3D (9)
  • Windows (8)
    • C# (2)
    • WPF (3)
  • Wordpress (2)

"There's no short-term solution for a long-term result." ~ Greg Plitt

"Everything around you that you call life was made up by people that were no smarter than you." ~ S. Jobs

"Hard work beats talent when talent doesn't work hard." ~ Tim Notke

© since 2016 - Nikola Brežnjak