

In case you’re looking for a way to implement Google AdMob ads in Ionic framework 3, then check out this tutorial: How to make money with Google AdMob ads in Ionic framework 3.
If you want, you can take a look at the screencast of this tutorial. This is actually my first ![]() screencast blog post so go easy on me 🙂
screencast blog post so go easy on me 🙂
I’ve been searching for a start to end tutorial on this but with no luck. Now, when I finally figured out how to use it, I’m documenting the exact steps which I did in order to get the AdMob working inside my Ionic app. You can fork the project from GitHub or download and test the .apk file on your device.
I broke down the steps in two parts: AdMob settings and Ionic settings.
AdMob settings
Let’s start with AdMob settings:
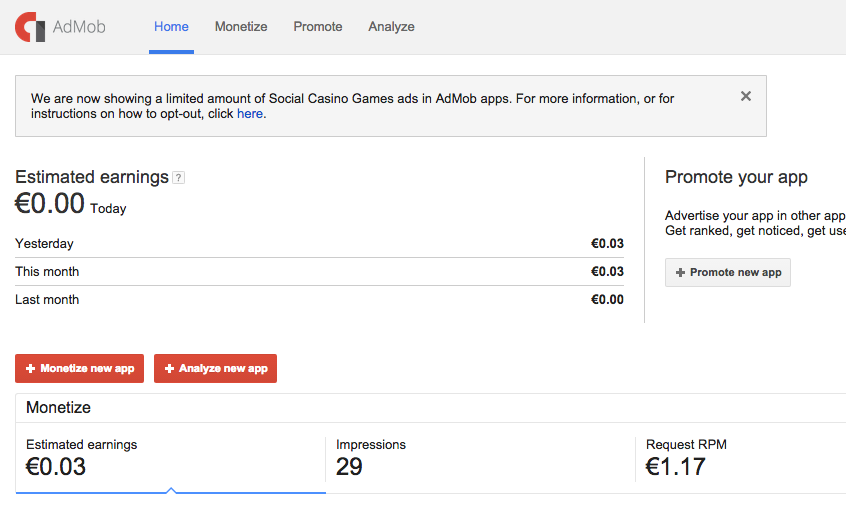
- Sign in /Sign up for AdMob at https://www.google.com/admob/
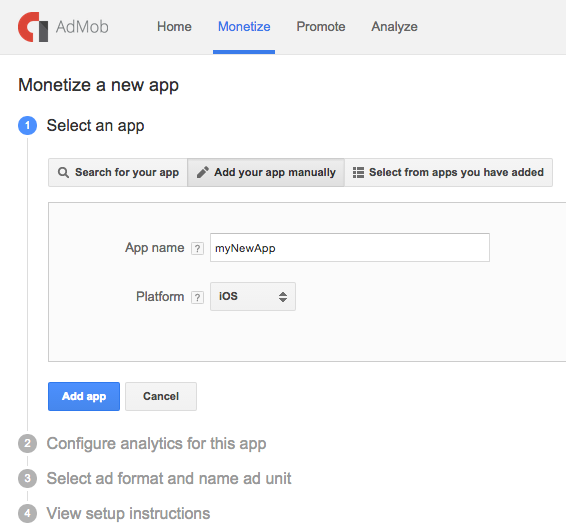
- Click the Monetize new app button:
- If your app is not yet published you can add it manually:
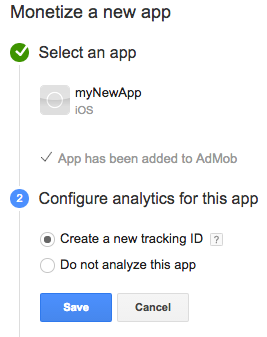
- Create new tracking ID:
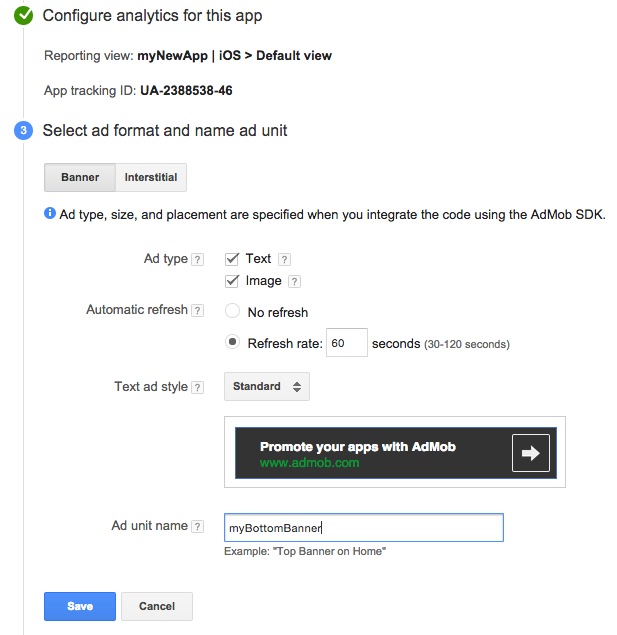
- Configure the adds type, size, placement, style, name:
- You can read additional info on how to implement GA and AdMob, but for now let’s just click Done:
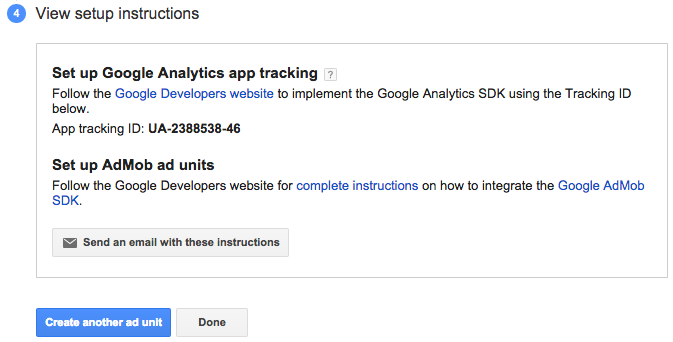
- You will now see the following similar screen:
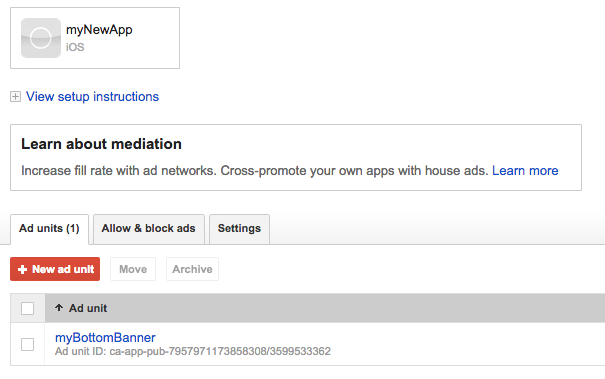
The most important thing to note here is this Ad unit ID, which in my test case is
ca-app-pub-7957971173858308/3599533362
Ionic settings
I’m counting on the fact that you know how to use Ionic since you’re looking for a specific topic like this, so am going skip the part of actually explaining how to use the Ionic cli. Ok, enough chit-chat, now I’m going to show you the steps on how to implement AdMob in your Ionic project:
- Start a new Ionic blank project:
ionic create IonicAdMobTest blank
- Add the platform for which you want to build the application:
-
ionic platform add android
In case you’re developing on a Mac, you can also choose to add:
ionic platform add ios
- Add the cordova-plugin-admob plugin by entering the following command in your command prompt when in the root folder of your project:
cordova plugin add com.rjfun.cordova.plugin.admob
As a side note, you can always check the list of all installed plugins by executing:
cordova plugin list
- Add the following code to your app.js file (located in the www folder) inside the .run function:
.run(function($ionicPlatform) {
    $ionicPlatform.ready(function() {
        // Hide the accessory bar by default (remove this to show the accessory bar above the keyboard
        // for form inputs)
        if (window.cordova && window.cordova.plugins.Keyboard) {
            cordova.plugins.Keyboard.hideKeyboardAccessoryBar(true);
        }
        if (window.StatusBar) {
            // org.apache.cordova.statusbar required
            StatusBar.styleDefault();
        }

        if(window.plugins && window.plugins.AdMob) {
            var admob_key = device.platform == "Android" ? "ca-app-pub-7957971173858308/3666912163" : "ca-app-pub-7957971173858308/3666912163";
            var admob = window.plugins.AdMob;
            admob.createBannerView(
                {
                    'publisherId': admob_key,
                    'adSize': admob.AD_SIZE.BANNER,
                    'bannerAtTop': false
                },
                function() {
                    admob.requestAd(
                        { 'isTesting': false },
                        function() {
                            admob.showAd(true);
                        },
                        function() { console.log('failed to request ad'); }
                    );
                },
                function() { console.log('failed to create banner view'); }
            );
        }
    });
})
Of course, change it according to your own admob_key which you obtained in the first part (step 8).
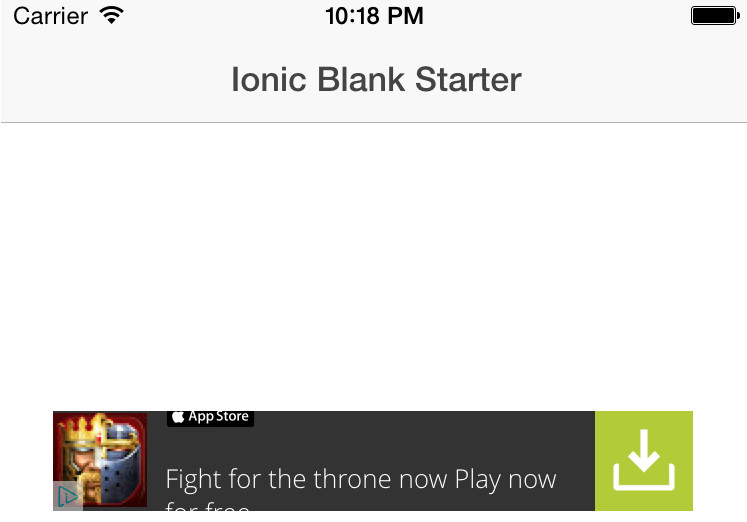
- Start the emulator by running:
ionic build ios && ionic emulate ios

//or, for android
ionic build android && ionic emulate android
- and you should get the following screen in your emulated application:
- You can clone the project from GitHub, or download the .apk (unzip needed) file and test on your Android device.
That’s all folks, hope this helps someone by saving time on endless testing as I did :/


