I rated the book The passionate programmer by Chad Fowler as favorite on my Shelfari account and shortly reviewed it as:
Trully a classic in our field!
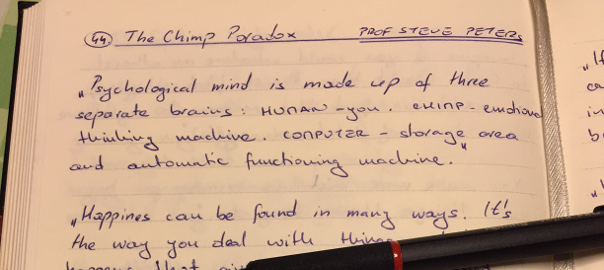
Those of you who have been following my Books category know that I like to mark the passages that I find valuable from books that I read (and somewhere also add my own piece of wisdom  ), like for example:
All in all, below are my notes from this book (yes, I know – there are quite a lot of them), and I’m sure a lot of them will resonate with you and I’m sure you’ll want to get a physical copy for yourself too (if for nothing else, then for doodling on it ;)). Best of all, the book is currently 43% off on Amazon for only $13.58.
I believe that everyone has remarkable in them but that it takes finding something they truly care about to draw it out. You can’t be remarkable if you don’t love your environment, your tools, and your domain.
To become remarkable, you have to believe that you’re making a significant dent in the universe.
Most people spend far more of their waking adulthood working than doing anything else.
If your life is primarily consumed by your work, then loving your work is one of the most important keys to loving your life. Challeng-ing, motivating, rewarding work is more likely to make you want to get up in the morning than dull, average tasks. Doing your job well means that the activity you do for 50 percent of your available time is something you’re good at. Conversely, if you don’t do your job well, a large amount of your time will be spent feeling inadequate or guilty over not performing at your best.
You don’t win a race by trying not to lose.
Kent Beck Extreme programming explained
A person who wants to become great is far more likely to become great than someone who just wants to do their job.
Most people follow everyone else’s plan but their own. To start differentiating yourself, all you have to do is stop and take a good look at your career. You need to be following your plan for you – not theirs.
Businesses don’t exist so we can have a place to go every day. The purpose of a business is to make money.
In The Pragmatic Programmer: From Journeyman to Master, Dave Thomas and Andy Hunt talk about programming by coincidence. Most programmers can relate to the idea: you start working on something, add a little code here, and add a little more there. Maybe you start with an example program that you copy and paste from a website. It seems to work, so you change it a little to be more like the program you really need. You don’t really understand what you’re doing, but you keep nudging the program around until it almost completely meets your needs. The trouble is, you don’t understand how it works, and like a house of cards, each new feature you add increases the likelihood your program will fall apart.
Which technologies should we invest in? Which domain should we develop expertise in? Should we go broad or deep with our knowledge? These are questions we really should be asking ourselves.
Imagine you’ve started a company and you’re developing what is destined to be the company’s flagship product. Without a “hit” with this product, your company is going to go bankrupt. How much attention do you pay to who your target customers are? Before actually manufacturing the product, how much thought do you put into what the product actually is? None of us would let decisions like these be made for us. We’d be completely attentive to every detail of the decision-making process.
So, why is it that most of us don’t pay this kind of attention to the choices we make in our careers? If you think of your career as a business (which it is), your “product” is made up of the services you have to offer. Is demand for your services going to grow or decline over the coming years?
15 years ago COBOL would be a low-rise choice. Low risk low reward. At the time if you invested in Java it would be high risk high reward. BeOS was high risk no reward at the time.
Picking a stable technology that has already wedged itself into the production systems of businesses worldwide is a safer, but potentially less rewarding, choice then picking a flashy new technology that nobody has deployed yet.
Make a list of early, middle, and late adoption technologies based on today’s market. Map them out on paper from left to right; the left is bleeding edge, and the right is filled by technologies that are in their sunsets. Push yourself to find as many technologies in each part of the spectrum as possible. Be as granular as possible about where in the curve they fall in relation to one another. When you have as many technologies mapped out as you can think of, mark the ones that you consider yourself strong in. Then, perhaps, in a different color, mark the ones that you have some experiehce with but aren’t authoritative on. Where are most of your marks on the adoption curve? Do they clump? Are they spread evenly across? Are there any technologies around the far edges that you have some special interest in?
As a .NET programmer, you may find yourself competing with tens of thousands of more people in the job market than you would if you were, for example, a Python programmer. This would result in the average cost of a .NET programmer decreasing significantly, possibly driving demand higher (in other words, creating more .NET jobs). So, you’d be likely to find jobs available, but the jobs wouldn’t pay all that well. If the Python job market were to support noticeably higher prices per programmer, additional people might be attracted to supply their services at this higher price range, resulting in competition that would drive the price back down.
India caters to the already balanced IT services markets. You don’t find mainstream Indian offshoring companies jumping on unconventional technologies. They aren’t first-movers. They generally don’t take chances.
You can’t compete on price, but you can compete on ability.
Research current technical skill demand. Use job posting and career websites to find out which skills are in high demand and in low demand. Find the websites of some offshore outsourcing companies (or talk to employees of those companies if you work with them). Compare the skills available via these companies with the high—demand list you compiled. Make note of which skills appear to be in high demand domestically with little penetration offshore. Do a similar comparison between bleading—edge technologies and the skills available via offshore outsourcing firms. Keep your eyes on both sets of technical skills that are underserved by the offshore companies. How long does it take for them to fill the holes (if ever)? This time gap is the window during which a market imbalance exists.
If you want to stay relevant,you’re going to have to dive into the domain of business you’re in.
Look for industry websites that you can monitor on a regular basis. In both the websites and the magazines, pay special attention to what the big news items and the feature articles are about. What is your industry struggling with? What’s the hot new issue right now? Whatever it is, bring it up with your business clients. Ask them to explain it and to give you their opinions. Think about how these current trends affect your company, your division, your team, and eventually your work.
Be the worst guy in every band you’re in. Being the worst guy in the band means always playing with people who are better than you.
So I learned from this that people can significantly improve its regress in skill, purely based on who they are performing with.
Pick an open source project that you admire and whose developers appear to be at that “next level” you’re looking to reach.
At the time I’d writing, the most popular language is Java, followed by C.
My explanation is that either good people seek out diversity, because they love to learn new things, or being forced into alien experiences and environments created more mature, well-rounded software developers.
For me, as a hiring manager, the first reason is that it shows that you’re interested. If I know you learned something for the sake for the sake of self-development and (better) pure fun, I know you are excited and motivated about your profession.
Learn a new language that makes you think in a new way.
Thinking about not losing is not the way to win! Winners take risks. They think about where do you want to go – not where the rest of the pack is.
But if your job isn’t fun, as we’ve come to realize, you don’t do a fantastic job at it.
More of us understand action leads to excellence. And without fun, there’s unlikely to be any passion in a software job.
Staying in the single company, working your way up the ranks, easily would think environment in which to grow as a developer. Gone are the days of the life for who would join a big company and settle in for a full career. This sort of behavior used to be assigned of the dictation. No it’s a liability. If you work in only one place and seen one set of systems, many [smart] managers would see that as a strike against you when making hiring decisions. I personally rather hire someone who has seen the variety of successes and failures in different environments than someone who has known only one way of doing things.
Programmer geeks can’t lead, and leaders can’t hack. It’s rare to find someone who’s even decent both.
Unfortunately, the software industry has turned out a whole lot of these shallow specialists who use the term specialist as an excuse for knowing only one thing.
This guy wanted to build his career around a specific technology created by a specific company of which he was not an employee. What if the company goes out of business? What if it let its now-sexy technology become obsolete? Why would you want to trust a technology company with your career?
The professional services barrier is the artificial barrier that a company erects between you and the solution to a problem you may have so that it can profit from selling you support services. Sometimes this barrier is intentionally erected, and sometimes it’s erected as a side effect of the attempt the company makes to protect its intellectual property (by not sharing its source code).
Try the small project, twice. Try it once in your home-based technology and then once, as idiomatically as possible, in the competing technology.
You have to be passionate about your work if you want to be great at your work. If you don’t care, it will show.
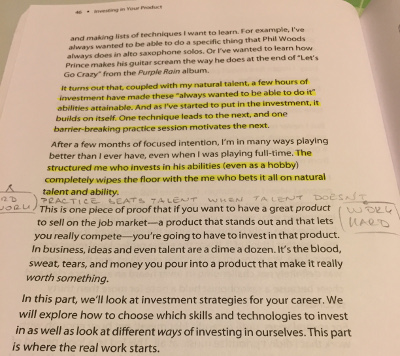
It turns out that, coupled with my natural talent, a few hours of investment have made these ”always wanted to be able to do it” abilities attainable. And as I’ve started to put in the investment, it builds on itself. One technique leads to the next, and one barrie-breaking practice session motivates the next. The structured me who invests in his abilities (even as a hobby) completely wipes the floor with the me who bets it all on natural talent and ability.
Lao Tzu said, ”Give a man a fish; feed him for a day. Teach a man to fish; feed him for a lifetime.” That’s all well and good. But Lao Tzu left out the part where the man doesn’t want to learn how to fish and he asks you for another fish tomorrow. Education requires both a teacher and a student.
Don’t ask to be taught, learn for yourself!
You can creatively help a business until you know how it works.
Depending on others is often seen as a sign of weakness.
It’s better to be moving in one direction than to be sitting still.
Important thing is that he narrowed down the long list of skills I could be learning to the short list of skills I learned.
If you want to really learn something, try teaching it to someone.
You don’t have to set up a formal mentoring relationship to get these benefits. Just start helping people, and the rest will come naturally.
If you always sound good during practice sessions, it means you’re not stretching your limits.
Important thing is to find your practice needs and to make sure you’re not practicing during your performances [on the job]. You have to make time for practice. It’s your responsibility.
codekata.com
Even with the abundance of prescriptive methodologies to choose from, it’s not likely you will ever work for a company that fully implement any of them. That’s OK. The best process to follow is the one that makes your team most productive and results in the best products.
Studying the work of masters is in the central part of becoming a master.
If you can hear the music or see the piece of art, you can learn from it. Thankfully, as a soft for developers we have access to practically infinite array of existing software in the form of open source software.
Sir Isaac Newton said, “If I have seen further, it’s by standing on the shoulders of giants.”
The standard IT management answer is that you add programmers to go faster. It’s wrong, but that’s what people believe.
Unless you’re really lucky, you’re probably not getting paid to be smart.
We are being paid to create value.
To be successful, wrong ability will get you only so far. The final stretch is populated by closures – people who finish things. This means getting up out of our reading chairs and getting things done.
Work expands so to fill time available for its competition.
Sense of urgency, even if manufactured, is enough to easily double or triple your productivity.
Always be the one to ask, “But, what can we do right now?”
It seems backward, but keeping your mind focused on the present will get you further toward your goals than keeping your mind focused on the goal itself.
Why is that, without facing great pressure, we are often able to work ourselves into this kind of altruistic, ultra productive frenzy.
How much more fun with your job be if you could treat the most interesting and annoying tasks with the same feverish desire to do them right?
It’s easy to get into the mode of just wanting more. It unfortunately seems to be a basic human tendency, in fact. You get the salary increase, and it feels good for a little while, but then you’re thinking about the next one.
Ask, “Was I worth it today?”
A dollar today is worth more than a dollar next year, because a dollar today can be used to generate more dollars.
You should never get too comfortable.
The less replaceable you think you are, the more replaceable you are.
Everyone likes creating. That’s when we feel we are given the opportunity to really put our stamp on a piece of work. To feel like we own it.
If l give you $1,000 and ask you to go get me a cup of coffee, I’m going to be very unhappy if you return with 1,000 less dollars and no cup of coffee. I’m even going to be unhappy if you bring me plenty of really nice coffee but it takes you two hours. If I give you $0 and ask you to go get me a cup of coffee, I’ll be extremely appreciative if you actually return with the coffee, and I’ll be understanding if you don’t. Project work is like the first scenario. Maintenance is like the second.
Martin renamed 40 hour work week to 8 hour burn.
When it comes to work less really can be more. The primary reason cited by the extreme programmers is that when we are tired we can’t think as effectively as when we are rested. When we are burned out, we aren’t as creative, and the quality of our work reduce his dramatically. We start making stupid mistakes that end up costing us time and money.
Projects are marathons not sprints.
Though your short-term productivity will significantly increase as you start putting in the hours, in the long term you’re going to crash so hard that the recovery time will be larger than the productivity gains you enjoy during your 80 hour weeks.
Apparently, when money was scarce, I found ways to be more efficient with my cash. And, the end result was essentially the same.
Bob Martin’s eight hour burn places the constraint on you and gives you a strategy for dealing with that constraint. You get to work and think, I’ve only got eight hours!
As thought workers, even if we’re not in front of a computer or in the office, we can be working. You might be working while you’re driving to dinner with your spouse or while you’re watching a movie. Your work is always around nagging you.
Make sure you sleep well tonight. Tomorrow, eat breakfast and then start work at an exact time [preferably a little earlier than usual]. Work on it for four hours. Take an hour lunch. Then work for four more hours so intensely that you’re absolutely exhausted and can’t do anymore work. Go home, relax, and have fun.
A problem needs resolution. Lingering on who’s fault it is only prolongs the issue.
The quickest path to missing your commitment is to make commitments that you know you can’t meet. I know that sounds patently obvious, but we do it every day. We are put on the spot and we don’t want to disappoint our leaders, so we agreed to impossible work being done in impossible timelines.
Heroes never panic.
We panic because we lose perspective. When something is going wrong, it’s hard not to focus all attention on the problem. To some extent, that’s a good way to solve problems. Unfortunately, it also makes the problem, no matter how small, see more important than it is. And with the problem inflated and stress level running high, our brains turn themselves off.
So, here’s how I’m learning to not panic. When something bad happens and I start to feel that sinking, stressed-out feeling that leads to panic, I compare myself to the frustrated computer-illiterate, and I laugh at myself. I analyze the situation from the third—person perspective, as if I’m helping that frustrated family member with their word processing disaster. Seemingly hard problems are suddenly easier. Seemingly bad situations are suddenly not so bad. And, I often find that the solution simple and staring me in the face in the same way that an error dialog often tells you exactly what to do next. If you’d just have the presence of mind to read the error message, the problem might be solved.
Like families, successful projects are alike, but they become successful project fails in its own way.
In short, you may have the best product in history, but if you don’t do some kind of advertising, nobody’s going to buy it.
These managers and customers we are talking about have a dirty little secret: they are afraid of you. And for a good reason. You’re smart. We speak a cryptic language they don’t understand. You make them feel stupid with your sometimes sarcastic comments [which you might not have even intended to be sarcastic]. And, your work often is the last and most important toll gate between the projects conception and it’s birth.
Wouldn’t you want to hire the person who wrote the book and technology or methodology you’re attempting to deploy?
You will never feel 100% ready, so might as well start now.
Anyone can use Rails. Few can say Rails contributor.
Don’t just mastered the subject – write the book on it. Write code generators that take what used to be a one week process took a five minute process. Instead of being respected among your coworkers, become your cities most recognizable authority on whatever technologies you’re focusing on by doing seminars and workshops. Do something previously unthinkable on your next project.
Carve out weekly time to investigate the bleeding edge. Make room for at least two hours each week in order to research and get the colleges and to start develop skills in them.
The next time you have to wash the dishes, don’t wash them to get them done. Try to enjoy the experience of washing the dishes. Don’t focus on finishing them. Focus on the act of washing them itself.
Watch the alpha geeks.
If you’re constantly exposed to something, it’s hard to see it changing unless change happens rapidly.
Developer, review thyself.
Start keeping a journal. It could be a blog or a personal diary. Write about what you’re working on, what you’re learning, and your opinions about the industry. After you’ve been keeping the journal for sometime, reread old entries. Do you still agree? Do they sound knees? How much have you changed?
Make your improvements small and incremental but daily.
I highly recommend that you check out the book Soft Skills by John Sonmez if you liked this post, as you’ll find even more great content about how to become the best software developer version of yourself.