Nikola Brežnjak blog - Tackling software development with a dose of humor
  • Home
  • Daily Thoughts
  • Ionic
  • Stack Overflow
  • Books
  • About me
Home
Daily Thoughts
Ionic
Stack Overflow
Books
About me
  • Home
  • Daily Thoughts
  • Ionic
  • Stack Overflow
  • Books
  • About me
Nikola Brežnjak blog - Tackling software development with a dose of humor
CodeProject, NodeJS

Deploying MEAN.io to Nodejitsu from Windows machine

Disclaimer: I’m in no way affiliated with Nodejitsu or MEAN.io. I’m just documenting my experience with them – problems (and solutions) I’ve faced while trying these new technologies on a Windows machine.

Great, with that off my chest, we can now start. This is a successor post to the previous one: Getting started with Nodejitsu on Windows by deploying a MEN framework, so you may wanna check that too.

MEAN is a fullstack javascript platform for modern web applications.

MongoDB – leading NoSQL database, empowering businesses to be more agile and scalable

Express – minimal and flexible node.js web application framework, providing a robust set of features for building single and multi-page, and hybrid web applications

Angular – lets you extend HTML vocabulary for your application. The resulting environment is extraordinarily expressive, readable, and quick to develop

Node.js – a platform built on Chrome’s JavaScript runtime for easily building fast, scalable network applications

Following the notes on the official website you have to clone the repo, install all the dependencies withnpm  and then run grunt .

git clone http://github.com/linnovate/mean.git

cd mean

npm install

grunt

If you get an error like this:

C:\Users\Nikola\Desktop\mean>grunt
Running "jshint:all" (jshint) task
>> 42 files lint free.

Running "concurrent:tasks" (concurrent) task
Running "nodemon:dev" (nodemon) task
Running "watch" task
Waiting...[nodemon] v1.0.15
[nodemon] to restart at any time, enter `rs`
[nodemon] watching: *.*
[nodemon] starting `node --debug server.js`
debugger listening on port 5858
Express app started on port 3000

events.js:72
        throw er; // Unhandled 'error' event
              ^
Error: failed to connect to [localhost:27017]
    at null.<anonymous> (C:\Users\Nikola\Desktop\mean\node_modules\mongoose\node
_modules\mongodb\lib\mongodb\connection\server.js:553:74)
    at EventEmitter.emit (events.js:106:17)
    at null.<anonymous> (C:\Users\Nikola\Desktop\mean\node_modules\mongoose\node
_modules\mongodb\lib\mongodb\connection\connection_pool.js:140:15)
    at EventEmitter.emit (events.js:98:17)
    at Socket.<anonymous> (C:\Users\Nikola\Desktop\mean\node_modules\mongoose\no
de_modules\mongodb\lib\mongodb\connection\connection.js:512:10)
    at Socket.EventEmitter.emit (events.js:95:17)
    at net.js:440:14
    at process._tickCallback (node.js:415:13)
[nodemon] app crashed - waiting for file changes before starting...

make sure that you have MongoDB installed and that you have the mongod.exe running on the default port 27017. Instructions on how to install MongoDB on a Windows machine can be found here: http://docs.mongodb.org/manual/tutorial/install-mongodb-on-windows/, but tl;dr is:

  • download the installation zip package
  • unzip in c:\mongodb
  • create c:\data\db  folder
  • run c:\mongodb\bin\mongod.exe

When you have mongod.exe  started in one command window (I use Console2) and you run grunt  in other you will get this in the “mongo” console:

C:\mongodb\bin>mongod.exe
mongod.exe --help for help and startup options
Tue Mar 11 14:50:24.240 [initandlisten] MongoDB starting : pid=10136 port=27017 dbpath=\data\db\ 64-bit host=Nikola-PC
Tue Mar 11 14:50:24.240 [initandlisten] db version v2.4.9
Tue Mar 11 14:50:24.240 [initandlisten] git version: 52fe0d21959e32a5bdbecdc62057db386e4e029c
Tue Mar 11 14:50:24.240 [initandlisten] build info: windows sys.getwindowsversion(major=6, minor=1, build=7601, platform=2, service_pack='Service Pack 1') BOOST_LIB_VERSION=1_49
Tue Mar 11 14:50:24.240 [initandlisten] allocator: system
Tue Mar 11 14:50:24.240 [initandlisten] options: {}
Tue Mar 11 14:50:24.244 [initandlisten] journal dir=\data\db\journal
Tue Mar 11 14:50:24.244 [initandlisten] recover : no journal files present, no recovery needed
Tue Mar 11 14:50:24.323 [initandlisten] waiting for connections on port 27017
Tue Mar 11 14:50:24.324 [websvr] admin web console waiting for connections on port 28017
Tue Mar 11 14:50:40.982 [initandlisten] connection accepted from 127.0.0.1:58323 #1 (1 connection now open)
Tue Mar 11 14:50:41.014 [initandlisten] connection accepted from 127.0.0.1:58324 #2 (2 connections now open)
Tue Mar 11 14:50:41.024 [initandlisten] connection accepted from 127.0.0.1:58325 #3 (3 connections now open)
Tue Mar 11 14:50:41.024 [initandlisten] connection accepted from 127.0.0.1:58326 #4 (4 connections now open)
Tue Mar 11 14:50:41.025 [initandlisten] connection accepted from 127.0.0.1:58327 #5 (5 connections now open)

and this in the “grunt” console:

C:\Users\Nikola\Desktop\mean>grunt
Running "jshint:all" (jshint) task
>> 42 files lint free.

Running "concurrent:tasks" (concurrent) task
Running "nodemon:dev" (nodemon) task
Running "watch" task
Waiting...[nodemon] v1.0.15
[nodemon] to restart at any time, enter `rs`
[nodemon] watching: *.*
[nodemon] starting `node --debug server.js`
debugger listening on port 5858
Express app started on port 3000

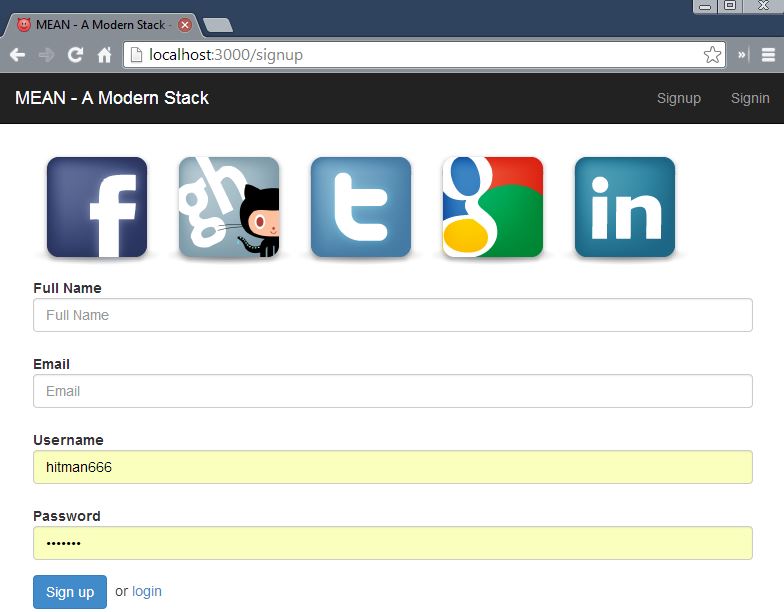
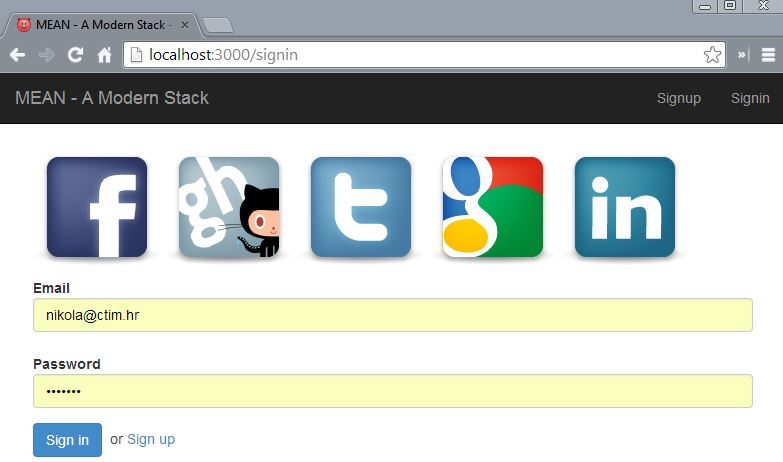
You can now take a look at your application by visiting localhost:3000 in your browser: meanHomeView the signup screen: meanSignup and signin screen: meanSignin

Ship it

In order to deploy to Nodejitsu, you have to login to Nodejitsu (jitsu login ) and then run jitsu deploy . At this point I got an error like this:

info:    Starting app mean
error:   Error running command deploy
error:   Errors occured while starting the application
error:   Error output from application. This is usually a user error.
error:   grunt-cli: The grunt command line interface. (v0.1.13)
error:
error:   Fatal error: Unable to find local grunt.
error:
error:   If you're seeing this message, either a Gruntfile wasn't found or grunt
error:   hasn't been installed locally to your project. For more information about
error:   installing and configuring grunt, please see the Getting Started guide:
error:
error:   http://gruntjs.com/getting-started
error:
error:   Error starting application. This could be a user error.
error:   info: Running start for app.
error:   info: Cleaning /opt/run
error:   info: Fetching application snapshot...
error:   info: Application snapshot fetched.
error:   info: Unpacking snapshot...
error:   info: Reading `package.json`...
error:   info: Starting application...
error:   info: Spawn: start --min-uptime 2000 -o /opt/run/forza.log -- forza -h multiplex.nodejitsu.com -p 8556 --start-log /opt/run/start.log --app-user hitman666 --app-name mean -- node node_modules/grunt-cli/bin/grunt
error:   info: `aeternum` pid: 63258
error:   info: Writing pidfile: /root/app.pid
error:   info: Tailing forza log: /opt/run/start.log
error:   info: Tail closing..
error:   info: Retry # 1 with 1000ms interval
error:   info: Tailing forza log: /opt/run/start.log
error:   info: Tail closing..
error:   info: Success:start

and naturally, I went looking if someone had a similar issue and it turns out someone on Stackoverflow asked this question. The OP (original poster) did find a solution him self and he said:

The gist of it was I had to move all grunt, karma, and forever dependencies to my devDependencies in the package.json file and change my start to “node server”.

Now, I tried to communicate with the OP to get some more info, but strangely no reply (yet). I figured it out myself in the end and this is how my package.json  file looks like now:

{
  "name": "mean",
  "description": "MEAN - A fullStack javascript framework powered by  MongoDB, ExpressJS, AngularJS, NodeJS.",
  "version": "0.1.2-1",
  "private": false,
  "repository": {
    "type": "git",
    "url": "https://github.com/linnovate/mean.git"
  },
  "engines": {
    "node": "0.10.x",
    "npm": "1.3.x"
  },
  "scripts": {
    "start": "node server.js",
    "test": "node node_modules/grunt-cli/bin/grunt test",
    "postinstall": "node node_modules/bower/bin/bower install"
  },
  "dependencies": {
    "express": "~3.4.7",
    "bower": "~1.2.8",
    "grunt-cli": "~0.1.11",
    "connect-mongo": "~0.4.0",
    "connect-flash": "~0.1.1",
    "consolidate": "~0.10.0",
    "swig": "~1.3.2",
    "mongoose": "~3.8.3",
    "passport": "~0.1.18",
    "passport-local": "~0.1.6",
    "passport-facebook": "~1.0.2",
    "passport-twitter": "~1.0.2",
    "passport-github": "~0.1.5",
    "passport-google-oauth": "~0.1.5",
    "passport-linkedin": "~0.1.3",
    "lodash": "~2.4.1",
    "forever": "~0.10.11",
    "view-helpers": "~0.1.4",
    "mean-logger": "0.0.1"
  },
  "devDependencies": {
    "grunt-env": "~0.4.1",
    "grunt-cli": "~0.1.11",
    "grunt-contrib-watch": "latest",
    "grunt-contrib-jshint": "latest",
    "grunt-karma": "~0.6.2",
    "grunt-nodemon": "0.2.0",
    "grunt-concurrent": "latest",
    "grunt-mocha-test": "latest",
    "karma": "~0.10.4",
    "karma-coffee-preprocessor": "~0.1.0",
    "karma-coverage": "~0.1.0",
    "karma-script-launcher": "~0.1.0",
    "karma-chrome-launcher": "~0.1.0",
    "karma-firefox-launcher": "~0.1.0",
    "karma-html2js-preprocessor": "~0.1.0",
    "karma-jasmine": "~0.1.3",
    "karma-requirejs": "~0.2.0",
    "karma-phantomjs-launcher": "~0.1.0",
    "forever": "~0.10.11",
    "supertest": "0.8.2",
    "should": "2.1.1"
  },
  "subdomain": "hitman666-mean2"
}

After making this change I deployed my application once more, and everything went without an error, but when I browsed it on Nodejitsu I got an error

502 Reached max retries limit

I realized that I don’t have a correct MongoDB connection string, and in order to change this I had to edit the file production.js which is in the config/env/  folder.MongoDBconnectionString

I copied the MongoDB connection string from Nodejitsu’s admin dashboard (I wrote about how to set this in my previous post: Getting started with Nodejitsu on Windows by deploying a MEN framework).

After this change I deployed my app again, and now everything was working, yay!

CodeProject, NodeJS

Deploying MongoDB and Node.js application on OpenShift

This is a post about getting started with OpenShift Online on a Windows machine by deploying a MongoDB, Node.js and RockMongo application for free. The reason why this wasn’t a title is that it’s just too darn long :). Cool, with getting that off my chest, we can now start…

OpenShift Online – Red Hat’s public cloud application development and hosting platform that automates the provisioning, management and scaling of applications so that you can focus on writing the code for your business, startup, or next big idea.

If you’ve tried OpenShift, you may have come across this offical how-to video only to find it completely useless. The accompanying official blog post is way better but still lacks some exact example code on, for example, how to connect to MongoDB from Node.js. Read on to see how I did it.

First, you have to create a new OpenShift account in case you don’t have one already.

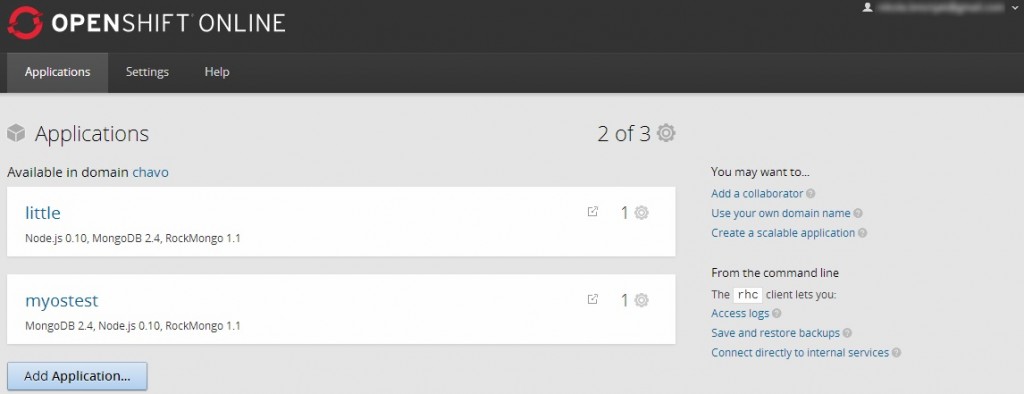
Once you login to the site you get a nice looking dashboard and in order to create a new application you could click on the Add application button:
openshift_login

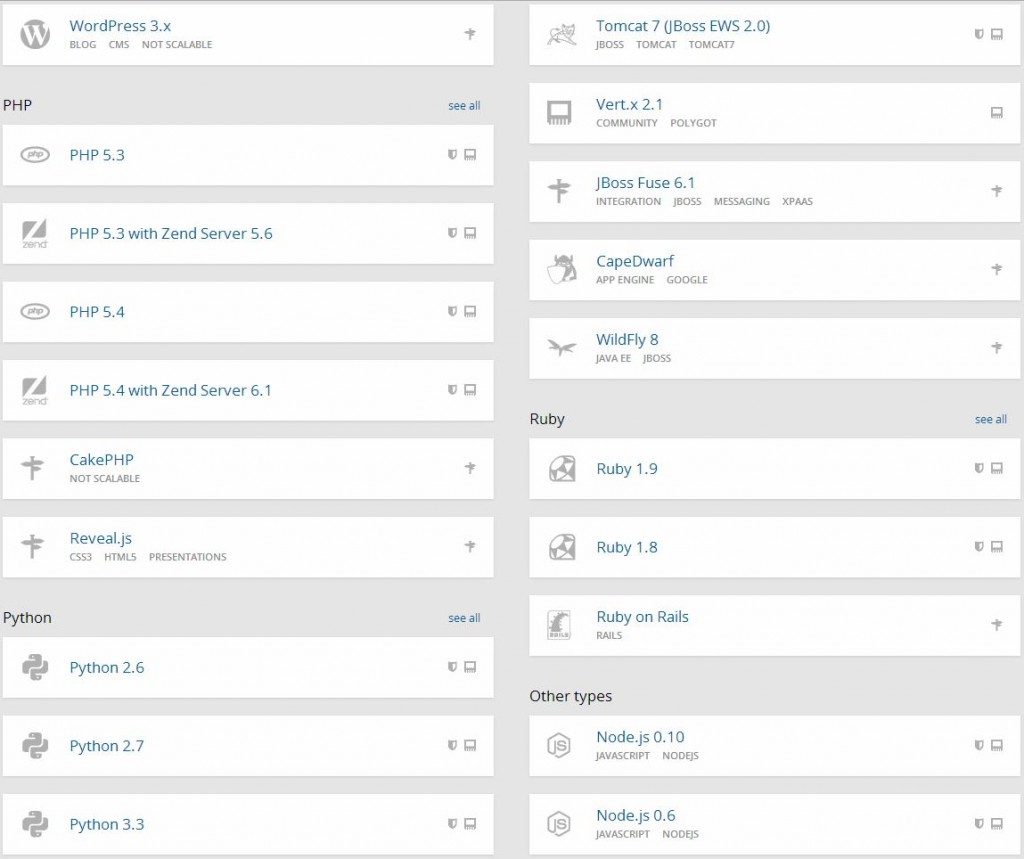
which would then offer really a lot of options:
openshift_applist

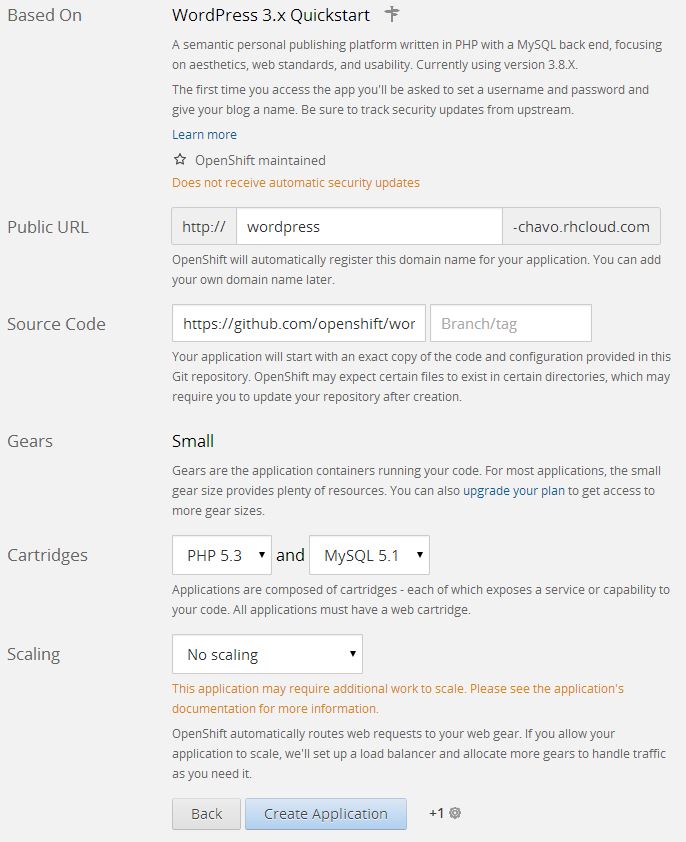
Setting up WordPress is easy as clicking the WordPress icon and naming your app on the next page:
openshift_wp
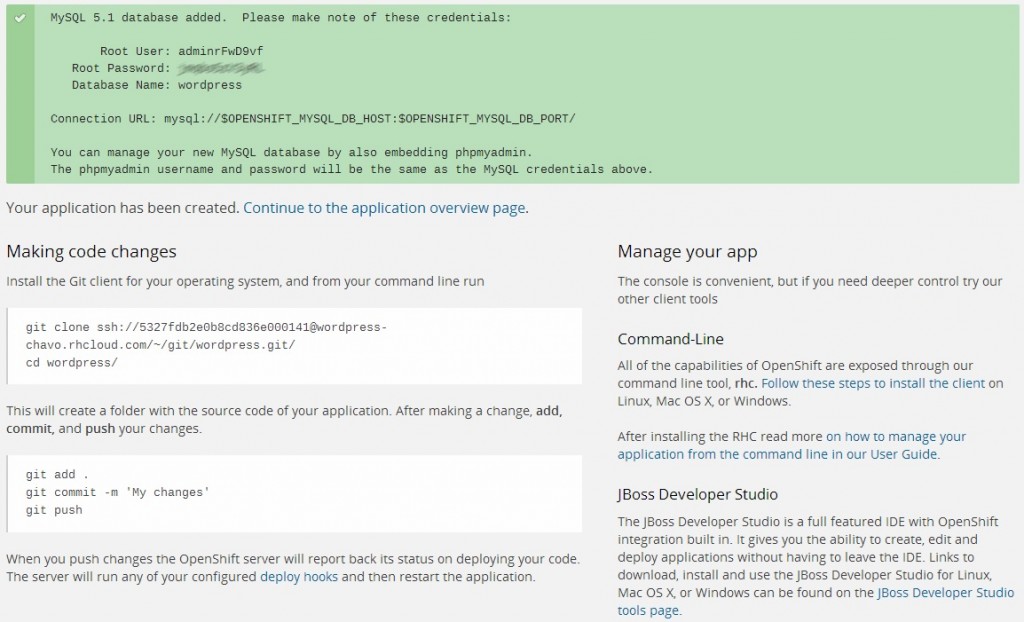
and clicking the Create Application button. After the process finishes (few mins) you get the instructions on how to alter the application:
openshift_wp_done
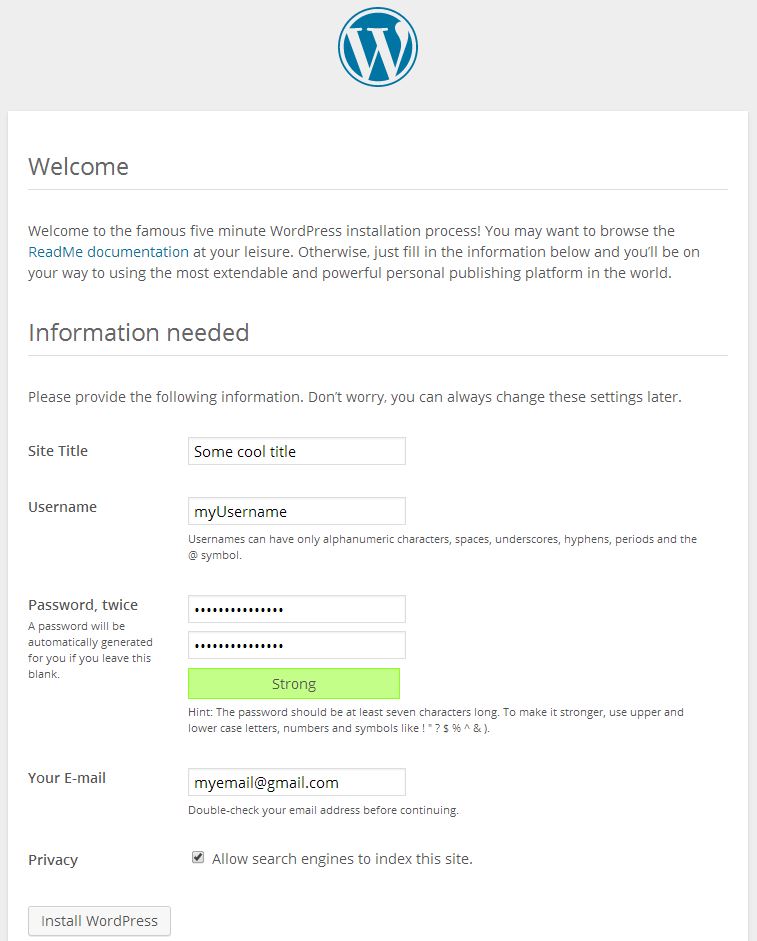
Basically, you clone the application’s source code with git and after doing some changes you push them back. At this point, all you have to do is visit the link of your newly created application (you can see the link in your Applications tab in the OpenShift admin interface) and you’ll get the WordPress init install screen:
openshift_wp_isntall

If you ever installed WordPress before everything should be familiar from now on. And there you have it – you have WordPress installed in a matter of few clicks.

Keep calm and roll up your sleves

You may be wondering where’s the MongoDB and Node.js from the title? Hack on…

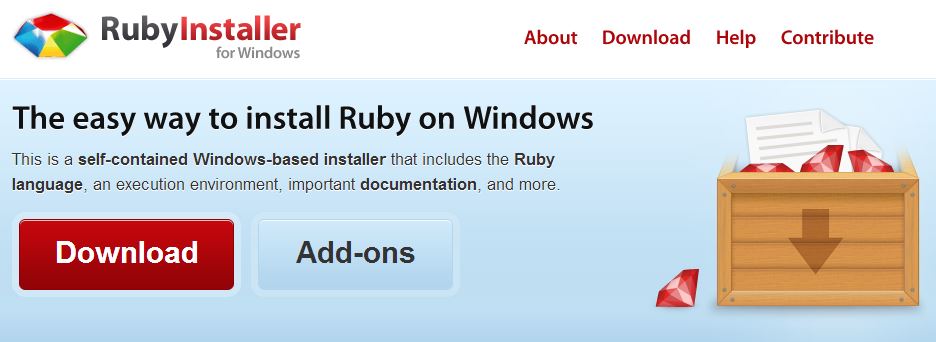
So, we saw how easy it was to create an app from web admin interface, but since we’re devs and we loove terminal (don’t we ;)) we’re gonna take a different route here. OpenShift offers the OpenShift Client tools aka rhc. In order to install rhc you first have to have Ruby installed, and the easiest way to do this on a Windows machine is to install the RubyInstaller:

openshift_rubyinstaller

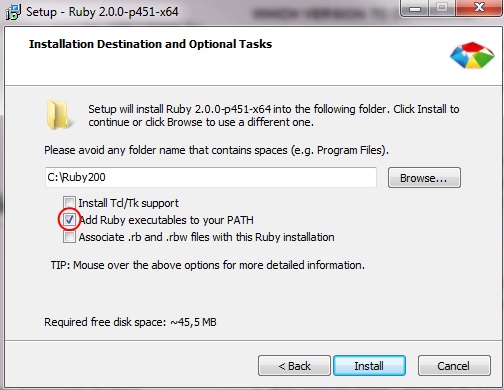
Just click the big red download button and I’m sure you now how to take it from there. Important note though, while installing just make sure that you check the Add Ruby executables to your PATH option:
openshift_rubypath

After the installation is done you can fire up your terminal (I use Console 2, and you can see my settings here: Customize Console 2 on Windows machine) and run

gem install rhc

and once this is done just run rhc setup  (this is an important part for us Windows users, as the official documentation on Installing OpenShift RHC Client Tools says we should only run rhc , and that does not work – as noted by the comments on that post).

Now we can use rhc to create a new application. To create a new application named myTest with Node.js and MongoDB you have to run:

rhc app create myTest nodejs-0.10 mongodb-2.4

and you’ll get an output similar to this:

C:\Users\Nikola\Desktop>rhc app create myTest nodejs-0.10 mongodb-2.4
DL is deprecated, please use Fiddle
Application Options
-------------------
Domain:     chavo
Cartridges: nodejs-0.10, mongodb-2.4
Gear Size:  default
Scaling:    no

Creating application 'myTest' ... done

  MongoDB 2.4 database added.  Please make note of these credentials:

   Root User:     admin
   Root Password: ..bip..Bip..
   Database Name: mytest

Connection URL: mongodb://$OPENSHIFT_MONGODB_DB_HOST:$OPENSHIFT_MONGODB_DB_PORT/

Waiting for your DNS name to be available ... done

Cloning into 'mytest'...
The authenticity of host 'mytest-chavo.rhcloud.com (54.235.21.98)' can't be established.
RSA key fingerprint is cf:ee:77:cb:0e:fc:02:d7:72:7e:ae:80:c0:90:88:a7.
Are you sure you want to continue connecting (yes/no)? yes
Warning: Permanently added 'mytest-chavo.rhcloud.com,54.235.21.98' (RSA) to the list of known hosts.
Enter passphrase for key '/c/Users/Nikola/.ssh/id_rsa':
remote: Counting objects: 21, done.
remote: Compressing objects: 100% (17/17), done.
Receiving objects: 100% (21/21), 20.22 KiB, done.ceiving objects:  90% (19/21)

Your application 'mytest' is now available.

  URL:        http://mytest-chavo.rhcloud.com/
  SSH to:     [email protected]
  Git remote: ssh://[email protected]/~/git/mytest.git/
  Cloned to:  C:/Users/Nikola/Desktop/mytest

Run 'rhc show-app myTest' for more details about your app.

If you’re concerned about that ‘DL is deprecated, please use Fiddle‘, don’t be as it’s a mere warning as they say on Stackoverflow (or if you want to explore this topic further make sure you check this question on SO).

If you get an error saying that there’s no such cartridge you will get a list of all the available cartridges which you can use, so just adjust the above command accordingly

C:\Users\Nikola\Desktop>rhc app create
DL is deprecated, please use Fiddle
When creating an application, you must provide a name and a cartridge from the
list below:

Short Name      Full name
==========      =========
diy-0.1         Do-It-Yourself 0.1
jbossas-7       JBoss Application Server 7
jbosseap-6      JBoss Enterprise Application Platform 6
jenkins-1       Jenkins Server
nodejs-0.10     Node.js 0.10
nodejs-0.6      Node.js 0.6
perl-5.10       Perl 5.10
php-5.3         PHP 5.3
zend-5.6        PHP 5.3 with Zend Server 5.6
php-5.4         PHP 5.4
zend-6.1        PHP 5.4 with Zend Server 6.1
python-2.6      Python 2.6
python-2.7      Python 2.7
python-3.3      Python 3.3
ruby-1.8        Ruby 1.8
ruby-1.9        Ruby 1.9
jbossews-1.0    Tomcat 6 (JBoss EWS 1.0)
jbossews-2.0    Tomcat 7 (JBoss EWS 2.0)
jboss-vertx-2.1 Vert.x 2.1

Please specify the name of the application and the web cartridge to install
Usage: rhc app-create <name> <cartridge> [... <cartridge>] [... VARIABLE=VALUE]
[-n namespace]
Pass '--help' to see the full list of options

Keep on rockin’ on

MongoDB is an open-source document database, and the leading NoSQL database. In order to add RockMongo MongoDB administration, which is a web front-end for interacting with your MongoDB, you have to execute this command:

rhc cartridge add rockmongo

after which you get an output similar to this:

C:\Users\Nikola\Desktop\mytest>rhc cartridge add rockmongo
DL is deprecated, please use Fiddle
Using rockmongo-1.1 (RockMongo 1.1) for 'rockmongo'
Adding rockmongo-1.1 to application 'mytest' ... done

rockmongo-1.1 (RockMongo 1.1)
-----------------------------
  Gears:          Located with mongodb-2.4, nodejs-0.10
  Connection URL: https://mytest-chavo.rhcloud.com/rockmongo/

Please make note of these MongoDB credentials:
  RockMongo User: admin
  RockMongo Password: ..i.aint.telin'..
URL: https://mytest-chavo.rhcloud.com/rockmongo/

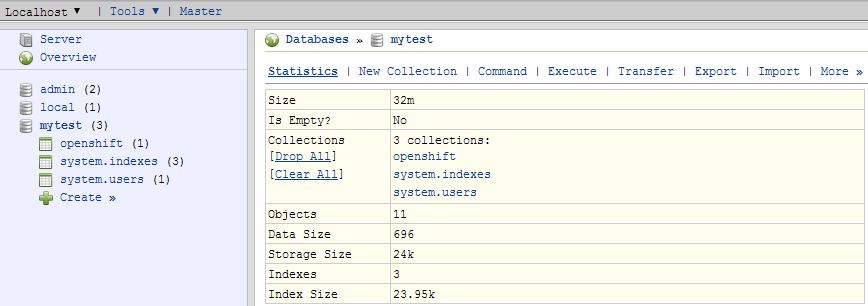
If you login to RockMongo by using the username and pass provided you will get a simple but useful interface:
openshift_rockmongo

However, if you prefer to do it via shell, you can do this:

rhc ssh

and after that start interactive command-line interface by typing mongo :

[mytest-chavo.rhcloud.com 532812f94382eca22b000657]\> mongo
MongoDB shell version: 2.4.6
connecting to: 127.9.197.130:27017/admin
Welcome to the MongoDB shell.
For interactive help, type "help".
For more comprehensive documentation, see
        http://docs.mongodb.org/
Questions? Try the support group
        http://groups.google.com/group/mongodb-user

Now let’s select a database, which will be same as your app’s name.

> use mytest
switched to db mytest

To insert some record we can do something like this:

> var a = {"user":"nikola", points:10};
> db.scores.insert(a);

and check if it was successfully inserted:

> db.scores.find();
{ "_id" : ObjectId("53284189d6e5e4aedb1fbafd"), "user" : "nikola", "points" : 10 }

To query this information with Node.js you first have to install mongojs with npm install mongojs . Then open up the server.js  file (it is in the root folder of your application) and add these lines in the self.createRoutes  object:

self.routes['/db'] = function(req, res) {
    var mongojs = require('mongojs');
    var dbName = "/mytest";
    var connection_string = process.env.OPENSHIFT_MONGODB_DB_USERNAME + ":" +  process.env.OPENSHIFT_MONGODB_DB_PASSWORD + "@" + process.env.OPENSHIFT_MONGODB_DB_HOST + dbName;
    var db = mongojs(connection_string, ['scores']);
    var books = db.collection('scores');

    db.scores.find(function(err, docs) {
       res.send(docs); 
    });
};

All aboard, and ready to take-off

Now it’s time to add the changes to the staging state with git add . (you may wanna check Git if this looks daunting). You can check the status of the files with git status . To commit the changes you have to execute:  git commit -a -m “Added code to talk to db” and finally git push  to send the changes to OpenShift for deployment.

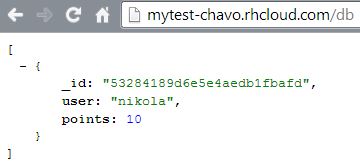
Now, if you followed this tutorial, on the link http://mytest-chavo.rhcloud.com/db (notice this db here, and ofc exact link would reflect to your app) you should get this output:

openshift_dboutput

And a quick closing with with one useful command to get the overview of the app settings:

C:\Users\Nikola\Desktop\mytest>rhc app show
DL is deprecated, please use Fiddle
mytest @ http://mytest-chavo.rhcloud.com/ (uuid: 532812f94382eca22b000657)
--------------------------------------------------------------------------
  Domain:     chavo
  Created:    10:33 AM
  Gears:      1 (defaults to small)
  Git URL:    ssh://[email protected]/~/git/mytest.git/
  SSH:        [email protected]
  Deployment: auto (on git push)

  mongodb-2.4 (MongoDB 2.4)
  -------------------------
    Gears:          Located with nodejs-0.10, rockmongo-1.1
    Connection URL: mongodb://$OPENSHIFT_MONGODB_DB_HOST:$OPENSHIFT_MONGODB_DB_PORT/
    Database Name:  mytest
    Password:       ..ccc...
    Username:       admin

  nodejs-0.10 (Node.js 0.10)
  --------------------------
    Gears: Located with mongodb-2.4, rockmongo-1.1

  rockmongo-1.1 (RockMongo 1.1)
  -----------------------------
    Gears:          Located with mongodb-2.4, nodejs-0.10
    Connection URL: https://mytest-chavo.rhcloud.com/rockmongo/

And this is it, now it’s your time to make something useful with it!

CodeProject, NodeJS

Getting started with Nodejitsu on Windows by deploying a MEN framework

Disclaimer: I’m in no way affiliated with Nodejitsu or any of the frameworks that I listed below in the post. I’m just documenting my experience with them – problems (and solutions) I’ve faced while trying these new technologies on a Windows machine.

MEN – MongoDB, Express, Node.js, and if you think MEN is not mean enough, take a look at the post on Deploying MEAN.io to Nodejitsu from Windows machine.

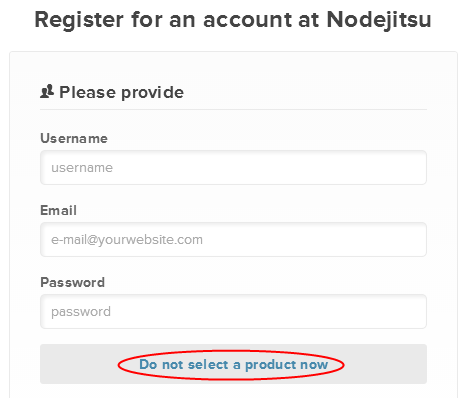
Nodejitsu is a cloud platform as a service based on Node.js and serves Node.js applications on their platform. Signup is free, you don’t have to enter billing info in order to try 2 months free (yes, databases work too!), just click on the “Do not select a product now” button:
nodejitsuFreeSignup
After signing up you get a confirmation mail like this:

Welcome to Nodejitsu!
Your Nodejitsu account is activated and ready to go!
username: userName
To confirm your account, install the latest jitsu:
sudo npm install jitsu -g
and then run:
jitsu users confirm userName big-h@5h
This will allow you to deploy applications with:
jitsu deploy

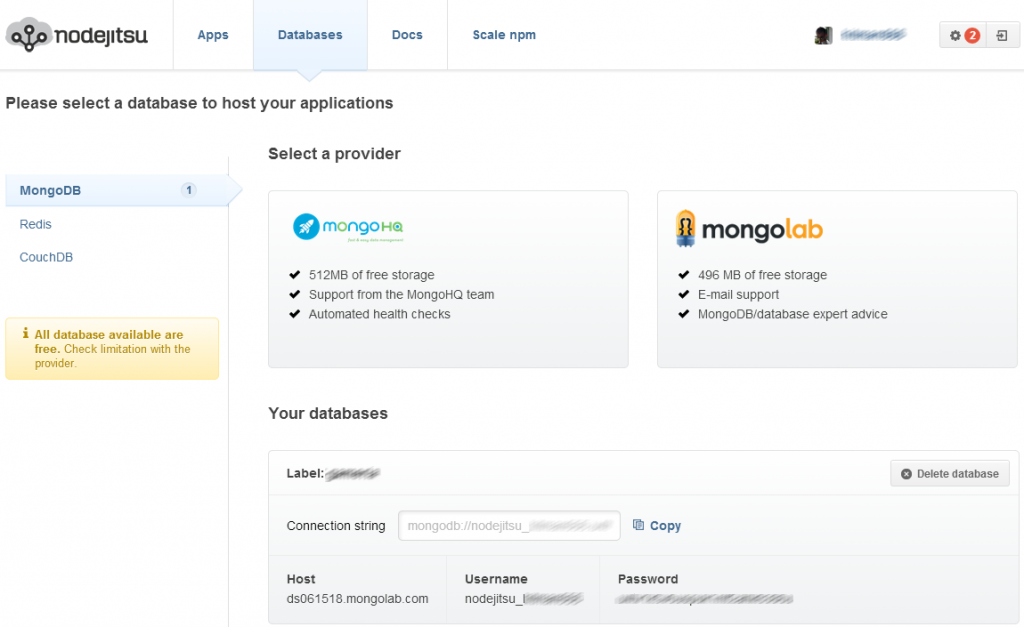
Setting up databases in the web admin interface is easy as you only have to literally click one button after deciding which database type and provider you want:
nodejitsuDatabases

Hackaton starters are gaining momentum  and there are quite a few of them already like:

  • Hackaton starter
  • Drywall
  • DozerJS
  • Skeleton
  • MEAN – only one which offers Angular out of the box (a follow up post on this is here)

I decided to try out Skeleton, mainly because I liked the “just right” Goldilocks reference 🙂

So, as the site suggests, you first have to installnodemon , gulp  andmocha , then clone the github repo, npm & bower install everything and you’re done:

# Install global dependencies
npm install -g nodemon gulp mocha

# Clone the repoo (and fetch only the latest commits)
git clone --depth=1 [email protected]:dstroot/skeleton.git
cd skeleton

# Install local dependencies
npm install
bower install

# Start everything up with Gulp 
# (builds the assets and starts the app with nodemon)
gulp

Everything works for you? Great! For the rest of unlucky ones, you may got (like me) after running gulp :

gulp

module.js:340
    throw err;
          ^
Error: Cannot find module 'jshint-stylish'
    at Function.Module._resolveFilename (module.js:338:15)
    at Function.Module._load (module.js:280:25)
    at Module.require (module.js:364:17)
    at require (module.js:380:17)
    at Object.<anonymous> (C:\Users\Nikola\Desktop\skeleton\gulpfile.js:22:21)
    at Module._compile (module.js:456:26)
    at Object.Module._extensions..js (module.js:474:10)
    at Module.load (module.js:356:32)
    at Function.Module._load (module.js:312:12)
    at Module.require (module.js:364:17)

I tried npm install jshint-stylish , and ran gulp again:

C:\Users\Nikola\Desktop\skeleton>gulp
[gulp] Using gulpfile C:\Users\Nikola\Desktop\skeleton\gulpfile.js
[gulp] Starting 'clean'...
[gulp] Finished 'clean' after 11 ms
[gulp] Starting 'styles'...
[gulp] Starting 'scripts'...
[gulp] Starting 'images'...
[gulp] Finished 'images' after 2.75 ms
[gulp] Starting 'lint'...
[gulp] Finished 'lint' after 192 ms
[gulp] Starting 'watch'...
[gulp] Finished 'watch' after 151 ms
[gulp] Starting 'develop'...
[gulp] Finished 'develop' after 1.68 ms
[gulp] Live reload server listening on: 35729
[gulp] gulp-notify: [Gulp notification] Clean task complete

events.js:72
        throw er; // Unhandled 'error' event
              ^
Error: Incorrect OS. node-notify requires Mac OS 10.8 or higher
    at C:\Users\Nikola\Desktop\skeleton\node_modules\gulp-notify\node_modules\no
de-notifier\lib\terminal-notifier.js:46:25
    at Object.module.exports.isMacOSX (C:\Users\Nikola\Desktop\skeleton\node_mod
ules\gulp-notify\node_modules\node-notifier\lib\utils.js:24:12)
    at Notifier.notify (C:\Users\Nikola\Desktop\skeleton\node_modules\gulp-notif
y\node_modules\node-notifier\lib\terminal-notifier.js:44:11)
    at module.exports (C:\Users\Nikola\Desktop\skeleton\node_modules\gulp-notify
\lib\report.js:17:5)
    at Transform._flush (C:\Users\Nikola\Desktop\skeleton\node_modules\gulp-noti
fy\lib\notify.js:41:5)
    at Transform.<anonymous> (C:\Users\Nikola\Desktop\skeleton\node_modules\gulp
-notify\node_modules\through2\node_modules\readable-stream\lib\_stream_transform
.js:130:12)
    at Transform.g (events.js:180:16)
    at Transform.EventEmitter.emit (events.js:92:17)
    at finishMaybe (C:\Users\Nikola\Desktop\skeleton\node_modules\gulp-notify\no
de_modules\through2\node_modules\readable-stream\lib\_stream_writable.js:363:12)

    at endWritable (C:\Users\Nikola\Desktop\skeleton\node_modules\gulp-notify\no
de_modules\through2\node_modules\readable-stream\lib\_stream_writable.js:370:3)

As the message says (note also on their website),  gulp notify , which uses node-notify  is not supported on Windows. The way I solved this was that I removed all of the .pipe(notify({ onLast: true, message: ‘Scripts task complete’ }))  lines from gulpfile.js, but it still wasn’t enough! Running lint job made the gulp fail, so I removed that to and woila then it all worked.

A note (though you can look this up on the official github page also) on how to setup Google login by:

  • Visit Google Cloud Console
  • Click CREATE PROJECT button
  • Enter Project Name, then click CREATE
  • Then select APIs & auth from the sidebar and click on Credentials tab
  • Click CREATE NEW CLIENT ID button
    • Application Type: Web Application
    • Authorized Javascript origins: http://localhost:3000
    • Authorized redirect URI: http://localhost:3000/auth/google/callback
  • Copy and paste Client ID and Client secret keys into config/config.js

:exclamation:Note: When you ready to deploy to production don’t forget to add your new url to Authorized Javascript origins and Authorized redirect URI, e.g. http://my-awesome-app.nodejitsu.com and http://my-awesome-app.nodejitsu.com/auth/google/callback respectively. The same goes for other providers.

Deploying to Nodejitsu is done by firstly  loging in and then executing jitsu deploy:

C:\Users\Nikola\Desktop\skeleton>jitsu login
info:    Welcome to Nodejitsu hitman666
info:    jitsu v0.13.15, node v0.10.26
info:    It worked if it ends with Nodejitsu ok
info:    Executing command login
prompt: username:  (hitman666)
prompt: password:
info:    Authenticated as hitman666
info:    Nodejitsu ok

C:\Users\Nikola\Desktop\skeleton>jitsu deploy

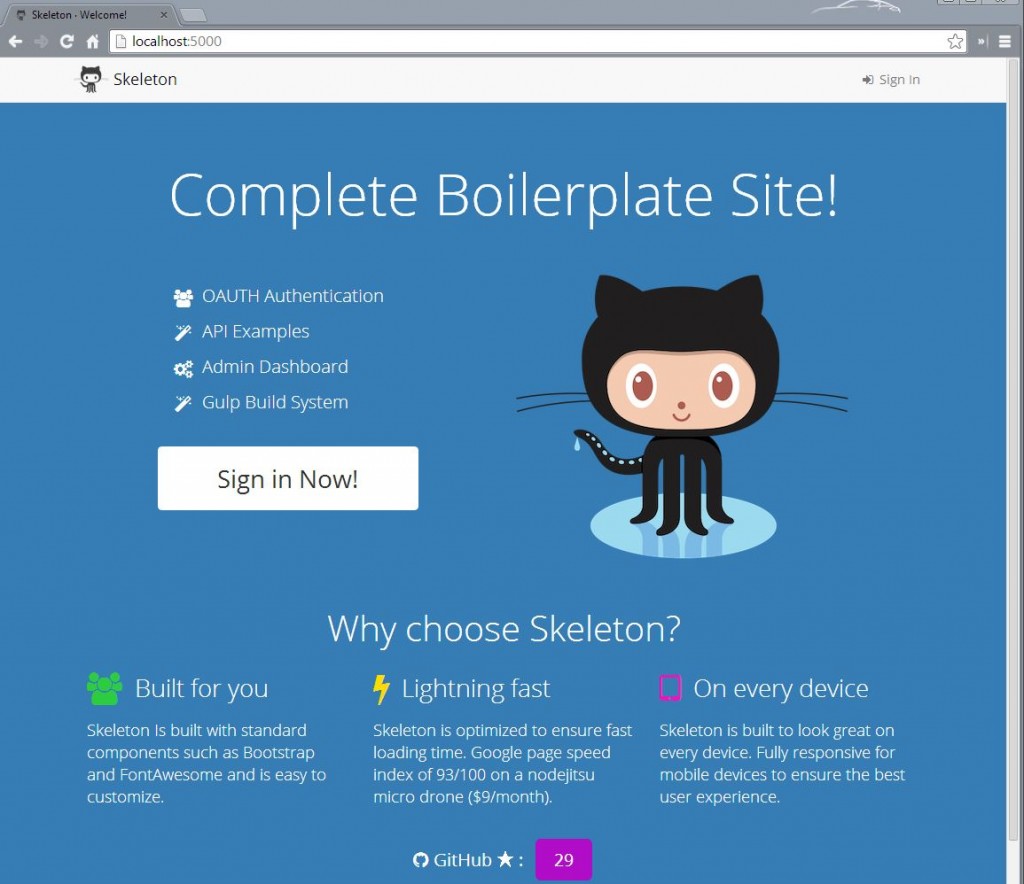
Boom, your app is live on Nodejitsu server and it should look like this (ofc YMMV in term of link):
skeletonWelcomeScreen

Recent posts

  • Discipline is also a talent
  • Play for the fun of it
  • The importance of failing
  • A fresh start
  • Perseverance

Categories

  • Android (3)
  • Books (114)
    • Programming (22)
  • CodeProject (35)
  • Daily Thoughts (77)
  • Go (3)
  • iOS (5)
  • JavaScript (127)
    • Angular (4)
    • Angular 2 (3)
    • Ionic (61)
    • Ionic2 (2)
    • Ionic3 (8)
    • MEAN (3)
    • NodeJS (27)
    • Phaser (1)
    • React (1)
    • Three.js (1)
    • Vue.js (2)
  • Leadership (1)
  • Meetups (8)
  • Miscellaneou$ (77)
    • Breaking News (8)
    • CodeSchool (2)
    • Hacker Games (3)
    • Pluralsight (7)
    • Projects (2)
    • Sublime Text (2)
  • PHP (6)
  • Quick tips (40)
  • Servers (8)
    • Heroku (1)
    • Linux (3)
  • Stack Overflow (81)
  • Unity3D (9)
  • Windows (8)
    • C# (2)
    • WPF (3)
  • Wordpress (2)

"There's no short-term solution for a long-term result." ~ Greg Plitt

"Everything around you that you call life was made up by people that were no smarter than you." ~ S. Jobs

"Hard work beats talent when talent doesn't work hard." ~ Tim Notke

© since 2016 - Nikola Brežnjak