Nikola Brežnjak blog - Tackling software development with a dose of humor
  • Home
  • Daily Thoughts
  • Ionic
  • Stack Overflow
  • Books
  • About me
Home
Daily Thoughts
Ionic
Stack Overflow
Books
About me
  • Home
  • Daily Thoughts
  • Ionic
  • Stack Overflow
  • Books
  • About me
Nikola Brežnjak blog - Tackling software development with a dose of humor
Quick tips, Windows

Grep GUI on a Windows machine with AstroGrep

I had to find some string inside one of the files, and I couldn’t remember in which file it was, classic 🙂

In linux, simple grep command would help, but on Windows there’s no such thing, or at least I thought… After some googling I came up with AstroGrep and I think it’s awesome, and it also comes with a GUI if you fancy that:

AstroGrep

You can download it freely from their site.

CodeProject, WPF

Custom YES/NO dialog with DialogResult in WPF

screenshot_blog

A simple example of how to make a custom YES/NO dialog with DialogResult in WPF. Freely (as in beer) available code is on Github: https://github.com/Hitman666/CustomYesNoDialogWPF. The breakdown is that you make a new window (MsgBoxYesNo) and assign DialogResult on the button clicks. You call this window as a dialog from a MainWindow and expect a bool in return upon which you act as you wish… MsgBoxYesNo.xaml:

<Window x:Class="CustomYesNoDialogWPF.MsgBoxYesNo"
        xmlns="http://schemas.microsoft.com/winfx/2006/xaml/presentation"
        xmlns:x="http://schemas.microsoft.com/winfx/2006/xaml"
        Title="MsgBoxYesNo" Height="300" Width="300"
        WindowStyle="None" ResizeMode="NoResize"
        WindowStartupLocation="CenterScreen"
        AllowsTransparency="True" Background="Transparent">

    <Border BorderThickness="5" BorderBrush="Black" CornerRadius="20" Background="SkyBlue">
        <Grid>
            <Grid.RowDefinitions>
                <RowDefinition Height="3*"></RowDefinition>
                <RowDefinition Height="1*"></RowDefinition>
            </Grid.RowDefinitions>

            <Grid.ColumnDefinitions>
                <ColumnDefinition></ColumnDefinition>
            </Grid.ColumnDefinitions>

            <Viewbox>
                <TextBlock x:Name="txtMessage" Width="420" FontSize="50" TextWrapping="Wrap" HorizontalAlignment="Center" VerticalAlignment="Center" TextAlignment="Center" Text="Are you sure you're awesome?"/>
            </Viewbox>

            <Viewbox Grid.Row="1">
                <StackPanel Orientation="Horizontal">
                    <Button Content="Yes" x:Name="Yes" Margin="1" HorizontalAlignment="Left" VerticalAlignment="Top" Width="55" Click="Yes_Click"/>
                    <Button Content="No" x:Name="No" Margin="1" HorizontalAlignment="Left" VerticalAlignment="Top" Width="55" Click="No_Click" IsCancel="True"/>
                </StackPanel>
            </Viewbox>
        </Grid>
    </Border>
</Window>

MsgBoxYesNo.cs:

public partial class MsgBoxYesNo : Window
{
    public MsgBoxYesNo(string message)
    {
        InitializeComponent();

        txtMessage.Text = message;
    }

    private void Yes_Click(object sender, RoutedEventArgs e)
    {
        DialogResult = true;
        this.Close();
    }

    private void No_Click(object sender, RoutedEventArgs e)
    {
        DialogResult = false;
        this.Close();
    }
}

MainWindow.cs:

private void Button_Click(object sender, RoutedEventArgs e)
{
    MsgBoxYesNo msgbox = new MsgBoxYesNo("Are you sure you're awesome?");
    if ((bool)msgbox.ShowDialog())
    {
        MessageBox.Show("Yes, you're awesome!");
    }
    else
    {
        MessageBox.Show("You're kidding, of course you're awesome!");
    }
}
CodeProject, WPF

How to build a font viewer application in WPF without writing any C# code

TL;DR

You can download from Github the demo application (zipped exe) or the whole source code project (Visual Studio project solution), or continue reading to see how it was built step by step.

What is this for an application?

My version of the FontViewer application as initially designed and developed in the book Sams Teach Yourself WPF in 24 Hours, with added IntegerUpDown control from Extended.Wpf.Toolkit NuGet package (for changing the font size).

Disclamer

I’m in no way affiliated with Amazon or this book, I just think it’s great, for beginners especially. This StackOverflow question may be useful if you’re searching for a good book on learning WPF.

Let’s build it step by step

First, create a new WPF Application project in Visual Studio (File -> New Project) as shown on the image below, and name it FontViewer:

FontViewer_1

Full source code listing

Now, copy the following XAML code in your MainWindow.xaml file (explanation comes after):

<Window x:Class="FontViewer.MainWindow"
        xmlns="http://schemas.microsoft.com/winfx/2006/xaml/presentation"
        xmlns:x="http://schemas.microsoft.com/winfx/2006/xaml"
        xmlns:xctk="http://schemas.xceed.com/wpf/xaml/toolkit"
        Title="FontViewer" Height="450" Width="600">
    
    <DockPanel Margin="8">
        <Border DockPanel.Dock="Top"
                CornerRadius="1"
                BorderThickness="2"
                BorderBrush="Black"
                Background="AliceBlue"
                Padding="8"
                Margin="0 0 0 8">
            <TextBlock FontSize="14" TextWrapping="Wrap">
                <Bold><Italic>Instructions:</Italic></Bold>
                <LineBreak />
                
                Select a <Underline>font</Underline> to view from the list <Italic>below</Italic>.
                <Span FontSize="10">
                    You can change the text by typing in the region at the bottom.
                </Span>
            </TextBlock>
        </Border>
        
        <ListBox x:Name="FontList" 
                 DataContext="{x:Static Fonts.SystemFontFamilies}"
                 DockPanel.Dock="Left" 
                 ItemsSource="{Binding}"
                 Width="160">
            <ListBox.ToolTip>
                <ToolTip>
                    <StackPanel Orientation="Horizontal">
                        <TextBlock Text="{Binding Path=Count, Mode=OneTime}"/>
                        <TextBlock Text=" fonts are installed."/>
                    </StackPanel>
                </ToolTip>
            </ListBox.ToolTip>
        </ListBox>

        <StackPanel Orientation="Horizontal"  
                    HorizontalAlignment="Center" 
                    Margin="5"
                    DockPanel.Dock="Top">
            
            <TextBlock Margin="0 0 5 0">Font size:</TextBlock>
            <xctk:IntegerUpDown x:Name="FontSize"
                                Height="20" 
                                Width="50"
                                Increment="1" 
                                Value="20">
            </xctk:IntegerUpDown>
        </StackPanel>

        <TextBox x:Name="SampleText"
                 MinLines="2"
                 Margin="5"
                 TextWrapping="Wrap"
                 ToolTip="Type here to change the preview text."
                 DockPanel.Dock="Top">
            The quick brown fox jumps over the lazy dog.
        </TextBox>

        <TextBlock Text="{Binding ElementName=SampleText, Path=Text}"
                   FontFamily="{Binding ElementName=FontList,Path=SelectedItem}"
                   FontSize="{Binding ElementName=FontSize,Path=Value}"
                   TextWrapping="Wrap"
                   Margin="5"/>
    </DockPanel>
</Window>

Code decomposition

You can see that our main container is DockPanel, which is useful when you want to “dock” certain elements to the sides (top, bottom, left, right) of the window.

Next comes the Border element which contains instructions (on how to use the application) written inside the TextBlock element. If you’re familiar with CSS, the attributes on the Border element should seem natural to you. However, one novelty is the DockPanel.Dock=”Top” property which basically tells the Border element to position itself at the top of the parent DockPanel (in which it is contained).

To populate the list of available fonts which are installed on the machine, we’re using the ListBox element. It’s docked to the left, its name variable (by which we can reference it later in the code) is set to FontList (x:Name=”FontList”), and most importantly the ItemSource attribute is set to {x:Static Fonts.SystemFontFamilies} which basically tells the ListBox that it should display all the items which are returned from the static property SystemFontFamilies provided by .NET framework.

After the ListBox comes a StackPanel which by default “stacks” elements that it contains one below the other. By using the Orientation property (Orientation=”Horizontal”) we can make the contained elements align one next to the other.

Let’s mix it up a little

Since we want to have a numeric Up/Down control as we do in WinForms we will have to download additional component as it doesn’t exist in the standard WPF library. The discussion about this can be found on Stack Overflow. The solution is to go to Tools -> NuGet Package Manager -> Manage NuGet Packages… as shown on the illustration below:

FontViewer_3

On the form that shows up after this you have to do a search for Extended.Wpf.Toolkit and Install it:

FontViewer_2

As stated in the installation instructions you have to:

  1. Add a using statement (“using Xceed.Wpf.Toolkit;” for most of the controls, “using Xceed.Wpf.DataGrid;” for the datagrid control) to the top of .cs files
  2. Add a new xmlns (xmlns:xctk=”http://schemas.xceed.com/wpf/xaml/toolkit” for most of the controls, xmlns:xcdg=”http://schemas.xceed.com/wpf/xaml/datagrid” for the datagrid control) to the top of XAML files
  3. Remember to use the namespace prefix (in the above example, <xctk: …> or <xcdg: …>) in the body of your XAML

As you can see in the full code listing, I added the needed xmlns in MainWindow.xaml. However, the needed using statement (using using Xceed.Wpf.Toolkit;) has to be added in the MainWindow.cs (right click on the MainWindow.xaml file and select View Code) file.

After this installation and proper including is done, you can use the new IntegerUpDown control in your XAML file like this:

<xctk:IntegerUpDown x:Name="FontSize"
                    Height="20" 
                    Width="50"
                    Increment="1" 
                    Value="20">
</xctk:IntegerUpDown>

Increment attribute tells the control by which amount to increment/decrement the number which is set by default in Value attribute.

Let’s enter some text

In order for the user to be able to enter some text and then see how the text looks like in the particular font, we’re using the TextBox element. Most important attribute is the x:Name (x:Name=”SampleText”) because we’ll use it to reference it in the TextBlock below.

Show me how the font looks like

We’re using the TextBlock element to show the user how the text which he entered in the TextBox looks like in the font which he selected from the ListBox. Here lies the core of our application as here we’re setting the so called Data Binding. We’re binding the Text attribute of the TextBlock to whatever is entered in the TextBox named SampleText (Text=”{Binding ElementName=SampleText, Path=Text}”). Next, we’re binding the FontFamily to the selected item in the ListBox named FontList (FontFamily=”{Binding ElementName=FontList,Path=SelectedItem}”), and finally we’re binding the FontSize to the Value of the IntegerUpDown control named FontSize.

Wrap up

If you run your application now you’ll see it works as expected and just like that you’ve made your very own version of the FontViewer application, you’ve seen how to install additional components from within Visual Studio using NuGet package manager, and you’ve seen how to set the data binding between elements.

Hope this proved to be helpful and got you excited about WPF in that manner that you’ll now go and do further exploring on your own.

Quick tips, WPF

Maximizing WPF Window to second monitor

So, if you have this in the code behind:

if (System.Windows.Forms.Screen.AllScreens.Length >= Config.ScreenNumber)
{
    System.Drawing.Rectangle screenBounds = System.Windows.Forms.Screen.AllScreens[Config.ScreenNumber - 1].Bounds;
    this.Left = screenBounds.Left;
    this.Top = screenBounds.Top;
}

And this in your XAML file on Window:

<Window WindowState="Maximized" ...

Asuming that Config.ScreenNumber equals 2, it will not position itself on the second screen no matter what you do, it will maximize on your main screen. What helped in the end was to remove the WindowState from the XAML definition and to add Loaded event handler:

private void Window_Loaded(object sender, RoutedEventArgs e)
{
    this.WindowState = WindowState.Maximized;
}
C#

Proper singleton implementation in C#

Taken from: http://msdn.microsoft.com/en-us/library/ff650316.aspx

public class Singleton
{
   private static Singleton instance;

   private Singleton() {}

   public static Singleton Instance
   {
      get 
      {
         if (instance == null)
         {
            instance = new Singleton();
         }
         return instance;
      }
   }
}

Static initialization

public sealed class Singleton
{
   private static readonly Singleton instance = new Singleton();
   
   private Singleton(){}

   public static Singleton Instance
   {
      get 
      {
         return instance; 
      }
   }
}

Multithreaded singleton

public sealed class Singleton
{
   private static volatile Singleton instance;
   private static object syncRoot = new Object();

   private Singleton() {}

   public static Singleton Instance
   {
      get 
      {
         if (instance == null) 
         {
            lock (syncRoot) 
            {
               if (instance == null) 
                  instance = new Singleton();
            }
         }

         return instance;
      }
   }
}

Test program; on first form you have two buttons, one which sets the amount of singleton, and second button which opens up another form which then sets the amount again. Once returned to the first form, the value updates to the one set on second form.

//Form1.cs
public partial class Form1 : Form
{
    myClass mc;
    public Form1()
    {
        InitializeComponent();
        mc = myClass.Instance;
    }

    private void button1_Click(object sender, EventArgs e)
    {
        mc.iznos = 10;
        updateUI();
    }

    public void updateUI()
    {
        label1.Text = mc.iznos.ToString();
    }

    private void button2_Click(object sender, EventArgs e)
    {
        Form2 f2 = new Form2();
        f2.ShowDialog();
    }

    private void Form1_Activated(object sender, EventArgs e)
    {
        updateUI();
    }
}


//Form2.cs
public partial class Form2 : Form
{
    myClass mc;
    public Form2()
    {
        InitializeComponent();
        
        mc = myClass.Instance;
    }

    private void Form2_Load(object sender, EventArgs e)
    {
        mc.iznos = 5;
        updateUI();
    }

    public void updateUI()
    {
        label1.Text = mc.iznos.ToString();
    }
}
public class myClass{
    private static readonly myClass _instance = new myClass();

    private myClass(){}
    public static myClass Instance
    {
        get 
        {
            return _instance; 
        }
    }

    public int iznos { get; set; }
}
C#

How to use App.config in Visual Studio C# .NET

Add reference to System.Configuration :

references

and include it using the using statement:

using System.Configuration;

Edit App.config so that you add your settings in the appSettings  node in an add  element with key  and value  parameters.

<?xml version="1.0" encoding="utf-8" ?>
<configuration>
    <startup> 
        <supportedRuntime version="v4.0" sku=".NETFramework,Version=v4.5" />
    </startup>

    <appSettings>
      <add key="server" value="localhost" />
      <add key="port" value="5432" />
      <add key="username" value="myusername" />
      <add key="password" value="mypass" />
      <add key="database" value="mydb" />
    </appSettings>
</configuration>

Now you can access your settings in code like this:

string server = ConfigurationManager.AppSettings["server"].ToString();
string port = ConfigurationManager.AppSettings["port"].ToString();
string username = ConfigurationManager.AppSettings["username"].ToString();
string password = ConfigurationManager.AppSettings["password"].ToString();
string database = ConfigurationManager.AppSettings["database"].ToString();


Heroku, NodeJS, Windows

Getting Started with Node.js on Heroku on a Windows machine

Heroku is a cloud platform as a service supporting several programming languages which lets app developers spend their time on their application code, not managing servers, deployment, ongoing operations, or scaling…

If you tried to get your feet wet with Heroku by deploying Node.js application, you must have come across this article on Heroku’s documentation (and you also may have run into problems when starting Foreman if you’re on a Windows machine – read onward to see how I’ve solved it).

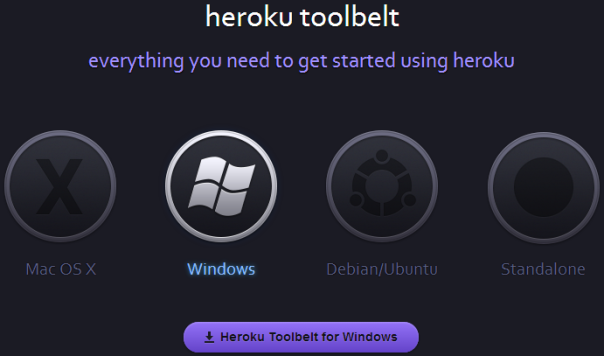
Obviously, first you have to make an account on Heroku, then install Heroku toolbelt (it gives you git, foreman, and heroku command line interface) for your environment (in my case Windows):
herokuToolbelt

Fire up your command prompt (I use Console2) and run heroku login . You need to have Node.js installed (in case you don’t you can download it here).

Write some Node.js app and put it in app.js file:

//app.js
var express = require("express");
var app = express();

app.get('/', function(req, res) {
  res.send('Every day in every way I\'m serving more requests');
});

var port = Number(process.env.PORT || 5000);
app.listen(port, function() {
  console.log("Listening on " + port);
});

If you have  package.json  file then Heroku will recognize your app as Node.js app. In order to create it, run npm init  in the root directory of your app. The npm init utility will walk you through creating a package.json file by asking few questions. If you already made your repository on GitHub and cloned it locally then npm init command in this folder will recognize that too and add:

"repository": {
    "type": "git",
    "url": "https://github.com/yourUsername/appName.git"
}

If you wish, you can freely clone my test app from Github: https://github.com/Hitman666/herokuTestApp.git

Next, install dependencies from your code (in app.js  example the required module is express). Use npm install <pkg> –save  to install a package and save it as a dependency in the package.json file. In my example that would be one command:

npm install express --save


You have to set a Procfile, which is a text file in the root directory of your application, to explicitly declare what command should be executed to start a web dyno. In our case this would be the contents of Procfile:

web: node app.js

Now you should be able to start your application locally using Foreman (installed as part of the Heroku Toolbelt) by running foreman start .

But here the party started :/

In my case foreman didn’t start at all, and after a lot of searching, I managed to solve it in few steps. First, I updated my Ruby installation:

gem update --system --source http://rubygems.org/

Then, according to this StackOverflow post I installed former version of foreman:

gem uninstall foreman
gem install foreman -v 0.61

Finally, I added Ruby’s bin folder (Ruby which, in my case, is in C:\Program Files (x86)\Heroku\ruby-1.9.2\bin) to my PATH variable.

Ok, almost there! Lets add our app to git (you should skip the git init command if you already cloned your app from GitHub):

git init
git add .
git commit -m "init"

and finally, lets deploy it to Heroku:

heroku create
git push heroku master

To open the app in your browser run heroku open . To push the changes to GitHub you have to execute git push origin master.

*Now that your app is up and running on heroku (my link) you may want to prevent it from going to sleep mode. Some suggestions on how to achieve this are in this post on StackOverflow (I went with UptimeRobot).

**At some point, as I was fiddling with the apps on Heroku’s website, I deleted all apps and then the git push heroku master  command from my console was not working anymore, so I had to do:

git remote rm heroku
heroku create
git push heroku master

***Also, I wanted to rename my app and that can be done easily:

heroku apps:rename NEWNAME


Quick tips, Sublime Text, Windows

How to use JSHint in Sublime Text on Windows machine

Since this is in the “quick tips” category I won’t go into what Sublime Text is, or why using JSHint is recommended, and that for it’s installation you need Node.js, I will just state the shortest possible path in how to install it, as I had some problems in doing this in a timely fashion:

//install jshint via npm
npm install jshint -g

In Sublime Text install JSHint Gutter via package manager.

And now, finally, since I’m on a windows machine, the problem was that once I got all this installed I had to set the Node.js path in JSHint Gutter plugin but with setting the absolute path to node.exe by using forward slashes:

{
  // Simply using `node` without specifying a path sometimes doesn't work :(
  // https://github.com/victorporof/Sublime-JSHint#oh-noez-command-not-found
  // http://nodejs.org/#download
  "node_path": "C:/Program Files/nodejs/",

  // Automatically lint on edit (Sublime Text 3 only).
  "lint_on_edit": false,

  // Automatically lint when a file is saved.
  "lint_on_save": true,

  // Highlight problematic regions when selected.
  "highlight_selected_regions": false
}

Recent posts

  • Discipline is also a talent
  • Play for the fun of it
  • The importance of failing
  • A fresh start
  • Perseverance

Categories

  • Android (3)
  • Books (114)
    • Programming (22)
  • CodeProject (35)
  • Daily Thoughts (77)
  • Go (3)
  • iOS (5)
  • JavaScript (127)
    • Angular (4)
    • Angular 2 (3)
    • Ionic (61)
    • Ionic2 (2)
    • Ionic3 (8)
    • MEAN (3)
    • NodeJS (27)
    • Phaser (1)
    • React (1)
    • Three.js (1)
    • Vue.js (2)
  • Leadership (1)
  • Meetups (8)
  • Miscellaneou$ (77)
    • Breaking News (8)
    • CodeSchool (2)
    • Hacker Games (3)
    • Pluralsight (7)
    • Projects (2)
    • Sublime Text (2)
  • PHP (6)
  • Quick tips (40)
  • Servers (8)
    • Heroku (1)
    • Linux (3)
  • Stack Overflow (81)
  • Unity3D (9)
  • Windows (8)
    • C# (2)
    • WPF (3)
  • Wordpress (2)

"There's no short-term solution for a long-term result." ~ Greg Plitt

"Everything around you that you call life was made up by people that were no smarter than you." ~ S. Jobs

"Hard work beats talent when talent doesn't work hard." ~ Tim Notke

© since 2016 - Nikola Brežnjak