TL;DR
We’re going to build a Pokémon search app. But we’re not going to write even one line of code.
🤨
I know, coming from a developer (who used to take pride in what… we’ll call "handcrafted artisanal code"), this sounds like heresy.
But stay with me here and see how far these kind of tools have come in only the last year.
We’ll be building the app using the so-called vibe coding. Basically: you "talk" to the editor, the editor writes the code, and you navigate aka prompt it toward the final product (that you’ll be happy with 🤞).
Programmers/Coders/Engineers – we’ve always liked to tell/instruct computers what to do. That’s still true, only the syntax got… conversational 🙂
Who would’ve thought 🤷♂️
~ Nikola Brežnjak on X
In my previous post, I did this with Replit: Vibe Coding a Pokémon Search App with Replit.
This time we’ll do the same thing, step-by-step, but with Cursor.
Same app. Same flow. Different tool. More "local dev" vibes (yup, puns still need some work).
The Tools
In this post, we’ll be using Cursor: https://www.cursor.com/.
Cursor is a code editor (much like Visual Studio Code – VSC – actually, its fork, in Github terms), but with an AI Agent that can plan and implement changes across your codebase. It’s like pair-programming… except your pair doesn’t need bathroom breaks.
For bonus points, we won’t even type anything. Instead, we’ll use our voice to code (🤯, I know) with *WisprFlow (or alternatives like SuperWhisper / VoiceTypr).
The Old Ways™
Previously, I wrote the "classic" (may I say, "old" at this point?) tutorials building the same app with two different tech stacks:
- Getting started with Vue.js 3 by building a Pokemon search application
- Getting started with React by building a Pokemon search application
This one is different.
Same Pokémon search app.
Less typing.
More vibes (😂 I know, I know).
Let’s Start Prompting
If you want to follow along:
- (Download, Install) Open Cursor
- Create a new empty folder (e.g.
pokemon-cursor) - Open that folder in Cursor
- Open the "AI chat" pane (
Command + i) and make sure you select the Plan mode

Pro tip: copy/paste these and adapt in case you’re feeling adventurous.
Prompt 1: Spec first, code later
First of all, always start with a plan before writing any code.
In the Replit post, I started with a simple prompt and then clicked Replit’s Improve prompt button.
I like that "improved" prompt better as:
- it’s more specific about what the app should do (less back-and-forth)
- it includes UI style guidance (so you don’t get "default HTML 2003 vibes")
- it forces a PRD + checklist (so you can hold the AI accountable)
So… let’s use that improved prompt here too 👇
Paste this into Cursor (Plan mode):
A comprehensive web-based Pokémon search application that allows users to discover and view detailed information about Pokémon using the PokéAPI.
Core Features:
- Search Pokémon by name or ID (bonus: autocomplete suggestions if it’s simple)
- Display detailed Pokémon information (stats, types, abilities, sprites)
- Browse Pokémon list with pagination (if it makes sense; keep it simple)
- Responsive design that works on mobile and desktop devices
Visual References:
Inspired by the official Pokémon website and Pokédex interfaces, using vibrant, game-accurate designs and intuitive card-based layouts.
Style Guide:
- Colors: Primary #FFCB05 (Pokémon yellow), Secondary #3D7DCA (Pokémon blue), Accent #CC0000 (Pokémon red), Text #2A2A2A (dark grey), Card Background #FFFFFF (white)
- Design: Flexo/Poppins/Roboto fonts, card-based grid layout, mobile-first approach, clean search interface with prominent search bar
Special Requirements:
- Must include a detailed PRD (Product Requirement Document) covering user stories, UI layout, components, state management, API endpoints, error/loading states, accessibility considerations, folder structure, and a deployment plan for GitHub Pages
- Provide a numbered implementation checklist after the PRD
- DO NOT include actual code implementation — documentation and planning only
You can leave the Auto for Model, but lately I’ve been defaulting to Opus 4.5. Then, just hit ENTER or click the button with the arrow pointing up (↑).

Answer the questions
Since we didn’t define the actual tech stack, Cursor will ask us which stack we want (language + CSS framework):


I chose Vue.js and Tailwind CSS.
Build the plan
Select Build to start creating the PRD and the implementation checklist.

Review the prompt
Cursor will create a seriously detailed PRD. I won’t paste it here fully, but will mention that mine included sections like:
# PokéSearch - Product Requirements Document

1. Project Overview
2. User Stories
3. UI Layout and Wireframes
4. Component Architecture
5. State Management
6. API Endpoints
7. Loading and Error States
8. Accessibility Considerations
9. Style Guide Implementation
10. Folder Structure
11. GitHub Pages Deployment Plan
12. Implementation Checklist
Also, Cursor created a detailed implementation checklist (sharing just sections that it covered below):
Phase 1: Project Setup
Phase 2: API Layer
Phase 3: Core Components
Phase 4: Detail View
Phase 5: Search Integration
Phase 6: Polish and Accessibility
Phase 7: Testing and Quality
Phase 8: Deployment
Final Checklist
Bonus Features (Optional)
Start cooking
Before you do ‘start cooking’, I really encourage you to read through the PRD and see if:
- it describes a simple UI
- it mentions loading + error states
- it keeps state management simple
- the folder structure looks reasonable
- it mentions GitHub Pages deployment
If something looks off, just tell Cursor what you want. And, once you’re happy, move on.
OK, now we start cooking 🧑🍳
Let’s now tell Cursor to implement the project by following the PRD and the Checklist it created:
Implement the product described in @PRD.md by executing @IMPLEMENTATION_CHECKLIST.md end-to-end.

Rules:
- Treat @PRD.md as source of truth. If checklist conflicts, call it out and follow PRD.
- Work in small, reviewable commits (or clearly separated change blocks) per checklist section.
- After each section, run/tests/build locally and paste results. Fix issues before moving on.
- Keep the solution minimal and maintainable. No over-engineering.
- Update docs and TODOs as you go; leave the repo in a “ship-ready” state.

Deliverables:
- All checklist items completed (explicitly mark each as done with a short note).
- A final summary: what was implemented, how to run, how to test, and any known gaps (should be none).
Start now.
Finally, send that prompt to Cursor (make sure you have Agent mode selected).

⚠️ You would most likely get a good final output if you wouldn’t use such a detailed prompt. Something like "Implement the @PRD" would most likely suffice. But, as with anything, treat this like a craft and go an extra mile (test multiple prompts and see what works best for you).
TL;DR: a bit more structure and detail in the prompt goes a long way.
Now we wait… ⏳
Here’s where Cursor does the ‘actual work’ of:
- creating files
- installing dependencies
- wiring up the UI
- calling PokéAPI
- and fixing the inevitable "oops, that didn’t run" moments
Yes, it can do all of that. No, it doesn’t always do it perfectly, and that’s why you’re here 😅
Meaning, it will ask you for permission to run certain commands (npm install, npm run dev, …). You can choose to whitelist the commands so it won’t ask your permission about running them again (do thread lightly here though, and actually read which commands it wants to run).

As it’ll be doing its thing, you’ll be able to follow along and read what it is all that it’s doing. I know, looking at someone else doing your job, gives you a weird feeling. 😅
Done
When Cursor is done, you’ll see a detailed message of what it did, including the section on running it and deploying to Github:
### How to Run

```bash
# Install dependencies
npm install

# Development server
npm run dev

# Production build
npm run build

# Preview production build
npm run preview
Preview
In the Replit version, preview was built into the web UI.
With Cursor, we’re running locally on our machine — so the "Preview" step is simply:
- run the commands it told you, or just tell Cursor to run the app (yes, literally, write "run the app")
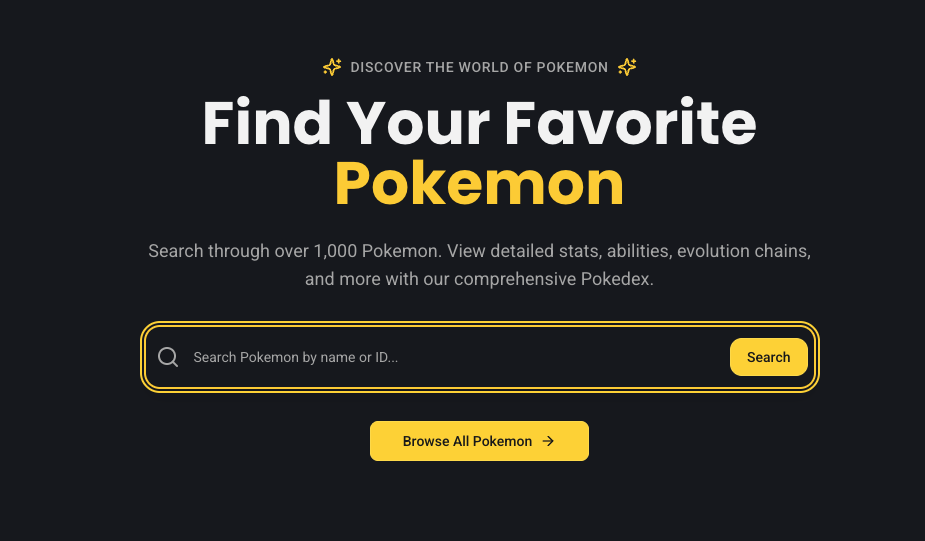
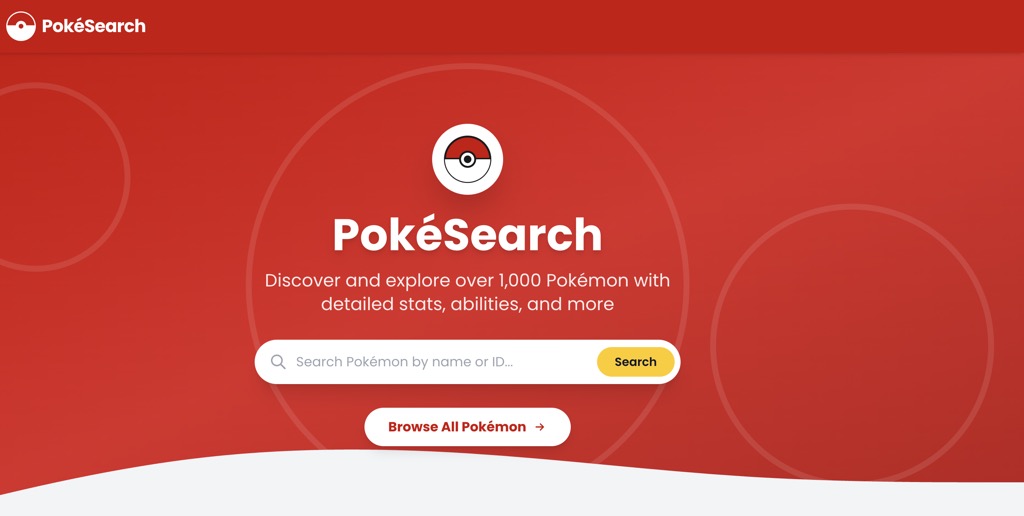
In my case, the URL was http://localhost:4173/PokemonSearch/ and it looks like this:

I’ll be frank and say that I liked the Replit output better (see here: https://pokedex-nikolabreznjak.replit.app/), but you can get to that as well by additional prompting.
I asked Cursor to let's now add a nice landing page to it., and it came up with this:

Not bad for a terrible prompt 🙈
Publish and share
Replit had a "Publish now" button.
Here, we’ll just ask Cursor to tell us how to deploy to Github Pages.
It said:
# Initialize git (if not already)
git init

# Add all files
git add .

# Commit
git commit -m "Initial commit: PokéSearch app"

# Create repo on GitHub, then add remote
git remote add origin https://github.com/YOUR_USERNAME/YOUR_PROJECT_NAME.git

# Push to master
git push -u origin master
Only thing you have to change in the commands above is the Github username, and the project’s name.
As a step 2, you have to:
Go to your repository on GitHub
Click Settings → Pages (left sidebar)
Under "Build and deployment":
Source: Select GitHub Actions
That's it! The workflow will trigger automatically
You can now run the workflow manually in the Actions tab on Github, or push some code changes and it will trigger automatically.

Once deployed, your app is going to be available at: https://YOUR_USERNAME.github.io/YOUR_PROJECT_NAME/
In my case, you can check it out here: https://NikolaBreznjak.github.io/PokemonSearchCursor/
Conclusion: the future is now!?
Here’s the uncomfortable truth: those who still treat AI coding tools as "cheating" or "not there yet" are losing out. If not on shipping MVPs faster, then on getting up to speed on unfamiliar codebases, and learning faster in general.
⚠️ And this last part is something I want to emphasise: if you "just" vibe code and have absolutelly no idea how the thing YOU built works (and have no desire to learn), then you’re missing the point.
Instead, you’ve got an amazing oportunity that the devs in the past didn’t have: you can ask the tool to tell you "how does this code work". And, you can ask all the questions without the fear of showing your lack of knowledge.
And, if you’re worried about quality (valid!), you don’t have to YOLO it. Do this instead:
- Tell the model: Explain what you intend to do without writing any code
- Make it produce a long spec document (architecture, edge cases, test plan).
- Iterate on that doc until it’s legit
- Then say something along the lines of: Now, iplement this spec perfectly
I would have never dreamed that the hottest new programming language will be [insertLanguageHere]. I say it like that because, technically, you could write in your language and some (most?) of the tools would understand you. If not, you can throw it in a ChatGPT (or any similar tool) for translation and then feed it translated into the AI tool.
No, the world won’t make the devs extinct, but it surely will enable a lot of non-devs to create things that make actual money. It’s your choice if you want to watch from the sidelines or get in on the action and see how it can help you – maybe now’s the time to do that project you ‘never had the time for’.
I’m cheering for you, good luck!
Disclaimer
Links prepended with a * are referral links.
If you enjoy the content and decide to sign up through those links, you’ll be helping me feed my caffeine addiction ☕️
Thanks a bunch, you glorious human! 🙌
New achievement
You made it to the end, here’s a 🎖️
P.S. In case you were wondering, the style has been recently influenced by a book series called *Dungeon Crawler Carl.
Enjoy! 👋